VisionCanvas
?
KLING PROMPTS
drinks, coffee, fruit lipstick, makeup etc
Transition of Pad Thai noodles Cascade
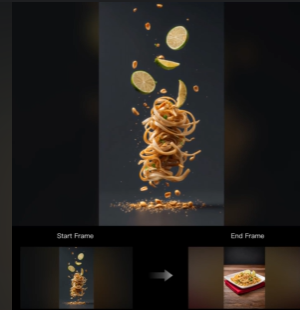
Pad Thai noodles fall and cascade down in slow motion, landing and coiling into a pile, then a fresh lime wedge slides in from the upper right and lands on top, followed by crushed golden peanuts raining down and settling over the noodles, hero shot ends on a perfect styled Pad Thai composition, dark moody background, macro food cinematography, dramatic side lighting, shallow depth of field
TRANSITION FROM SWASH TO LIPSTICK
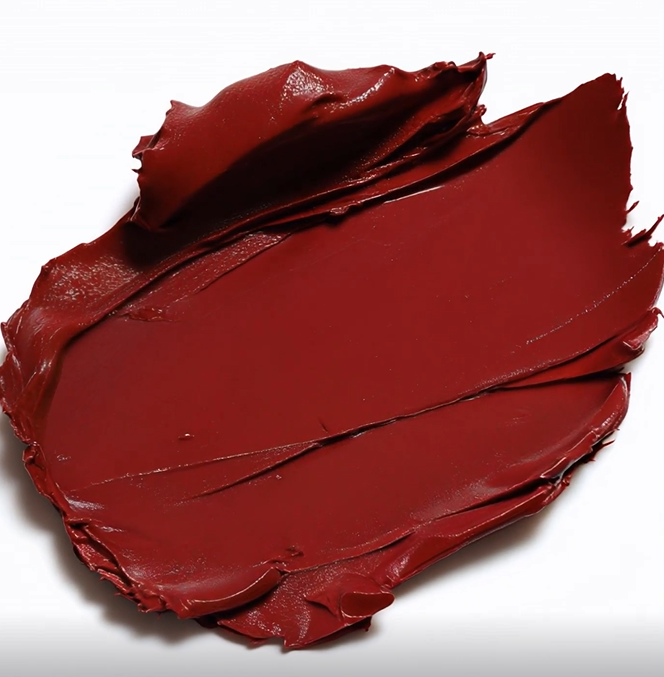
tiny SMUDGE grows softly as if slowly spread Light glides over velvet Lipstick bullet fade pop-in with soft bouncE lipstick standing on the final smudge
ASMR VIDEO OF KNIFE CLEARING FROST
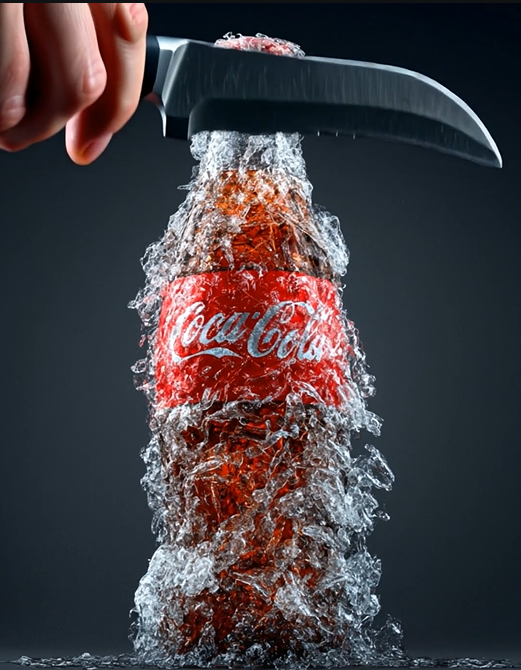
a hand holding a knife enters the scene and removes the the frost from the top of the bottle slolwly as if cutting the frsost
GOLDEN RINGS FALL INTO THE BAG

A luxury golden bag sits on a table. The zip of the the bag opens and diamond rings fall from top into the bag in a sequence . Each piece sparkles in focus, shown as a showcase of beauty. Camera lingers on the diamonds in close-up, highlighting their brilliance.
ASMR- SLICING BLACKBERRIES

A close-up of a hand holding a knife slicing a Blackberries that looks like transparent glass on a wooden board. A Blackberries made of glass that is extremely realistic and beautiful, resembling a translucent red crystal, is placed on a clean wooden cutting board. The knife smoothly slices through the fruit, creating thin, transparent slices. The sound of the knife cutting through the glass-like fruit is amplified, creating a refreshing ASMR sound. This ASMR video exudes a sense of luxury and elegance, high.
ASMR MAKEUP ITEMS FALLING INTO BAG

Items gently dropping into a bag, a hand softly touches the smooth surface, enhancing a luxurious experience.
ASMR MUSHROOM CUT

knife sliced glossy mushroom like glass. ASMR video, ASMR sound, satisfy
SKINCARE SERUM ADVERTISEMENT

Water splashes and swirls, melon slices rise, bottle spins with a gentle metallic chime, sunlight glistens.