Category Archives: Blog

Your blog category

Chatgpt Uses

Chatgpt Functions

I use ChatGPT a lot for my work, and it’s really helpful. Here are some things it can do:

  1. Coding: It can help you write code, which is great for both learning and fixing bugs.
  2. Excel and Powerpoint: ChatGPT can make Excel files and PowerPoint presentations, which saves a lot of time.
  3. Describing Pictures: It can describe pictures for you, which is handy for creating content or making things more accessible.
  4. Making Tables: It can set up tables to help you keep things organized.
  5. Summarizing: If you have a long article or a big paragraph, ChatGPT can summarize it so you can get the main points faster.

ChatGPT can also chat about almost anything, explain things you’re curious about, and help with training scenarios. It’s like having a really smart assistant who understands how to turn ideas into words.

Codes: Here, if you see the video below, the text in red is having a pulsing animation effectthat I have done through coding . I gave a prompt to chatgpt –(i need a code for my website . text will have a pulsing animation effect.”MENTION THE TEXT “).

I am attaching few screenshots which will tell u how chatgpt gives you result

As you can see in the screenshot above, it provides you with the necessary codes. But what’s even more interesting is that if you don’t know where to enter this code on your website, it will also give you instructions on where to place it.

After every code,, it provides a detailed explanation of how and where to enter the code. However, sometimes the language might be a bit difficult to understand or too flowery. In such cases, you can simply give another prompt, such as “Explain in simple language” or “Explain in more detail, step by step, considering I am a complete beginner.” Also, there’s no need to provide full references every time; it can handle follow-up questions effectively.

This was just a small example, but you can use it for many other things when writing code. And trust me, ChatGPT is the best at writing code—Gemini and Claude AI can’t compare to it.

One important thing to note is that ChatGPT doesn’t always provide correct codes; it can make mistakes as well. If you’re someone who doesn’t know coding at all—like me, I have no idea about coding—it’s important to have patience and keep prompting ChatGPT to get the desired result. The best part is that it can handle follow-up prompts, making it easier to work through any issues you encounter.

Don’t expect it to give you everything on a silver platter in one go.”You have to practice prompting; only then will you start to understand how it works. If you don’t get the required result on the first try, don’t be discouraged. Just continue asking questions and refining your prompts until you achieve what you need. ChatGPT’s ability to respond to follow-up prompts makes it a powerful tool, even for those with no coding background.

2. Making Tables

You can use Chatgpt to make tables.

Imagine you are a skincare enthusiast with a blog, and you want to compare the ingredient lists of different products.

Given below in green gradient is the data which I provided to chatgpt and gave a Prompt (Plz make table and map the common ingredient against each other)

Cetaphil Face Cream: Key Ingredients
Antioxidant: Tocopherol, Tocopheryl Acetate
Skin-identical ingredient: Glycerin

Venusia: Key Ingredients
Skin-identical ingredient: Glycerin
Soothing: Aloe
Sunscreen: Zinc Oxide

Bioderma Face Cream: Key Ingredients
Anti-acne: Zinc Gluconate, Phytosphingosine
Antioxidant: Tocopherol
Cell-communicating ingredient: Phytosphingosine
Skin-identical ingredient: Glycerin, Phytosphingosine, Ceramide NP, Ceramide AP, Cholesterol, Ceramide EOP
Soothing: Zinc Gluconate

Aqualogica Moisturizer: Key Ingredients
Skin-identical ingredient: Glycerine, Sodium Hyaluronate
Soothing: Aloe Barbadensis Leaf Juice

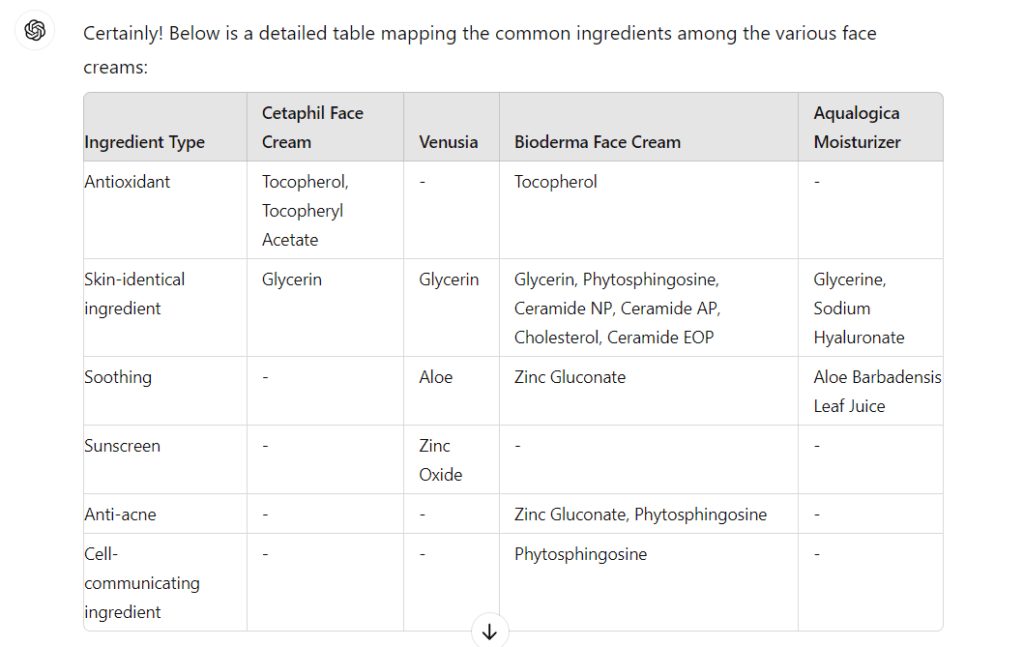
If you look at the video below chatgpt has given me the table and notice it has two options at top Download and expand table . When you download the table you get it in excel format.

And when you expand it gives an option to chat and give prompts if you want to change anything.Look at the screenshot below there is an option on right side down where you can message chatgpt to make any changes in the table.

One more important thing now you want chatgpt to create the table without slider which will help you to directly paste the tabkle in your blog post or wherever you want.Prompt

(Plz make table and map the common ingredient against each other) Cetaphil Face Cream: Key Ingredients
Antioxidant: Tocopherol, Tocopheryl Acetate
Skin-identical ingredient: Glycerin, Venusia: Key Ingredients
Skin-identical ingredient: Glycerin
Soothing: Aloe
Sunscreen: Zinc Oxide, Bioderma Face Cream: Key Ingredients
Anti-acne: Zinc Gluconate, Phytosphingosine
Antioxidant: Tocopherol
Cell-communicating ingredient: Phytosphingosine
Skin-identical ingredient: Glycerin, Phytosphingosine, Ceramide NP, Ceramide AP, Cholesterol, Ceramide EOP
Soothing: Zinc Gluconate, Aqualogica Moisturizer: Key Ingredients
Skin-identical ingredient: Glycerine, Sodium Hyaluronate
Soothing: Aloe Barbadensis Leaf Juice, do not use slider)

With the orginal prompt I added do not use slider so it gave me a table like this which you can copy and paste in your blog post.
Make Excel and PowerPoint

Let me explain this with an eg as well. If you have gone through my website, I have one page named Midjourney Prompts. Naturally, I need to find keywords (Midjourney Prompts, t-shirt design midjourney, line art,patterns,neutral aesthetic, etc)

Prompt: Create a EXCEL (KEYWORDS).

CHATGPT will give you the below result and you will get a link to Download the Excel File. You can even give it instruction to make PPT.

ChatGPT Describing Pictures

Now comes the most interesting feature. Nowadays, we see a lot of AI-generated images on Google, and sometimes we want to create them as well but don’t know how to give prompts to Midjourney or any other image generator. In that case, ChatGPT can be of help to you.

Let me explain—it’s very simple. Whichever image you want to generate, take a screenshot of that image, upload it to ChatGPT, and ask it to describe the image. It will provide a detailed description. But can you use that as your prompt? The answer is sometimes yes, sometimes no; it depends on the kind of description you are looking for in the image.

Let me give you an eg
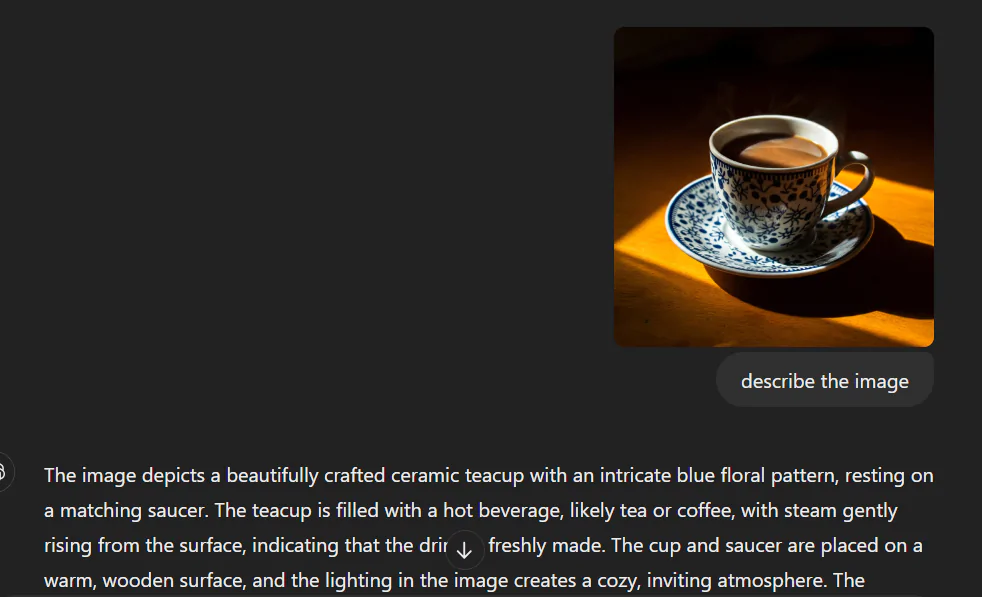
“In this example on left side. I provided a prompt to describe an image. The response included a lot of details, but it missed a crucial aspect: the camera angle. If you carefully examine the image, you’ll notice that the camera angle is very important to mention when generating this images with tools like Midjourney. Without specifying the angle, the image generator might produce a front profile instead of the intended perspective.

“Look at the image on the left. I asked ChatGPT to describe the camera angle, which it did accurately.

The conclusion is that while you can ask it to describe an image, you should be specific about the details you need. Otherwise, it will describe whatever it thinks is important.

Prompting is a skill you need to practice. As you continue interacting with AI, you’ll learn how to give precise prompts and what details you need to extract from the AI.”

Summarizing

This is another very helpful function of ChatGPT. Imagine you are someone who participates in debates and needs to conduct a lot of research on various articles, summarizing key points. Going through each article and manually writing down summaries can be time-consuming.

In this case, it’s very easy—ChatGPT can not only summarize the article and write pointers but also create tables, generate Excel sheets, and even draft PowerPoint slides, depending on what you need. All you have to do is provide the appropriate prompt. You can do this in three ways:

  1. If you have a PDF or a screenshot, upload it and ask ChatGPT to convert it to text, then request a summary, pointers, or even tables and slides based on that text.
  2. If you have text from different sources, simply paste it into ChatGPT and give specific prompts to generate summaries, pointers, tables, or structured data in Excel.
  3. If you’re preparing for a debate or presentation, you can ask ChatGPT to help structure the information into PowerPoint slides, outline your arguments, or even organize data into an Excel sheet for analysis.

Additionally, when you find information online, ChatGPT might provide varied details due to the vast amount of data available. However, you can refine your results by asking it to provide the primary source of the information, guiding you to the root where you can find raw, unfiltered data.

Though there are lot of things chatgpt or for the matter of fact gemini or claude ai can do . The only thing is you have to keep experimrnting them with differnt prompt.

Though there are many things ChatGPT, or for that matter, Gemini or Claude AI, can do, the key is to keep experimenting with different prompts. And keep coming back to my page—I’ll be updating it as I come across new insights and features.

For those using the free version of ChatGPT, here’s a helpful tip: you can create two free images per day. Also, be aware that Claude AI allows only 5 free messages every 4 hours, so it’s not completely free.”

Chatgpt 40 Mini is Free

If you’re looking for a powerful AI assistant without the cost, the GPT-4.0 Mini model offers an excellent solution. With a free plan that costs you $0 USD/month, this model helps you tackle a variety of tasks with ease. Here’s what you can expect from the free plan:

  • Assistance with Writing, Problem Solving, and More: Whether you need help drafting a blog, answering questions, or solving everyday challenges, GPT-4.0 Mini is ready to assist. It’s designed to offer reliable support for common tasks without overwhelming you with complexity.
  • Access to GPT-4.0 Mini: One of the highlights of this plan is the full access to GPT-4.0 Mini, a lightweight version of the GPT-4 model that is optimized for speed and efficiency. It’s perfect for handling general inquiries and content generation quickly.
  • Limited Access to GPT-4.0: Although the full capabilities of GPT-4 are usually reserved for paid plans, you still get limited access to this powerful model with the free plan. This is helpful for more complex tasks that need deeper AI insights, even if only in a limited capacity.
  • Limited Access to Advanced Features: Alongside access to GPT-4.0, the free plan provides limited access to advanced functionalities such as data analysis, file uploads, vision, web browsing, and image generation. This gives you a taste of the higher-level capabilities without committing to a paid subscription.
  • Use Custom GPTs: For those who enjoy customization, the free plan allows you to create and use custom GPTs. This feature lets you tailor your AI to specific needs, making it more personal and efficient for your unique tasks.

This plan is a great way to explore AI and experiment with different functionalities, especially if you’re looking to integrate AI into your workflow without any upfront investment.

Use Cases of ChatGPT-4.0 Mini

To better understand the capabilities of ChatGPT-4.0 Mini, let’s explore some real-life scenarios:

  • Generate Two AI Images Daily: Suppose you are a social media manager needing fresh visuals for your posts. ChatGPT-4.0 Mini allows you to create two AI-generated images per day using DALL·E. This feature can save you from relying on stock photos or hiring graphic designers, keeping your content fresh and engaging.

  • Create Excel and PDF Files from Text or Data: Imagine you’re a small business owner who needs to generate a monthly sales report. ChatGPT-4.0 Mini can take your text or raw data and automatically generate Excel spreadsheets or PDFs. This helps you organize data effortlessly without having to manually enter everything into a spreadsheet.

  • Write Code: Let’s say you’re working on a website and you want to keep track of how many times people download the images you’ve uploaded. Even if you’re new to coding, ChatGPT-4.0 Mini can help you out. You can simply ask it to write a basic HTML and JavaScript code that adds a download button under each image, and it will count how many times each image gets downloaded. It’s a straightforward way to make your site more interactive and can really help speed things up while you’re building your project.

  • Use on Mobile with Voice Functionality: Picture yourself commuting to work and suddenly remembering that you need to respond to an email or get content ideas for your next project. Using voice functionality on mobile, ChatGPT-4.0 Mini allows you to dictate your ideas, generate responses, or even have it write emails for you. It’s hands-free and helps you stay productive on the go.

Conclusion

ChatGPT-4.0 Mini is a highly accessible and efficient AI model, available on free . Whether you’re generating images, creating documents, writing code, or using voice commands on mobile, it has the versatility to handle a variety of tasks with ease. For more complex needs, you might want to consider upgrading to GPT-4, but for most everyday tasks, GPT-4.0 Mini offers an excellent balance of power and simplicity.

How to Save Your ChatGPT Conversations Without Losing Them: A Comprehensive Guide

As someone who uses ChatGPT extensively for personal and family-related projects, managing conversations can quickly become overwhelming. It’s easy to clear the memory when it fills up, but what if there’s an important conversation you want to save? Deleting chats one by one is a hassle, and relying solely on the archive option doesn’t help either because archived chats are also deleted when you clear the memory.

After some trial and error, I’ve found a few reliable methods to save conversations before clearing memory—whether they are short or long. Here’s what works best.

For Shorter Conversations: Copy and Paste or Screenshots Work Perfectly

When dealing with shorter conversations or snippets of valuable information, the easiest methods are copying and pasting or taking screenshots.

  • Copy and Paste:
    • If the conversation is short and easy to manage, I simply highlight the text, right-click, and choose “Copy.”
    • I paste it into a document editor like Google Docs, Word, or Notion, then save it for later. This method is great for organizing by topic, date, or project.
  • Screenshots:
    • For quick visual reference, I often take a screenshot. I use the Snipping Tool on Windows or Cmd + Shift + 4 on Mac to capture the specific part of the chat I need.
    • I store these images in a labeled folder for easy access later. This is perfect for smaller sections or key pieces of information that I want to remember.

These two methods are simple and fast, ideal for chats that don’t require saving entire conversations but only important sections.

For Longer Conversations: GoFullPage Browser Extension is a Lifesaver

When it comes to longer conversations, where copying or taking multiple screenshots would be time-consuming, I turn to the GoFullPage browser extension. It’s the perfect tool to save an entire chat in one go.

  • How to use GoFullPage:
    • First, I installed the GoFullPage extension on Chrome.
    • When I’m in a long conversation, I click the extension’s icon, and it automatically captures the entire page, from top to bottom.
    • I can save the capture as a PDF or an image, making it easy to keep track of long chats in a single file.

This method is a real timesaver when you want to preserve full conversations for future reference.

Why Archiving Isn’t Enough: Archived Chats Are Deleted with Memory

If you’re thinking about using the archive feature to save conversations, there’s something important to know: archived chats are also deleted when you clear your memory. While archiving helps in organizing active chats, it won’t protect them from being permanently deleted when you decide to clear your memory.

I learned this the hard way after thinking archived conversations would stay intact. Unfortunately, they get wiped out along with everything else. So, while archiving helps you declutter, it’s not a long-term solution for saving important chats.

Final Thoughts

Managing and saving your important ChatGPT conversations can be easy once you have the right methods in place. For shorter chats, copying and pasting or taking screenshots works well. For longer conversations, I highly recommend using the GoFullPage extension to save everything in one go.

And remember, relying on the archive option isn’t enough, as archived conversations are deleted when you clear your memory. With these strategies, you can safely save and organize your conversations without worrying about losing valuable information when your chat memory fills up.

Ai videos

AI Video Creation with Kling AI and Luma: Prompts, Tips, and Step-by-Step Guide

Luma Dream Machine and Kling AI are two artificial intelligence models that produce videos from simple text prompts or images. Luma gives you 30 free credits, which are renewed every month, while Kling gives you 66 free credits.

One thing to note is that if you are using the free version, Luma Dream Machine takes a lot of time. After uploading the image and giving the prompt, you can forget it for 1 to 2 days and then check. In the paid version, you get the result immediately.

I have created a few videos using both. For each image and video, I have shared the prompts below.

In this page i have uploaded the only the image for watching the video click on the link Given in video.

One important thing to note: if you’re not a paid subscriber of Kling AI or Luma AI, even though they offer free credits in their plans, it can take 2 to 3 days to process your videos

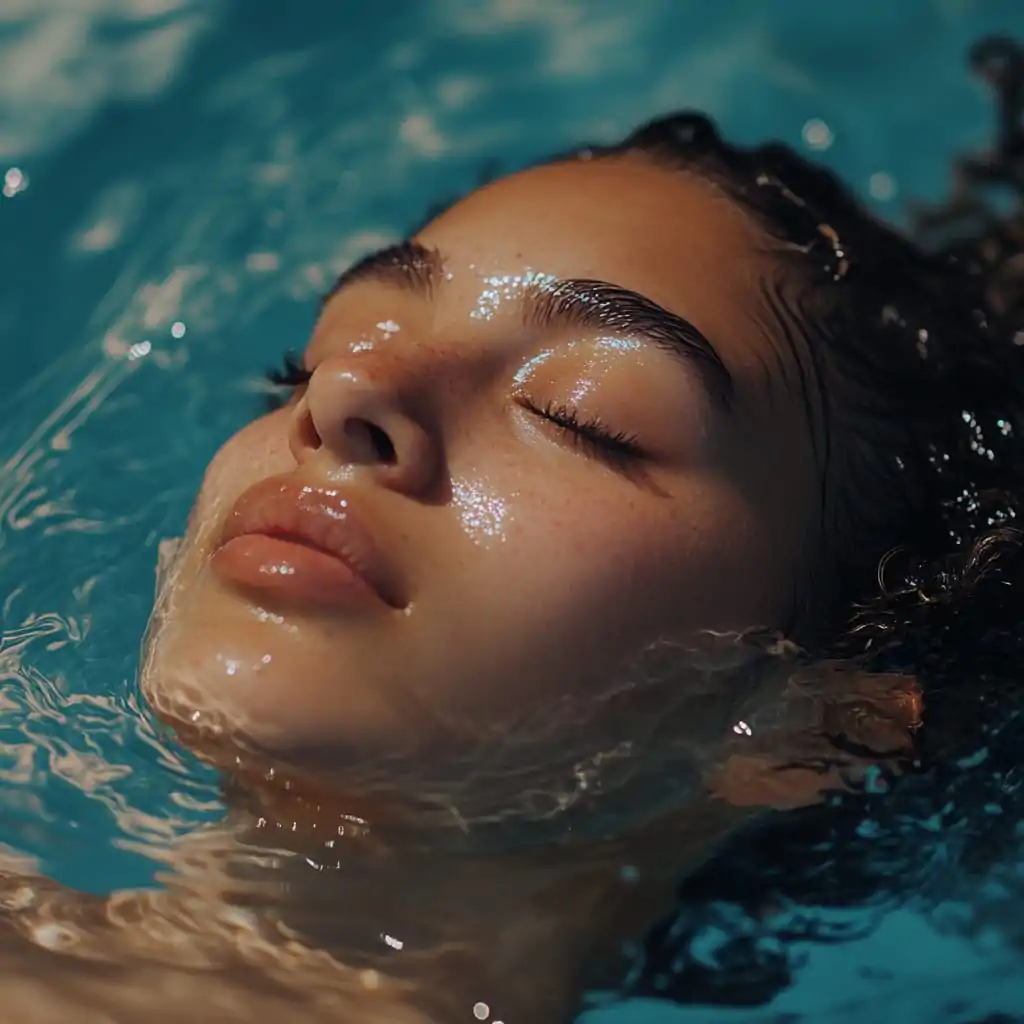
Lady Floating in Water (Kling AI & Luma AI Prompts)

Image Prompt: close up of face, lady floating in water –v 6.1(created in midjourney)

Video Prompt:The lady lifts her face up and opens her eyes, breaking the water’s surface with a serene and refreshed expression

Same prompt is used in both Klingai and Luma labs to create the video.

Click on the video prompt link to watch the video.

Peaceful Beach (Luma AI Prompts)

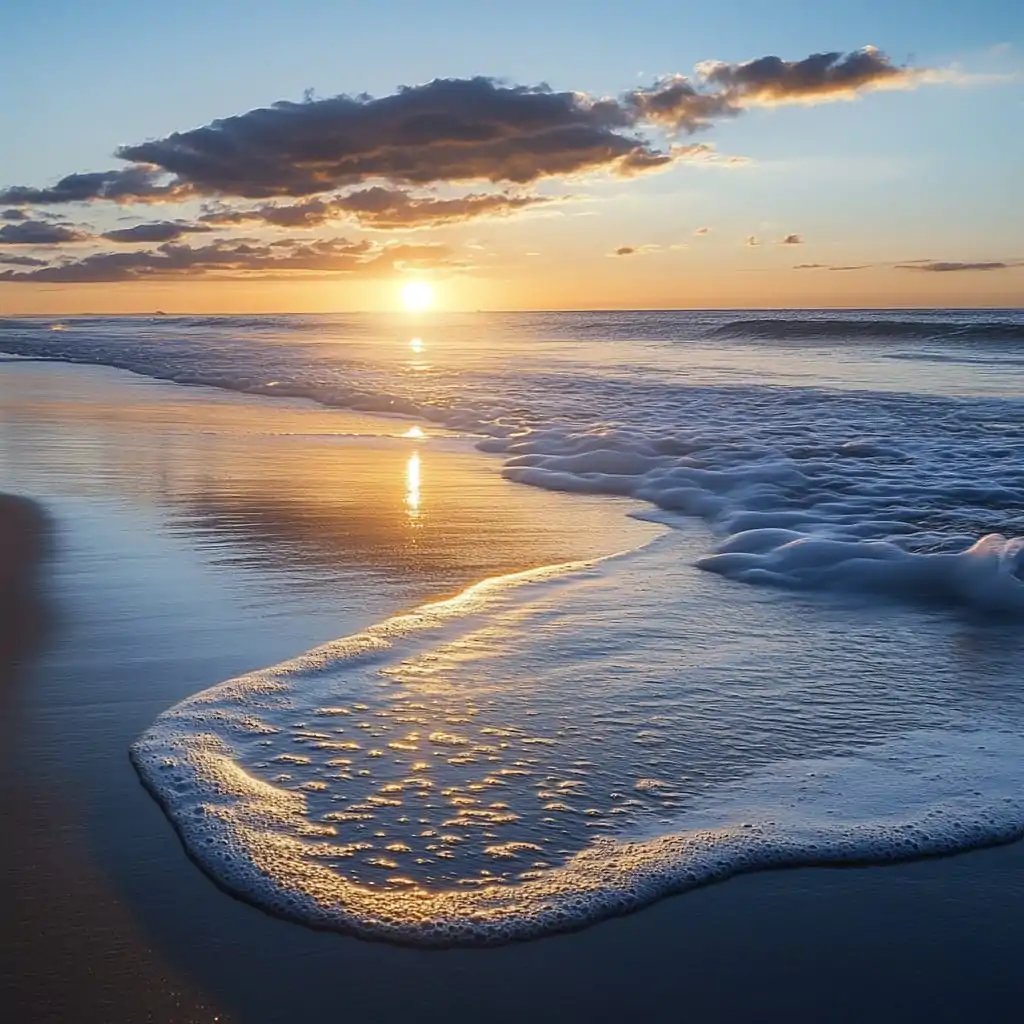
Create an image of a peaceful beach, sunrise –v 6.1
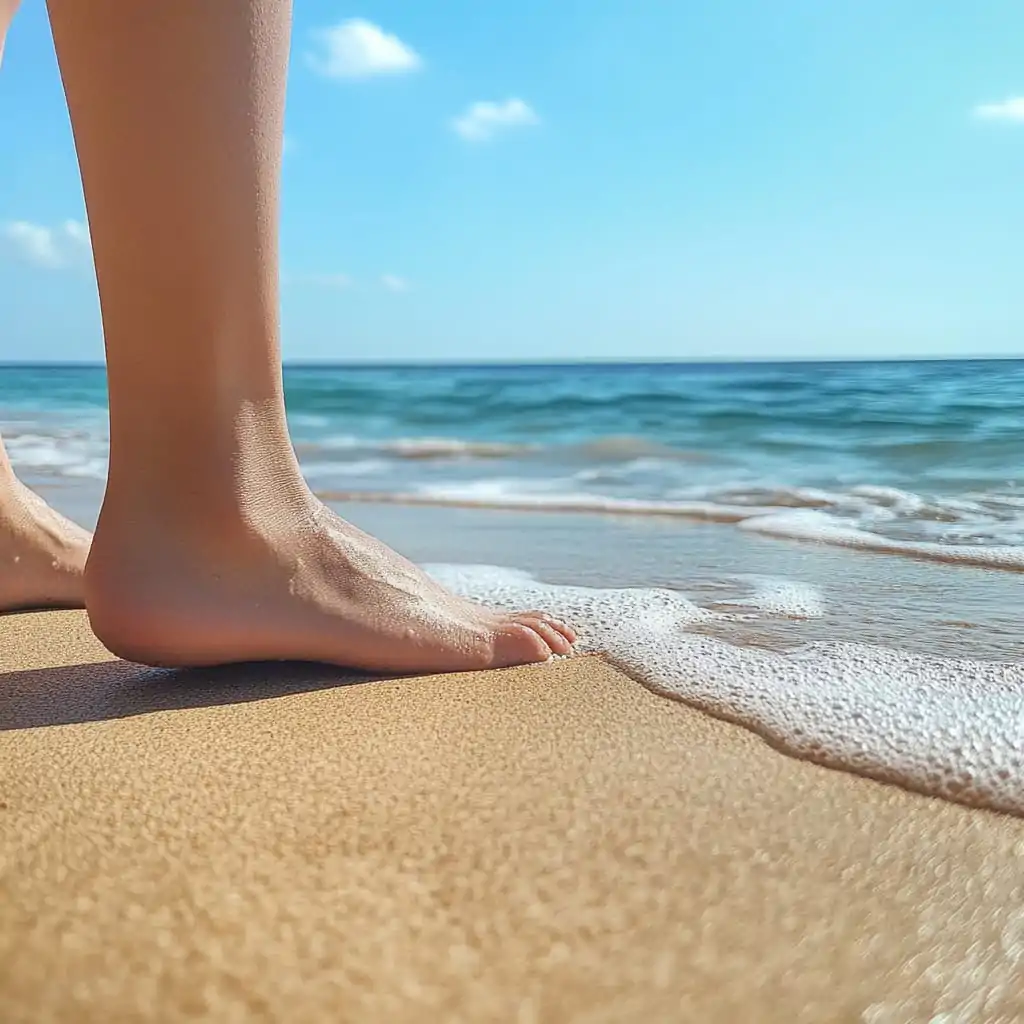
Close up of a lady’s feet on the sand, standing on the sand ,background sea beach –v 6.1

Video Prompt :Peaceful beach at Sunrise, the girl is walking along the water edges.

I’ve created a video for this in Luma Labs. In Luma, you have the option of entering two images. Basically, you enter the first image and then the second image. Describe the first image, describe what happens in the transition between the images, and then enter the second image.

POV SHOT (Kling AI Prompts)

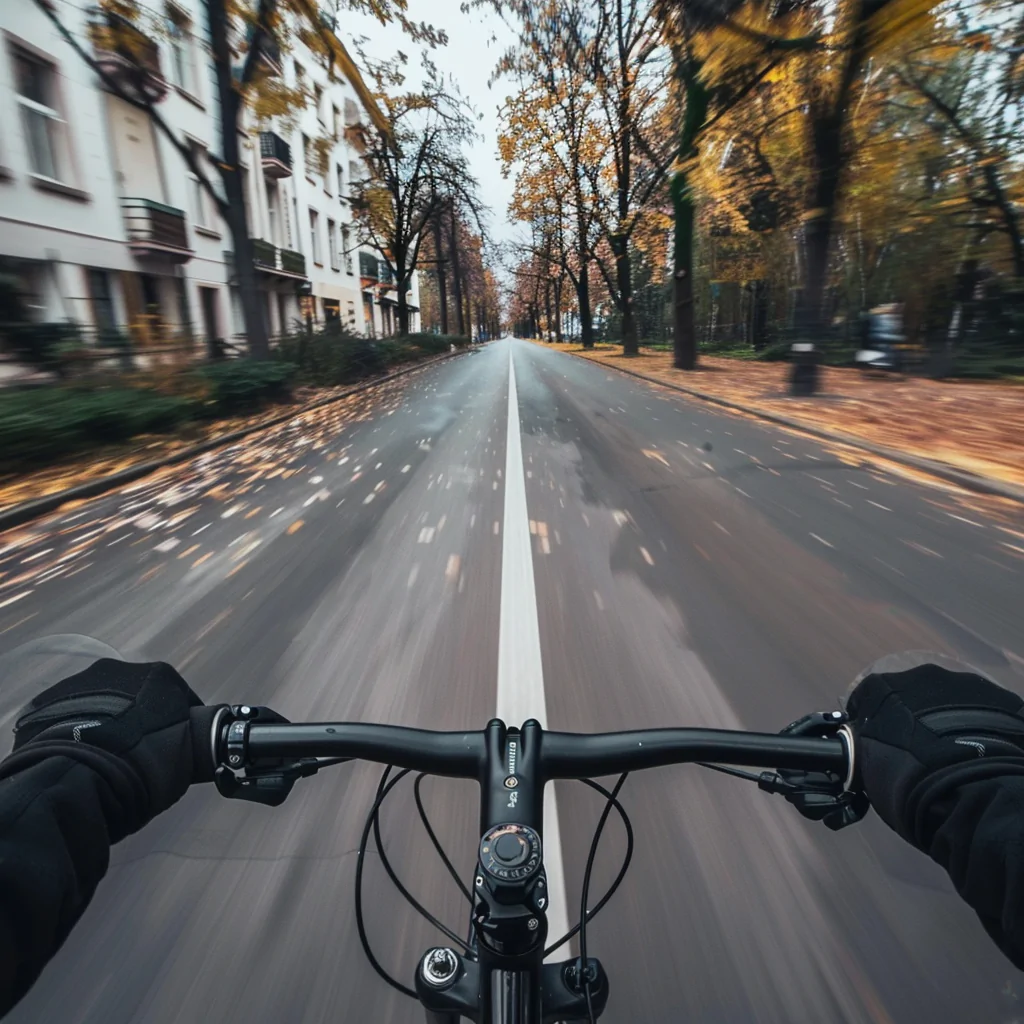
Image Prompt:create a pov shot of a road, bike rider –v 6.0

Video Prompt: For this POV SHOT i did not give any prompt just uploaded the image and clicked enter.

Created in Klingai

Pouring Milk in Cup (Kling AI Prompts)

“In the Kling gallery, you’ll discover a wealth of videos and images uploaded by Kling.

They provide an option called ‘Clone and Try,’ allowing you to effortlessly replicate their work. By simply clicking on ‘Clone and Try,’

I was able to achieve this result

Monalisa Drinking Coffee (Kling AI Prompts)

Let me show you how I created this famous video of the Mona Lisa drinking coffee.

I created this video using Kling AI, but it took me five tries. Sometimes, you won’t get the desired result even if your prompt is good. You have to keep experimenting, be patient, and make sure you have enough credits.

Video Prompt:Monalisa is holding a coffee mug, with her hands drinking coffee from coffee mug.

Honey Dripping on Bread (Kling AI Prompts)

Image Prompt: close-up shot of honey being drizzled onto toasted slices of bread, honey is flowing smoothly from a honey dipper, creating a glossy, golden stream that glistens in the warm light, background blurred view of more slices of bread and a jar of honey, cozy and inviting atmosphere. Fujifilm Velvia 50 –c 10 –stylize 200 –v 6.0 (created in midjourney)

Video Prompt:Image of a bread on which honey is being drizzled on the bread with a dripper, close-up of the bread, showing its golden-brown crust and the texture of the toast. A honey dipper is gently lifted above the bread, and as it tilts, golden honey begins to flow smoothly from it, glistening in the light.

Video is created in Kling AI. When you enter a prompt for video in Kling AI, follow this small formula: first enter the description of the image, then enter what motion you want in the image. This will give you better results, though don’t always expect to get the result you want. Most of the time it will fail, so you have to give it a few tries. But sometimes, rather than getting what you want, you get something very nice and different. So have patience when you use AI to generate images or videos

Plz chk the video on my Instagram or X link.

Rain (Kling AI Prompts)

Image Prompt: Close-up of a lady’s face as she lies by a window with raindrops trickling down the glass –v 6.1 – (created in midjourney)

Video Prompt:Close-up of a lady’s face as she lies by a window with raindrops trickling down the glass,Water droplets are falling on the glass pane gently. Created in Klingai

“As you can see in this video prompt, the first part is the image prompt and the second part specifies the motion I need in the image. Try to write the prompt using this formula to get a good result.”

Speed Shot of Bike (Kling AI Prompts)

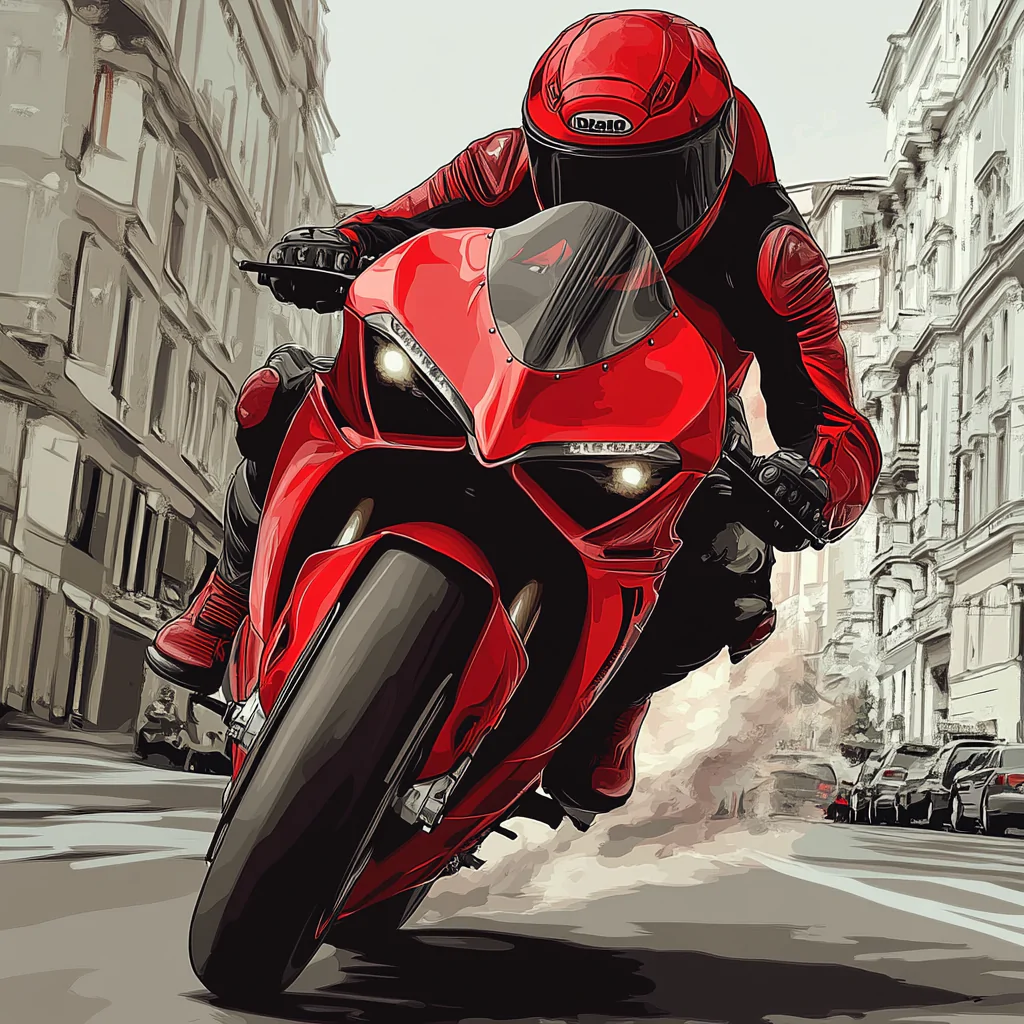
Image Prompt: vector, create an image of a motorcyclist, riding a sportbike at high speed, dynamic, background city street, red dress, red helmet. red bike – (created in midjourney)

Video Prompt1:vector, create an image of a motorcyclist, riding a sportbike, background city street, red dress, red helmet. red bike.Animate the image to show the biker riding at high speed through an urban environment with motion blur and flying debris for a dynamic effect.

Video Prompt 2: Vector, create an image of a motorcyclist, riding a sportbike, background city street, red dress, red helmet. red bike.Animate the image to show the biker riding at high speed with flying debris and moving car at the side and back

As you can see here, I have given two prompts. That’s because in Kling AI, you have an option of extending the video, but that will happen only when you take a paid plan. In the free plan, this feature is not available.

Look at the second video prompt. The part which is in bold is added in the second prompt because I wanted some cars at the side, which were not there in the first slide.

Let me tell you one more secret. You must be wondering where I got the sounds from, like you can hear tire screeching, traffic sound, and bike broom sound. So, it’s not Instagram audio. These sounds are easily available on CapCut.

Use CapCut to edit your videos; you will get all kinds of sounds there for free.

If you see this video, which I have uploaded on Instagram, there I’ve joined the two videos which I have created in Kling AI with 5-second durations each

Cyberpunk City (Kling AI Prompts)

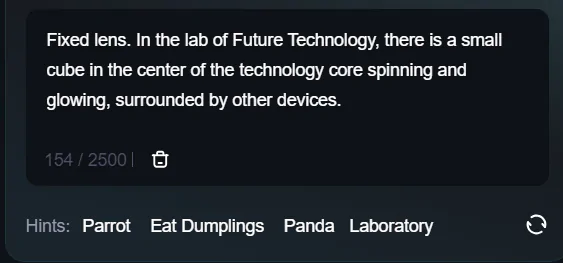
Prompt: On an alien planet, in a cyberpunk urban streetscape, the buildings are futuristic, the camera moves slowly forward, and there are pedestrians on the streets.

This video I have create in Kling Ai. So as I have mentioned before when you login to kling and goto their gallery, there are lot of videos they have uploaded where they give the option of clone and try, like you can see below.

Once You click on Clone and try .Look at the image below at HINTS; there you get lot of options, like in the image below, which is given: parrots, eating dumplings, etc. So I selected this cyberpunk city prompt and got this result.

But you get this option only if you have a paid plan. And also, in the free plan for the last two days, it took at least one hour for the result. In the paid plan, its instant like Maggi Noodles.

And sound effects I generated through Elevan labs.In free plan you get 10000 credits free so can utilize that. Chk the Sound effect option below And for editing use CAPCUT, its free and its very easy to use capcut to edit videos.

Lofi Coffee Shop (Pika AI Prompts)

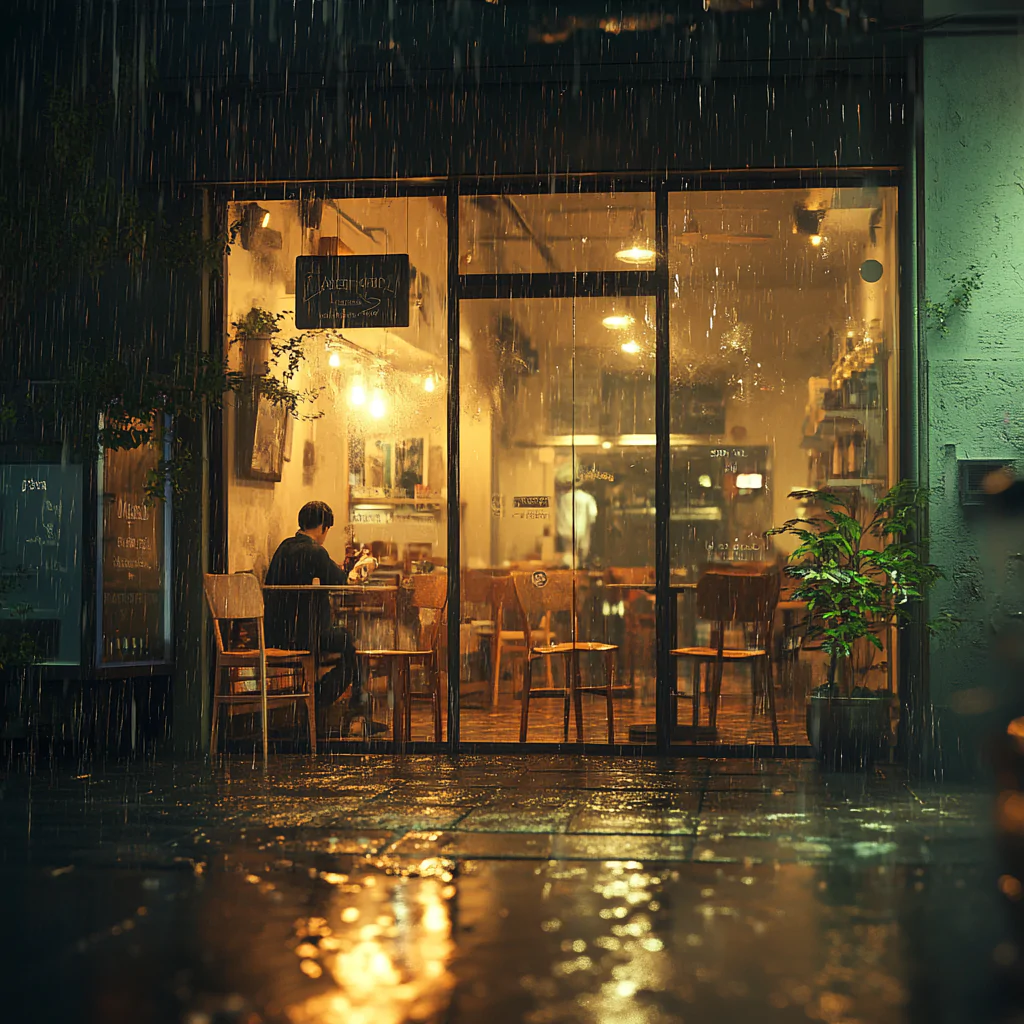
Image Prompt: lofi coffee shop on a rainy evening, street chairs glistening with rainwater, straight-on perspective. The camera angle is at eye level, capturing the cozy and intimate atmosphere inside the warmly lit café, A gentle rain falls outside, inside, a boy sitting at the chair waiting for someone , detailed view of the entrance’

Video Prompt: Its raining outside

This video is created in Pika with just a simple prompt.

Bikers (Klingai Prompts)

Image Prompt : digital illustration, three motorcyclist, backpack and helmet, back profile, biking on rugged dirt road, riding through a lush green mountain forest, Snow-capped mountains rise majestically with fluffy clouds dotting a bright blue sky. In the distance, a traditional temple with golden rooftops sits perched on a cliff.

Video Prompt:three motorcyclists are riding their bikes slowly on a rugged dirt road, surrounded by lush green forest and towering snow-capped mountains in the background. Their movements are steady and controlled, with the tires carefully navigating the rocky terrain.

This video is created in Kling Ai and edited in capcut. One more thing i want to mention here capcut has lot of sound effects . Its free as well. So use capcut for editing

Silent Escape (Kling AI Prompts)

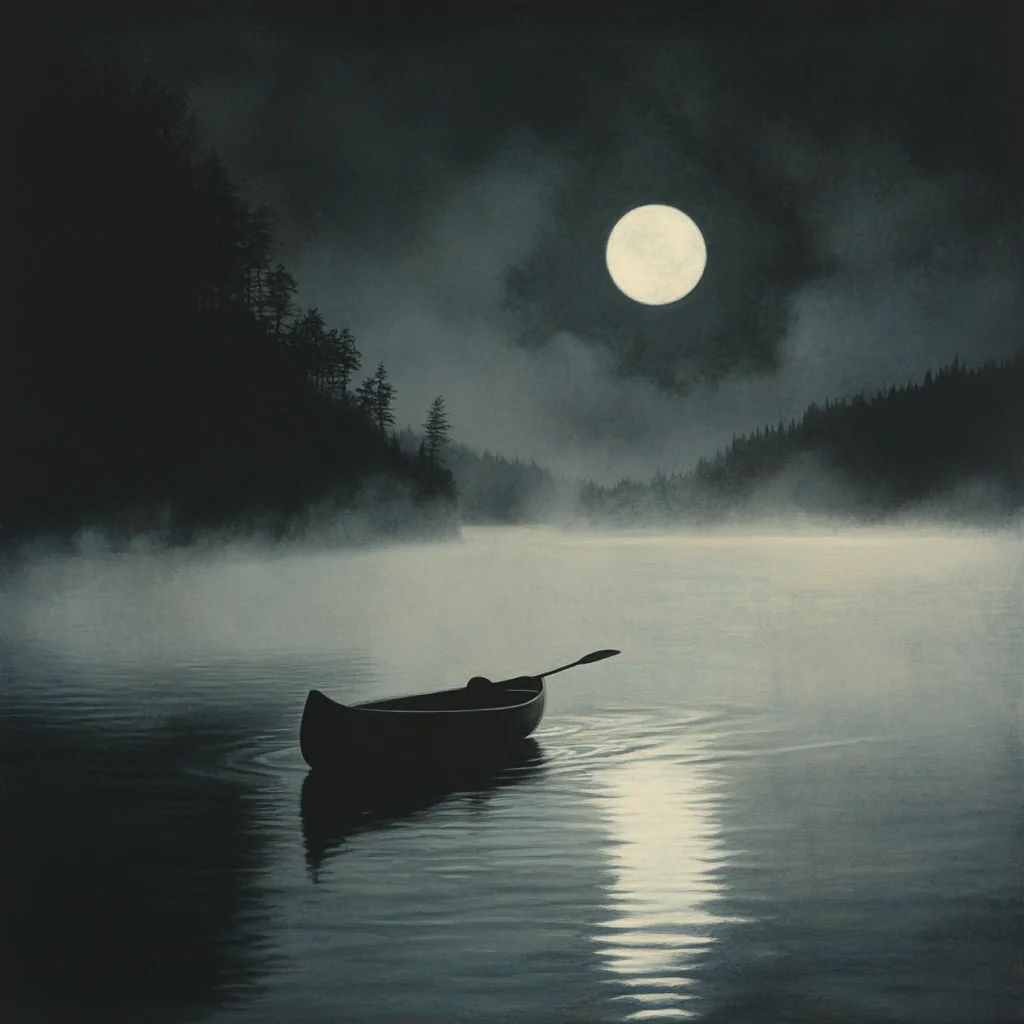
Image Prompt:digital illustration, A tranquil lake reflecting a full moon, foreground, canoe glides across the water,shoreline is dotted with ancient, gnarled trees, and mist hovers over the water’s surface.

Video Prompt :Boat slowly drifting on the water with gentle ripples.

This video created in Kling AI . Kling also has an option of first frame and end frame but that is available to paid users. So I used that option to create the video. Click on the link to watch the video where you can see two image are there which along with sounds have edited in capcut.

Age is no Bar(Kling AI & Luma AI)

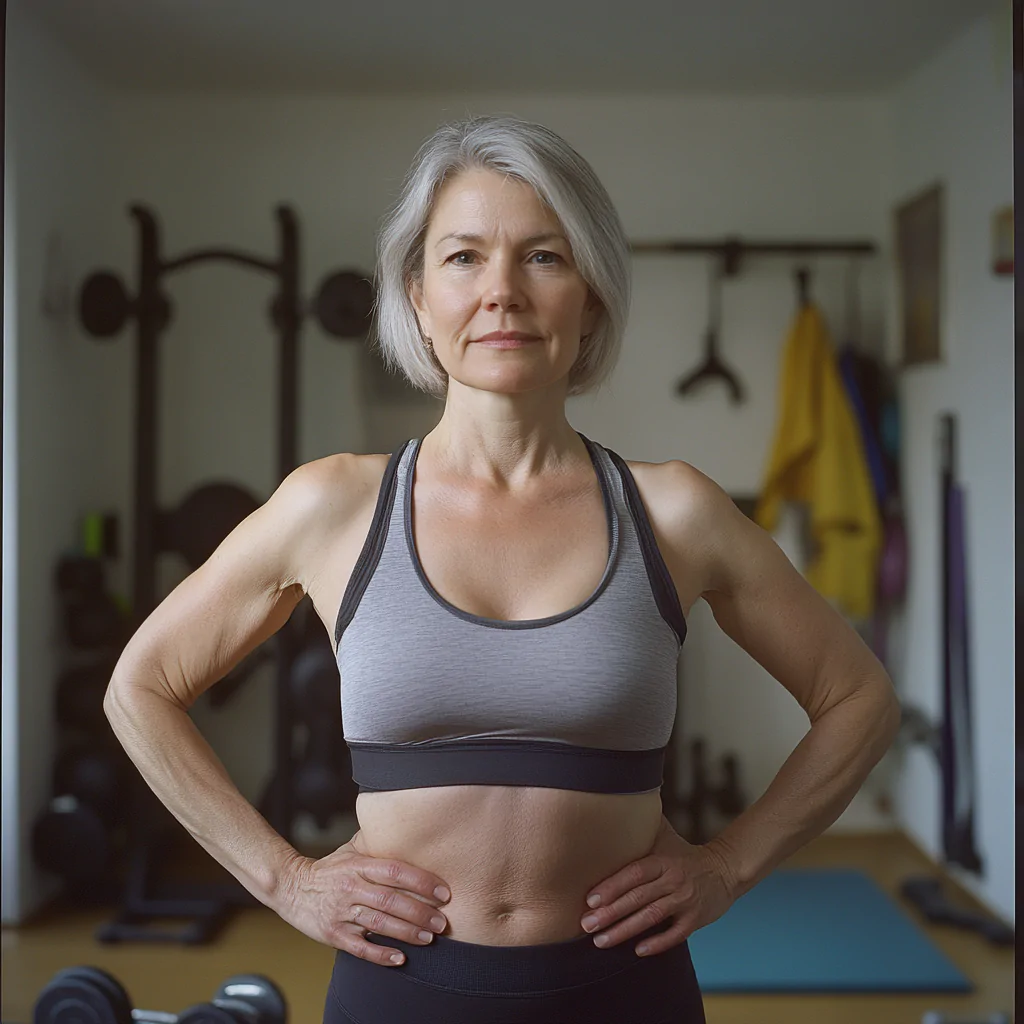
Image Prompt: medium shot, portrait of a middle aged women,hands straight next to the hip, gym attire, stylish, background home gym, weights and yoga mat, kodak potra 800 film type

Video Prompt: she is talking, smiling . blinking her eyes.

I created this image in MidJourney. I also generated versions in Kling AI and Luma Labs. Click the VIDEO PROMPT link and check out both videos on my Instagram.

Kling followed the prompt quite accurately—it moved the mouth, showed smiling, and even blinking.

In Luma Labs, the mouth didn’t move, but it followed the other aspects of the prompt well.

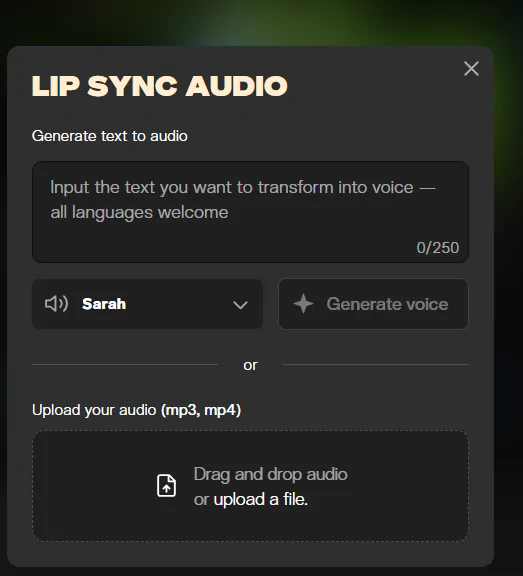
Now, you might be wondering how I made the video lip-sync. Since I wanted it to be a lip-sync video, I used Pika AI, which made it really simple. Let me show you how.

Look at the below screenshot ( select image or video from there)

Here you can see as u update the image or video, Lip sync option pops up just click on that.

After clicking Lip Sync u get this box .Here you have two options either upload your own audio or write a script and genrate the audio.

It only takes a few minutes, and your video will be ready.

Conclusion :

Image to Video to Lip Sync
Image created in MJ
Video in Kling AI
Text to Speech in Elevenlabs
Lip Sync in Pika ai

Innocence (Kling AI Prompts)

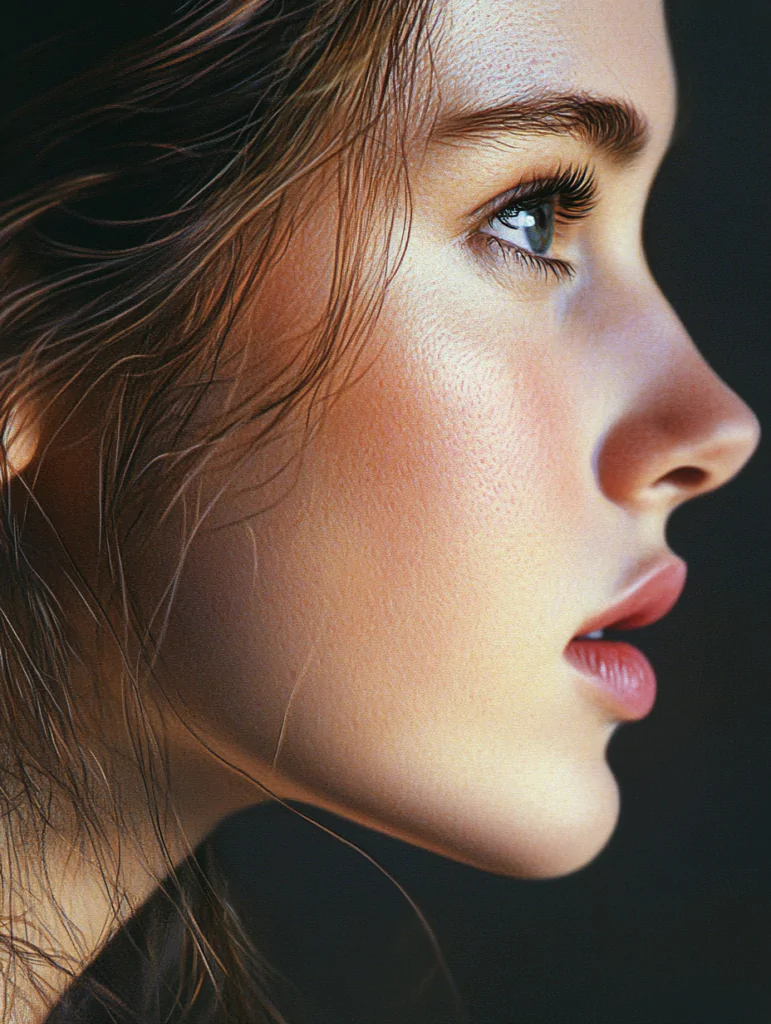
Image Prompt: Close-up portrait, three quarter profile portrait of a woman, dramatic lighting, soft pastel background, intricate details on the face, hyper-realistic, Kodak Portra 160 , –ar 3:4

Video Prompt :She turned her head towards the camera with a gentle smile.

Cookie Love (Kling AI Prompts)

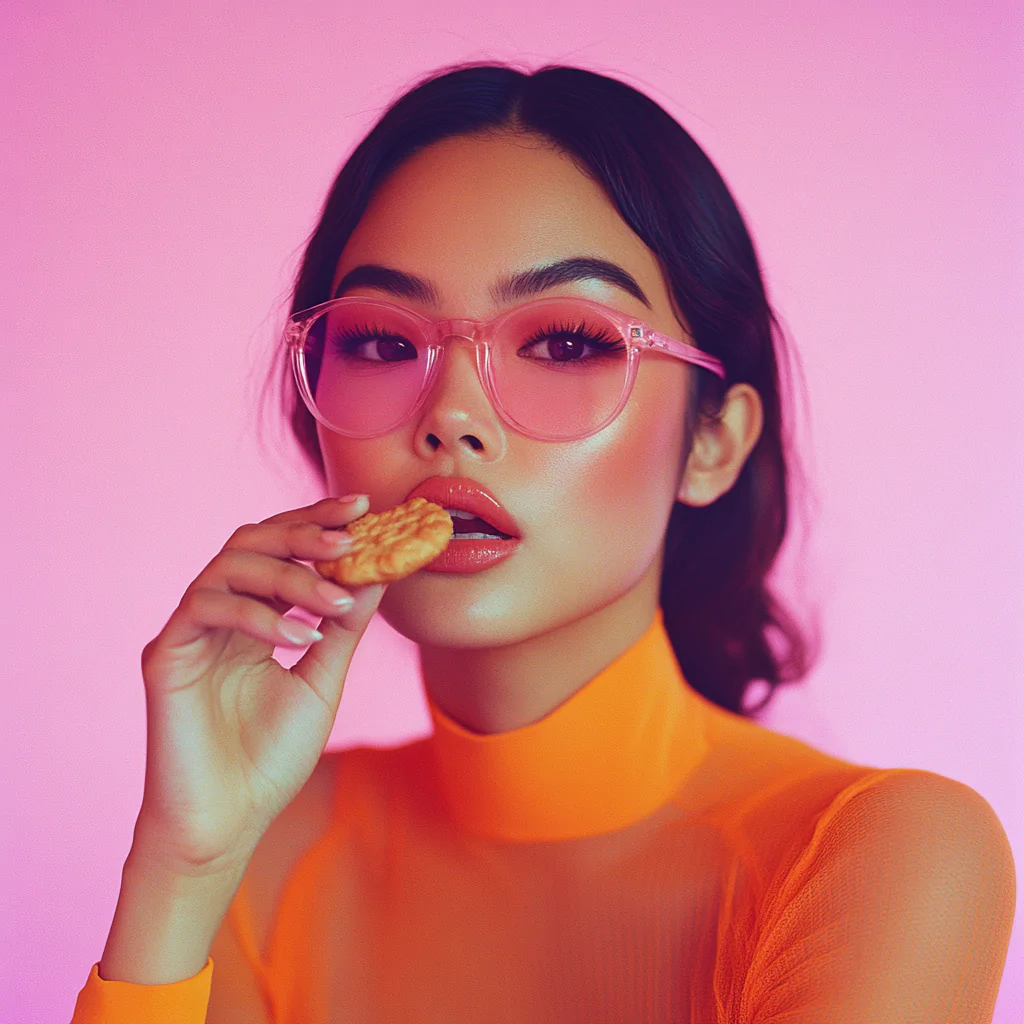
Prompt: fashion photography, three quarter profile portrait of a lady, pink glares, eating a cookie, looking at the camera, orange top, kodak potra 400.

Video Prompt: The lady in the video is enjoying her cookie, taking a small, savoring bite with a relaxed and content expression.

This video is created using kling ai.

This video is so amzing if you notice there is no morphing of fingers, eyes.

Gentle Flow(Kling AI Prompts)

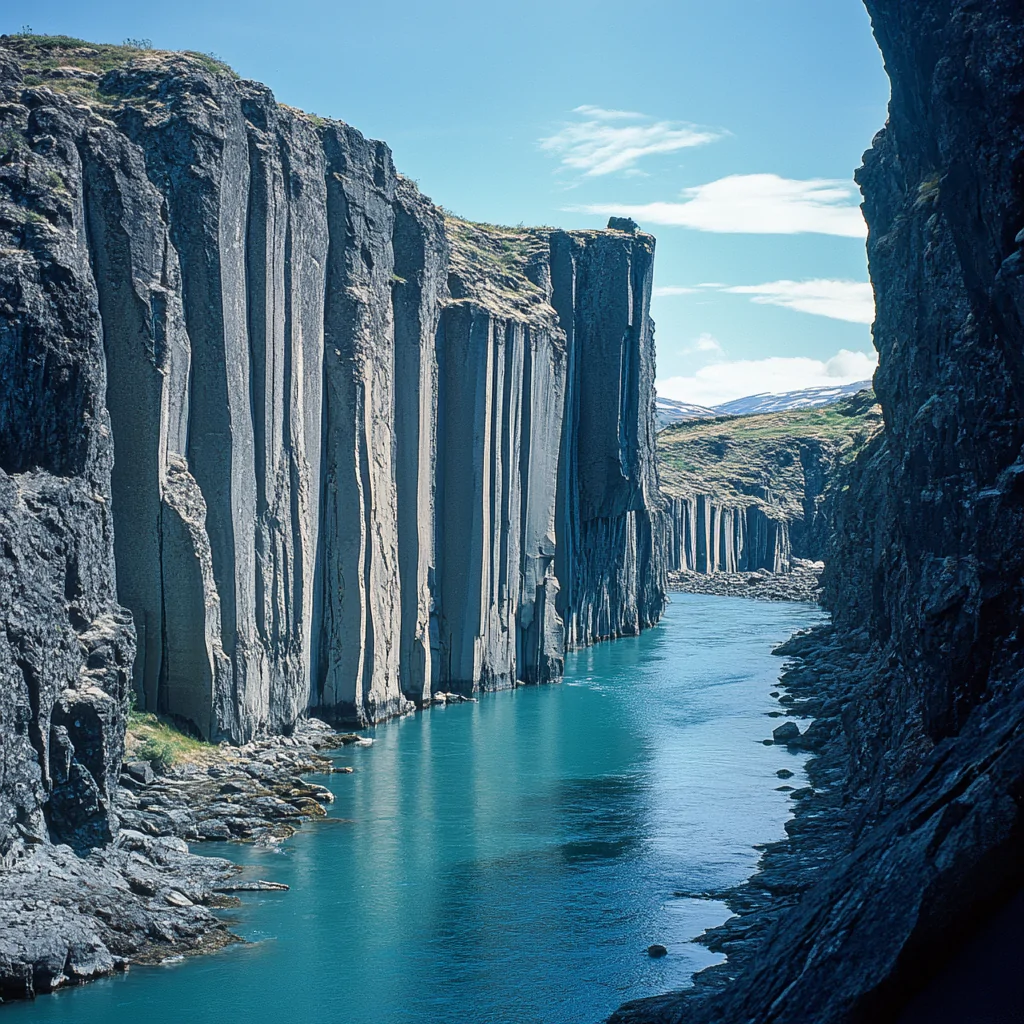
Image Prompt: Extreme long shot, narrow fjord, azure water, blue sky, weathered basalt columns, varied heights, natural cracks, sparse vegetation, soft shadows, subtle mist, Fujifilm Velvia 50, sharp details.

Video Prompt :a slow zoom-in with slow-motion water movement.

This image is created in midjourney and video in cling and sound in eleven labs. To learn about different shots you can use in midjourney click on this link (MIDJOURNEY CAMERA SHOTS0

Eleven labs has a new feature SOUND EFFECTS where you can create sounds by giving prompts. They also have library of sounds which can be used if you are a paid member. And you get 10,000 free credits as free member.

Cream Dream (Kling AI Prompts)

Image Prompt: fashion photography, three quarter profile portrait of a lady, pink glares, eating a softy ice cream, looking at the camera, orange top, kodak potra 400.

Video Prompt: The lady in the video is enjoying her ice cream, taking a small, savoring bite with a relaxed and content expression

AI Face Morphing (Kling AI Prompts)

Image Prompt:

1.create a portrait image of a bay girl in white

2.create a portrait image of 20 year old girl in white.

3.create a portrait image of 20 year old East Asian girl, soft almond-shaped eyes and straight dark hair, white dress.

4.create a portrait image of 20 year old East Asian girl, soft almond-shaped eyes and straight dark hair, white dress.

For 4 images 4 prompts are given above.

I have used Kling AI to create some awesome transitions between images. Kling has a feature similar to Luma AI called ‘End Frame.’ This option helps smooth out the transitions, but it’s only available to paid users. Let me show you how it works!

In the screenshot, you’ll see I’ve added two images and selected the ‘End Frame’ option. Now, all I have to do is write a prompt, and Kling AI takes care of the rest – super easy, right?

I’ve also made three transition videos from four images to show how seamless it can look. Check out the video on Instagram by clicking on VIDEO PROMPT to see it in action! 🎥✨

Video Prompt:

1.Face remains Same

2. Face remains same

3. Transition

Use Case Scenario

Imagine a beauty brand using these face transitions in a video to show how their products work for all skin tones. It’s a perfect way to represent inclusivity! You’d see one face smoothly change into another, showcasing the beauty of different ethnicities. Or picture an art exhibition using these transitions to visually express diversity and human connection.

Each face would transition from one ethnicity to another, celebrating unique features while spreading a message of harmony and inclusion. It’s a beautiful way to remind everyone that, no matter where we come from, we’re all connected.

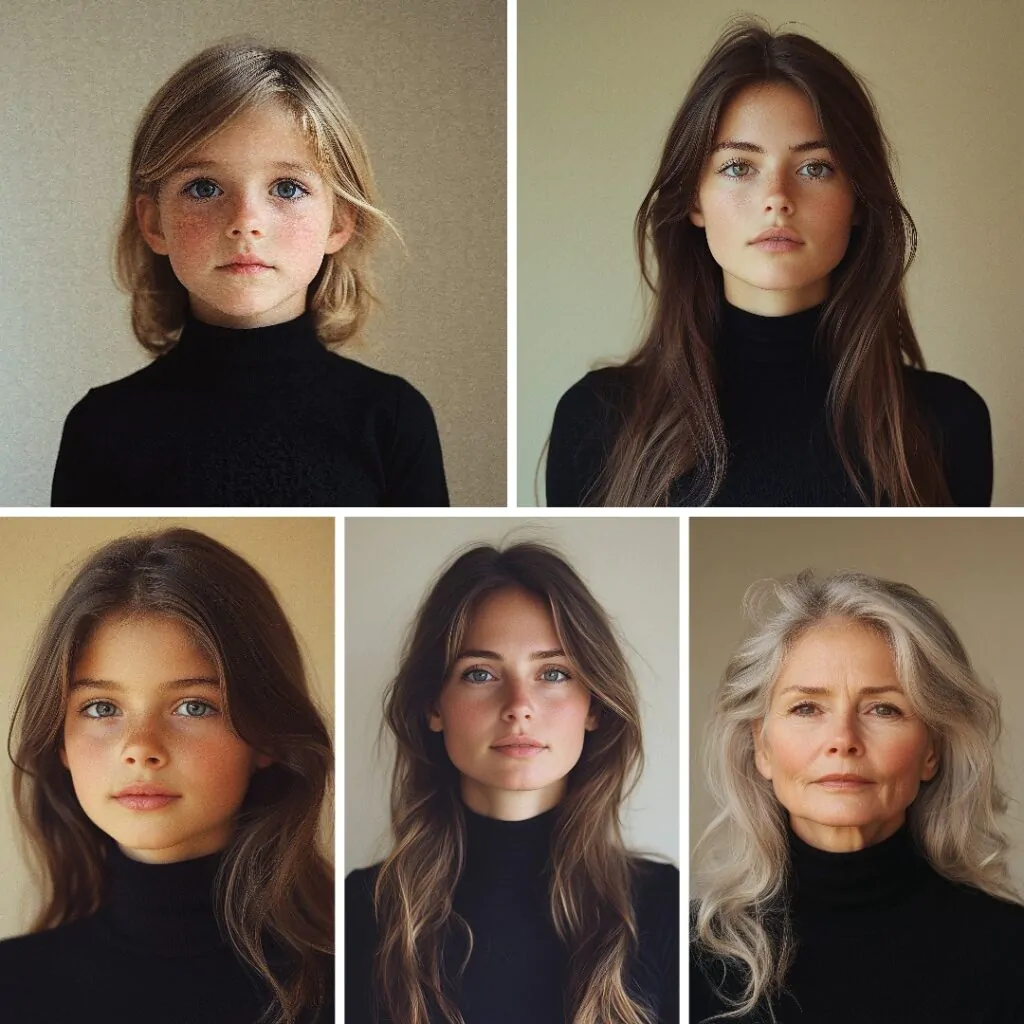
AI Life Time Lapse Video (Luma AI Prompts)

Image Prompt: 1. Close-up, midbody shot, 6 year old girl, black turtleneck t-shirt, beige background, kodak potra 400.

2.close up, midbody shot, hair open, 13 year old girl, black turtle neck t. shirt, beige background, kodak potra 400.

3.close up, midbody shot, long hair, 24 year old girl, black turtle neck t. shirt, beige background, kodak potra 400.

4..close up, midbody shot, long hair, 40 year old girl, black turtle neck t. shirt, beige background, kodak potra 400.

5.close up, midbody shot, hair open, 60 year old girl, black turtle neck t. shirt, beige background, kodak potra 400.

Video Prompt: Face remains still

I created this video using the Luma Dream Machine with the Keyframes feature. All I did was enter a younger age, then an older age, and used the prompt.Take a look at the screenshot

Here are a few observations for this video:

First, it’s best to stick to an aspect ratio (AR) of 1:1 or wider.Midjourney defaults to 1:1 if you don’t specify an AR.

I tried using a vertical image in Luma , but it didn’t turn out well—likely because there’s not enough space for the AI to work effectively.

Another important tip: keep the hairstyle consistent in each frame of your video. Open hair tends to work best. If the hair is tied in one image and open in the next, the transition can look awkward, almost like the hair is suddenly popping out of nowhere. In my images, I made sure all the hair was open, and it really made a difference. You can see this technique in action on Luma’s video channel as well, where all the ladies have long, open hair. Check out the video on the left for my experiment and the one on the right for Luma’s experiment to see a smooth hair transition.

Lastly, don’t expect perfect results right away. Even with the best prompts, the outcomes can sometimes be inconsistent, so be prepared to experiment and use a few credits to get it just right.

I hope these tips help you create smoother face transition videos in Luma!

“Lifetime” 🕰️  Aging Timelapse made with AI 🤯

Smooth Transition(Luma AI keyframe Prompts)

I’ve created five images in MidJourney and turned them into a video using KlingAI and edited in capcut. The transitions between the images are super smooth, creating a fluid motion that’s really relaxing to watch. It has a soothing effect, and I think you’ll love the calming vibe! You can also use them as mobile wallpaper.

I’ve been experimenting with both Luma and Kling AI, and they each have their strengths.

Kling AI is amazing for body movements, making everything feel smooth and natural. Luma, on the other hand, is great when you need camera transitions or movement effects.

I’ll be sharing more of my Kling AI experiments soon, so stay tuned! If you’re using these tools, I recommend choosing carefully based on your needs—Kling for body motions and Luma for camera transitions. After trying them out myself, I’ve noticed how powerful each can be in the right situation

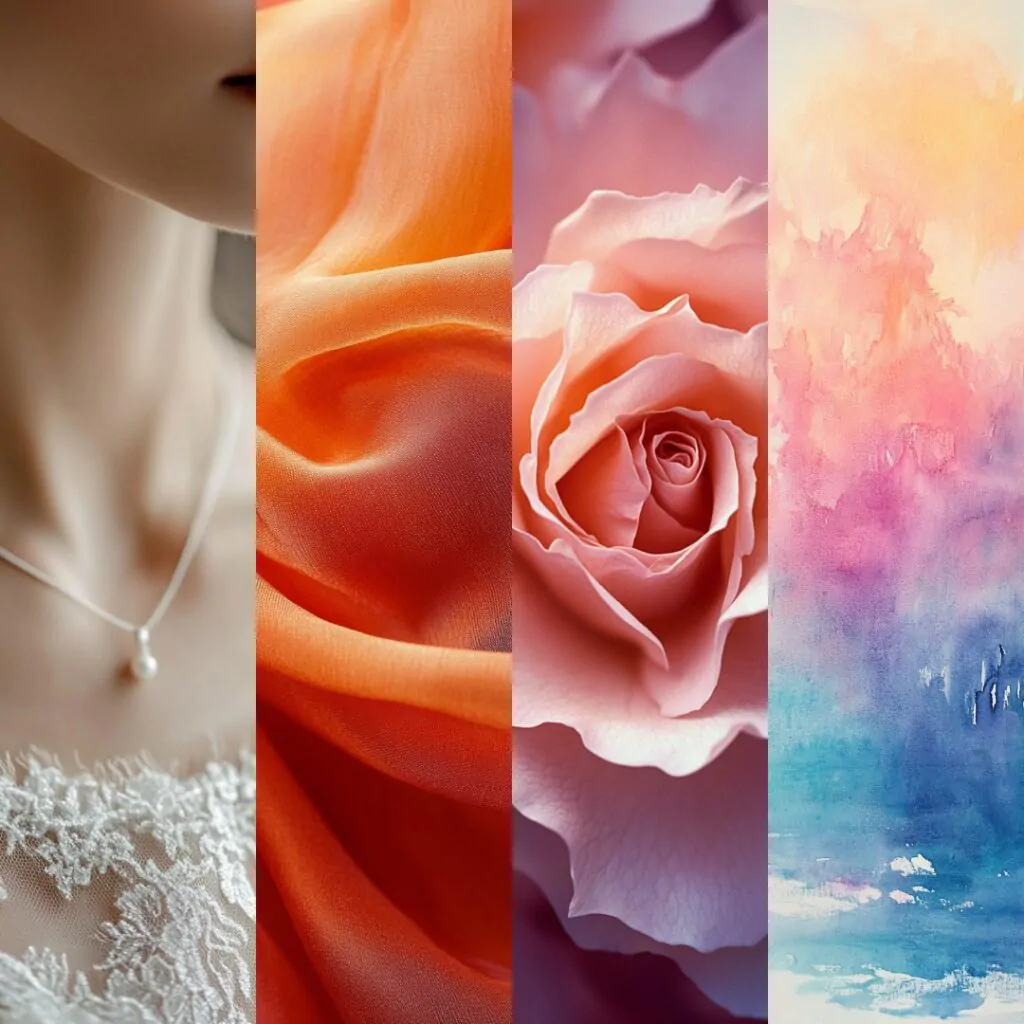
Image prompt :

Image 1 :high angle shot, pink cherry blossoms, glowing white pink pebbles covering the entire street, very beautiful, –ar 9:20

Image 2: Macro shot of a woman’s pure beautiful neck, seen on the shoulders of a white wedding dress, hd, 8k , –ar 9:20

Image 3: Silk texture, close up photography, vietnam, 135mm, –ar 9:20

Image 4:close up of delicate pink rose in bloom, kodak gold 100,– sref 1700688126, –ar 9:20

Image 5:Soft pastel watercolor brushstrokes, –ar 9:20

There are five transitions. I have made the video using Lumas end frame option in which you upload two images.

Video Prompt:

Prompt 1: Fade to the close-up of the woman’s neck and pearl necklace (Cherry Blossom to Women’s neck)

Prompt 2:(In this I have not given any prompt just entered the images and clicked enter (Neck to Pink Rose)

Prompt 3:Subtle ripple effect across the fabric (Rose to Orange Fabric)

Prompt 4: orange fabric moving gently, fades, the colors blend into abstract forms, eventually transforming into the soft pastel painting (Orange Fabric to painting)

Refer the below print screen to get an idea how to upload images in luma and give the prompt

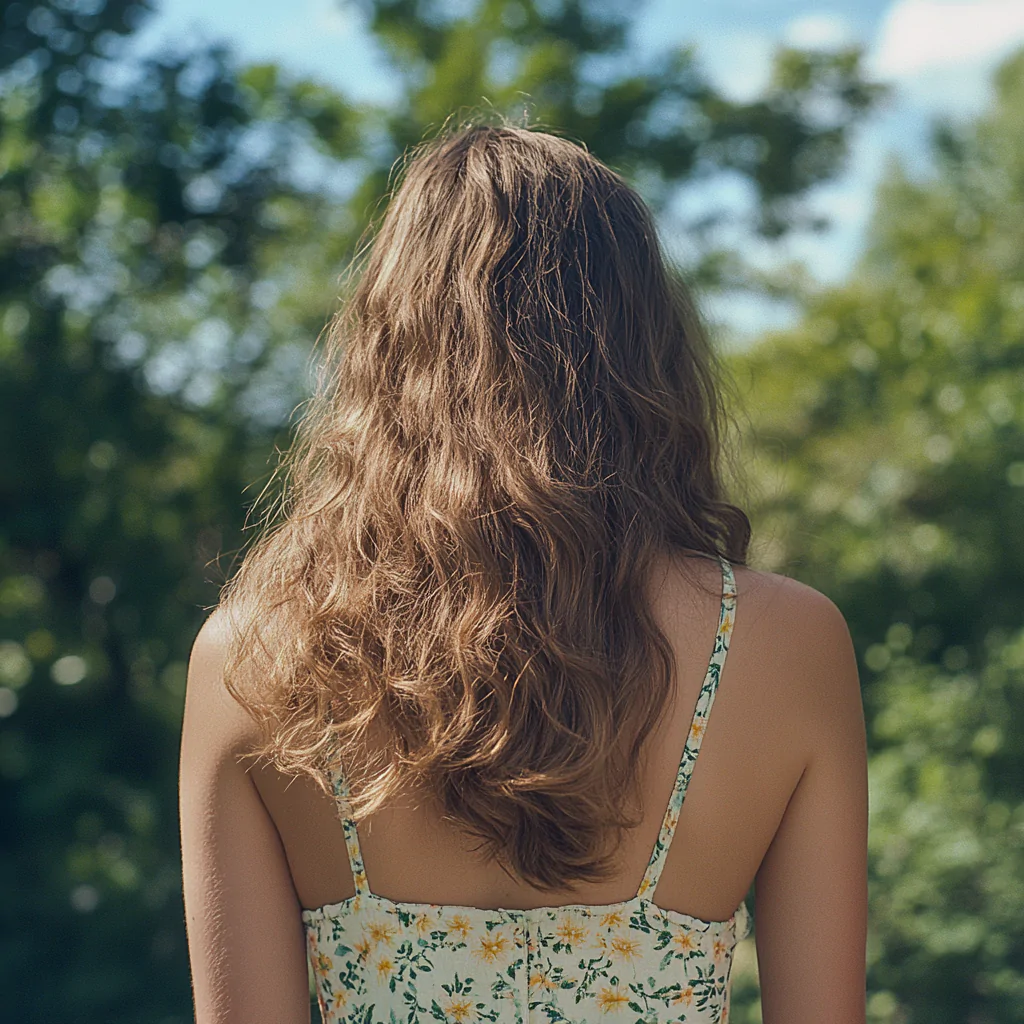
Hair Flip ( Kling AI Prompt For Neck Movements)

This image is craeted in midjourney and video creayed in kling ai using Image to video option.

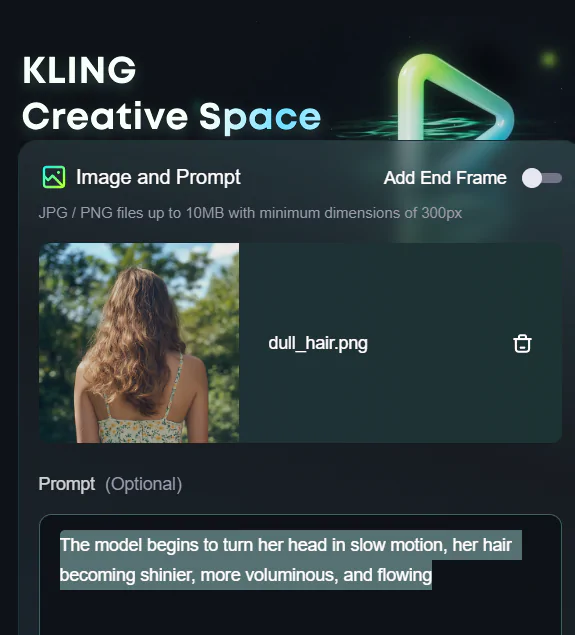
The idea behind this video was a woman with dull hair who turns her neck, flipping her hair, which then transforms into voluminous, shiny locks—just like we often see in shampoo or hair oil commercials. With this concept in mind, I created the video. Whenever you’re creating a video, it really helps to have a story in mind, as it guides you to prompt the AI tools more effectively.

Image Prompt: Back view, mid body shot, close up of dull dry fizzy long hair, , wearing straps, sunny weather, outdoor, Kodak Portra 800.

Video Prompt: The model begins to turn her head in slow motion, her hair becoming shinier, more voluminous, and flowing

Refer the below Print Screen

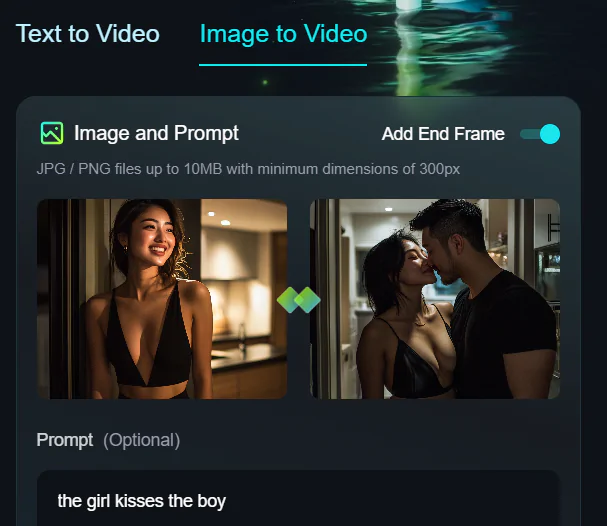
Kling AI Kissing Prompt

These three images I have created in midjourney refer the prompt below. and the video i have made in Kling AI.

Image1 Prompt : mid body shot, three quarter profile, Asian woman in a modern kitchen, smiling, woman wears a black strappy jumpsuit , framed by a doorway, nighttime, romantic lighting –v 6.1

Image2 Prompt: close up, Asian woman in a modern kitchen, kissing an asian man, smiling, woman wears a black strappy jumpsuit , man jeans t,shirt, framed by a doorway, nighttime, pov love.

Image 3 Prompt: close up, Asian woman , asian man, cuddling in a cozy apartment bedroom at night, woman wears a black strappy jumpsuit , man jeans t,shirt, background bedroom, warm ambient lighting, pov love.

Video – Two videos are created for this transition.

The first video was created using the “add end frame” option. I started by inserting the image of the girl, followed by the couple kissing. If you look closely, when the girl moves toward the boy, the boy’s hand appears on her back before she actually reaches him, which causes a bit of misalignment. To avoid this kind of distortion, try to keep the shot in close-up or frame it up to the waist—this might help prevent any awkward hand placement or deformation.

The video prompt is very simple

Video Prompt: The girl kisses the boy

In this image again you enter the second image first and then final image .

Video Prompt: They move slowly from kitchen to bedroom.

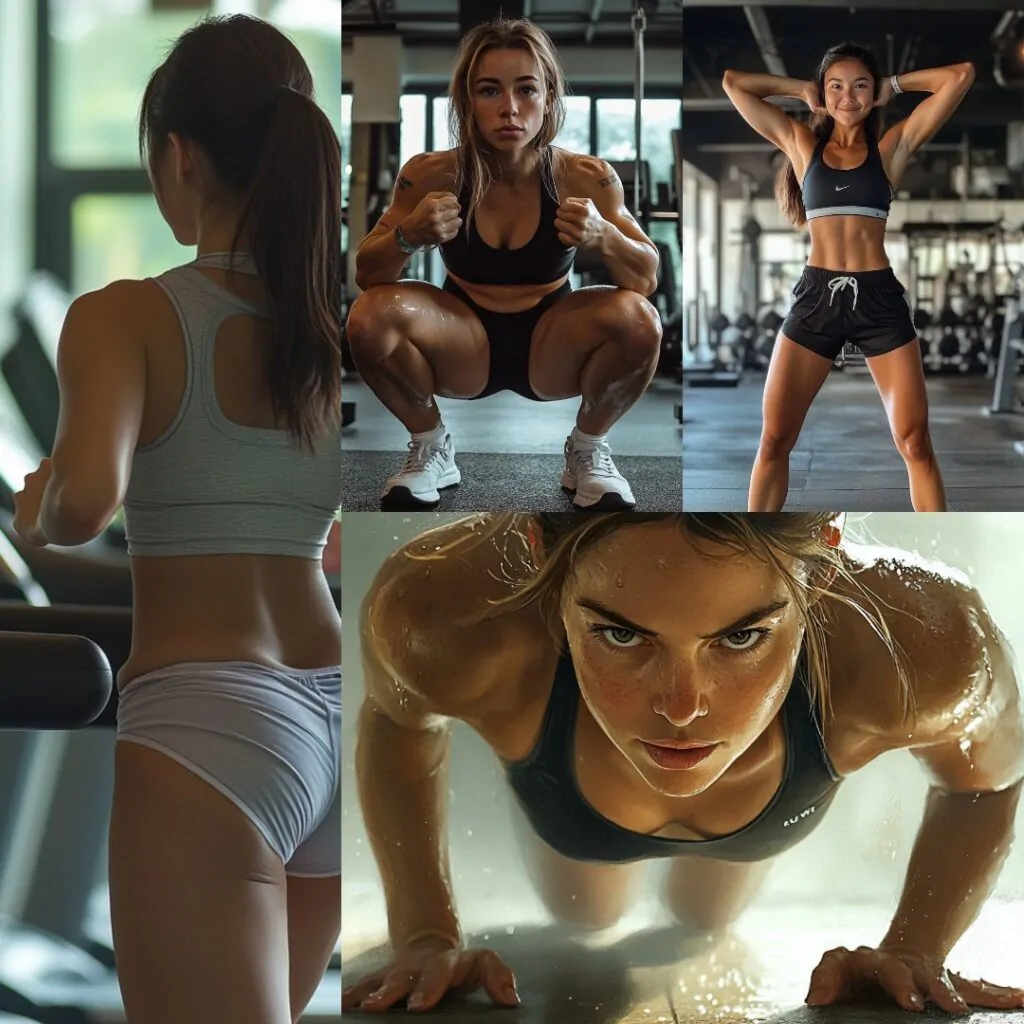
Fitness Prompt Kling AI

These images are created in midjourney.

I ve shared the image prompt below

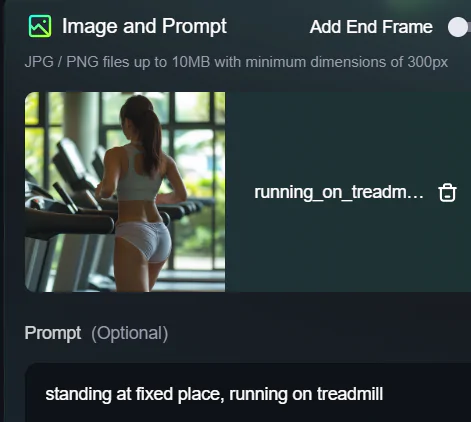
Image 1 (Treadmill)-full body shot, asian women, healthy, running on the treadmill at gym –v 6.1.

Image 2(Squat)– full body short, Wearing black gym shorts and white trainers, image of a lady in gym, practicing squat exercise, sweat on her face, looking at the camera, excited , background gym, –v 6.1

Image 3(Semi Squat)– full body short, Wearing black gym shorts and white trainers, image of a lady in gym,standing with arms bent ath the elbow, sweat on her face, looking at the camera, excited , background gym –v 6.1

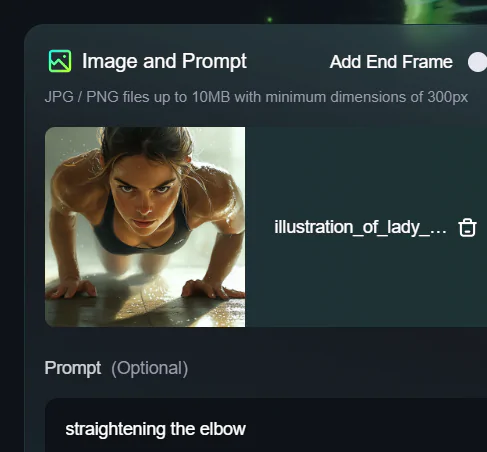
Image 4(Plank)- Low-angle shot of a determined young woman in a high plank position, hands under shoulders, intense gaze forward. Camera close to the ground, capturing her focused expression and defined muscles. Sweat glistens on her skin, background blurred to emphasize her powerful form.

Video Prompt

Using all these images, I have made a video in kling ai. In all the prompts I have just uplaoded the image and given a prompt (the action which I want the lady to perform)

let me show you the workflow below.

Videp Prompt: Lady is in squat position and stands up straight

Video Prompt: squatting down on the floor

Video Prompt: straightening the elbow

Video Prompt: standing at fixed place, running on treadmill

All the videos were merged in CapCut and uploaded to Instagram using Insta music. You can actually merge them directly in Instagram as well, but CapCut offers some cool transitions that really make your video look awesome. Click on the video prompt above to chk the video in instagram

Running Prompt Kling AI

Image is created in Midjourney

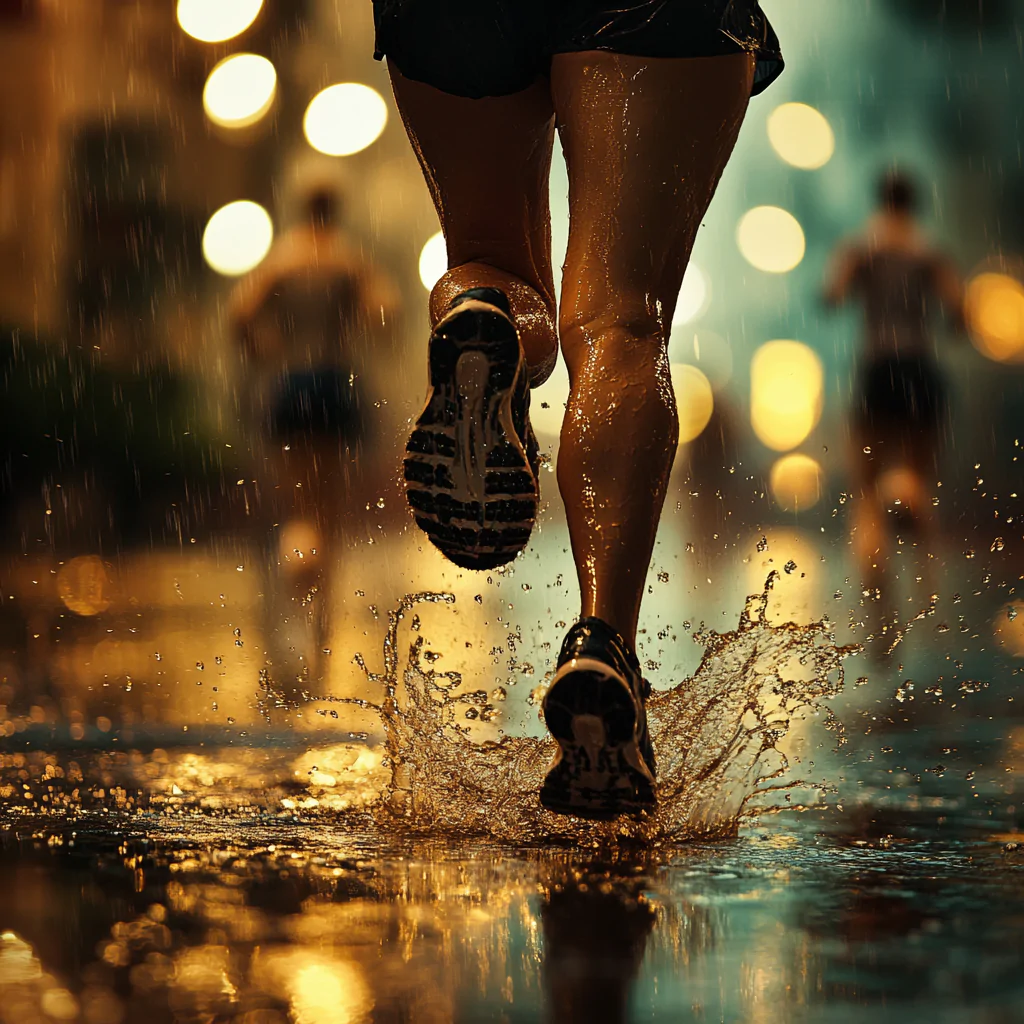
Image Prompt : Dynamic action, lady runner, a low-angle rear view, focus on muscular legs and athletic shoes splashing through rainwater, intense motion, wet urban environment, blurred background with other runners, city buildings, and streetlights reflecting off the wet ground, dramatic rain-soaked atmosphere.

Video Prompt: LADY RUNNING FORWARD

This type of video, like running squating, which i have created above, please dont create in luma . Luma cannot handle body movements. Kling is best in this.

Running Prompt Kling AI

Image is created in Midjourney

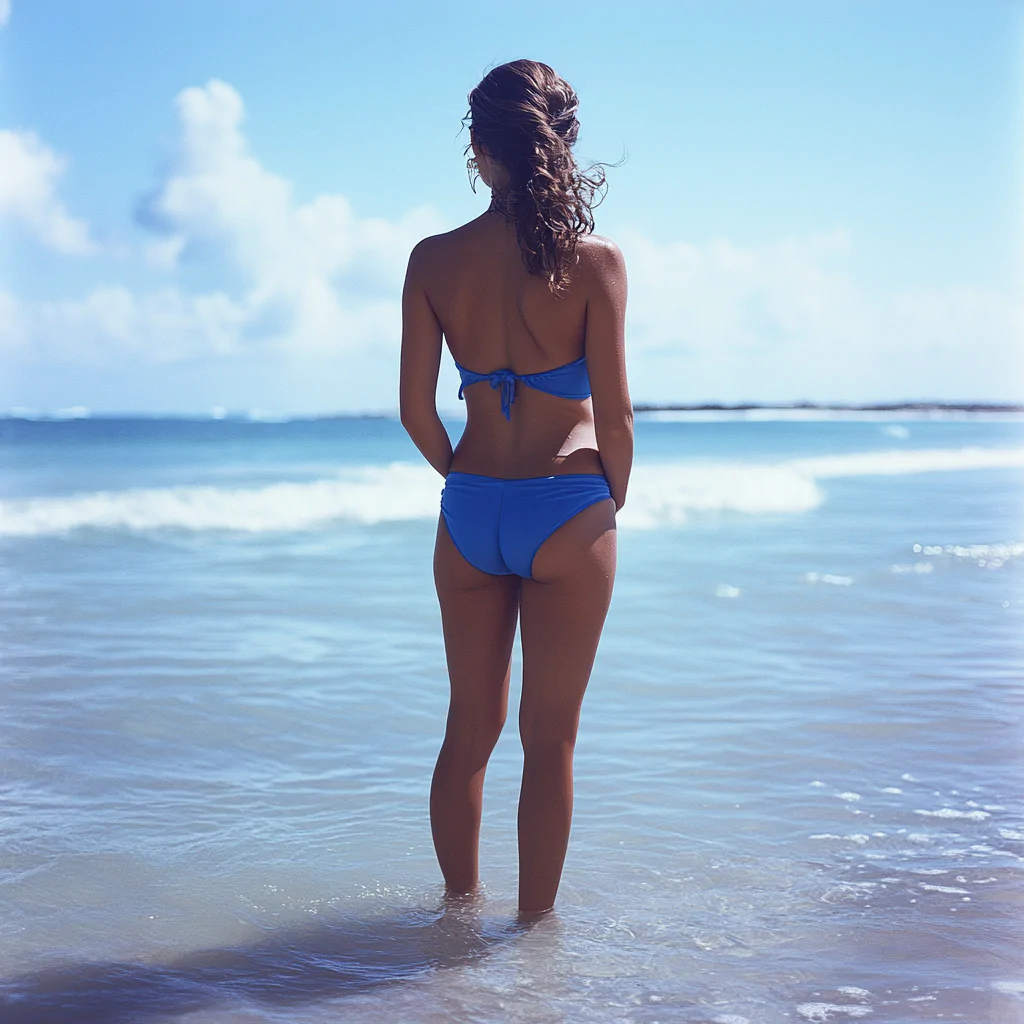
Image Prompt : Back profile, extreme long shot, gorgeous european lady, standing in a ocean, abs, wearing blue SWIM dress, natural daylight, kodak potra 100, ar 3 :4.

Video Prompt : the lady in swimming costume is running forward.

Kling AI is amazing at making running videos! Whether I asked it to show just the legs(refer the above image) or the whole body running, the movement looks super natural and smooth.

Santa Fitness Prompt Kling AI

Image is created in Midjourney

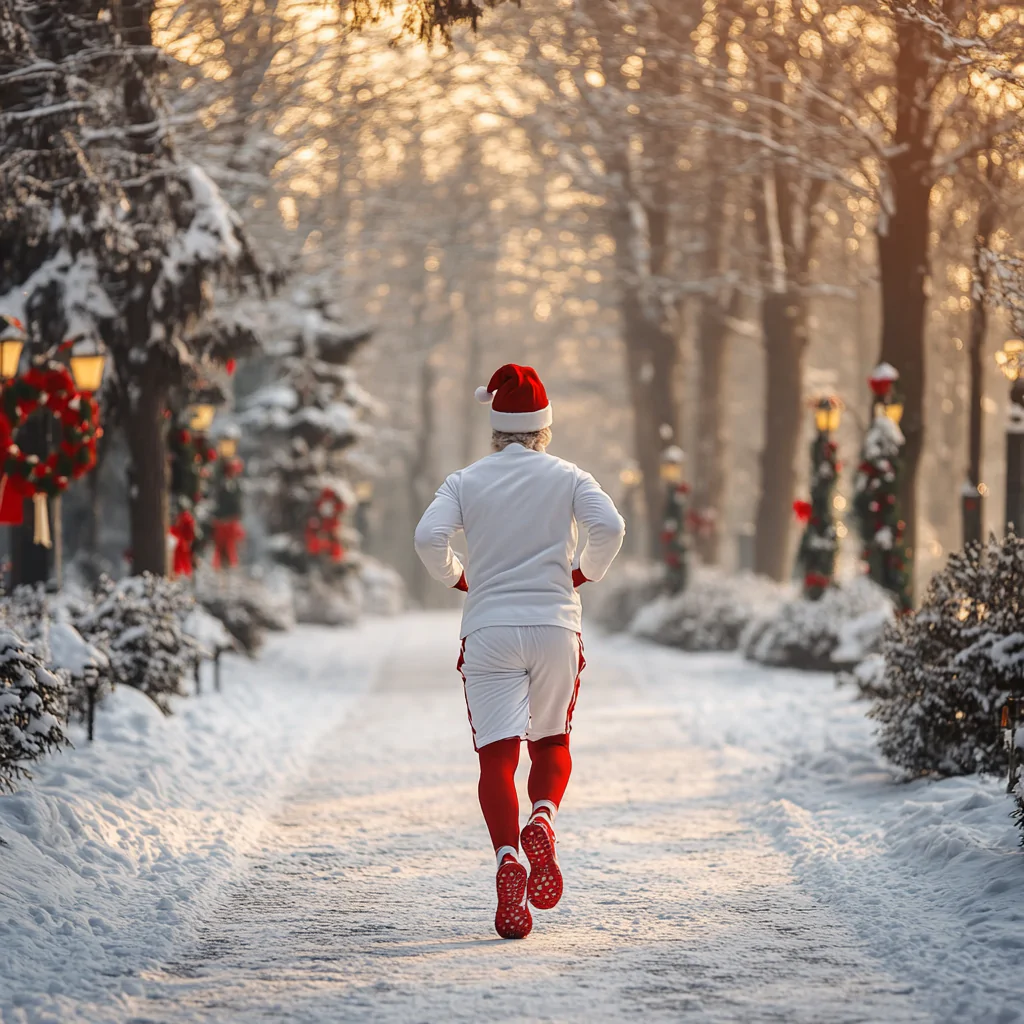
Image Prompt: Back profile POV of well built Santa Claus , white sporty jogging outfit, red cap, red sneakers, jogging through a snow-covered, Christmas-themed park. early morning with soft sunlight reflecting off the snow, and holiday decorations like wreaths and candy canes line the park path.

Video Prompt: Santa is running forward, tress are moving backward.

When making videos with body movement, it’s better to use Kling AI instead of Luma AI because Luma often distorts the image. For running scenes, try using a back profile shot, as the face can get distorted in front profile shots

Santa Biking Prompt Luma Ai

Image is created in Midjourney

Image Prompt: POV shot from the back of Santa Claus, riding a vintage motorbike down a snow-covered straight road, 35mm film

Video Prompt: santa claus riding the bike forward.

Cat’s busy day 🎩🐾 Kling Ai

Image Prompt:

Image 1- side profile, create an iimge of a cat in office dress , sitting on a dining , holding the toast with hands to eat.

Image 2: front profile, image of a cat in office dress, driving a mercedes, background city lights

Image 3 : full body shot, white snickers, create an image of cat playing guitar, retro theme.

Image 4: A cat, wearing suit , typing on a laptop, background office

Images are created in midjourney and videos are created in Kling AI.

Video Prompt

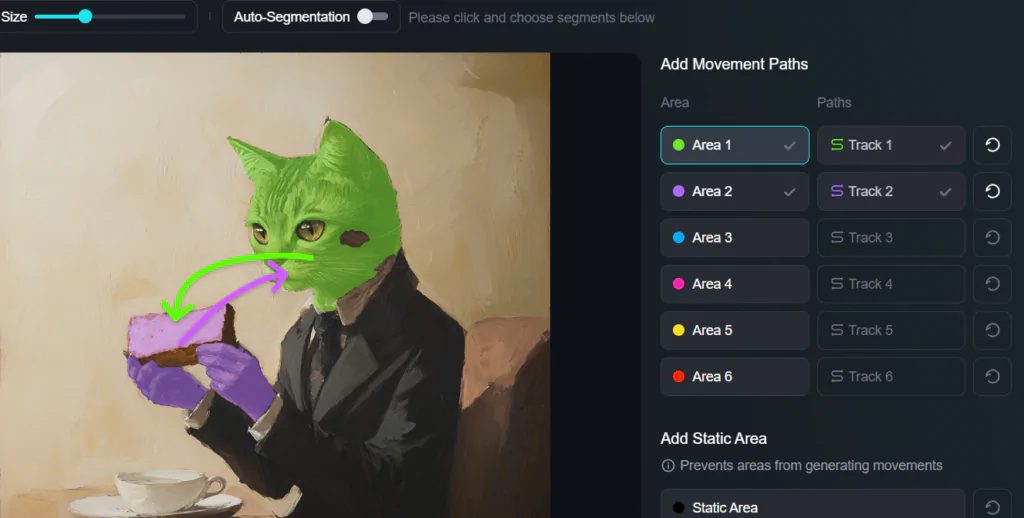
For cat eating the toast I used Motion Brush option of Kling Ai . Chk the Print screen below and Prompt (cat eating the toast)

For Cat driving just used simple prompt (cat driving the car)

For Guitar and driving as well used simple simple prompts (cat driving the car)(cat playing the guitar)

And final video is edited in Capcut .

Watch the video in Youtube

Cat’s busy day 🎩🐾. If u want to learn how to create this video click link in bio. #aivideoyoutube

A Journey Home

Images are created in Midjourney

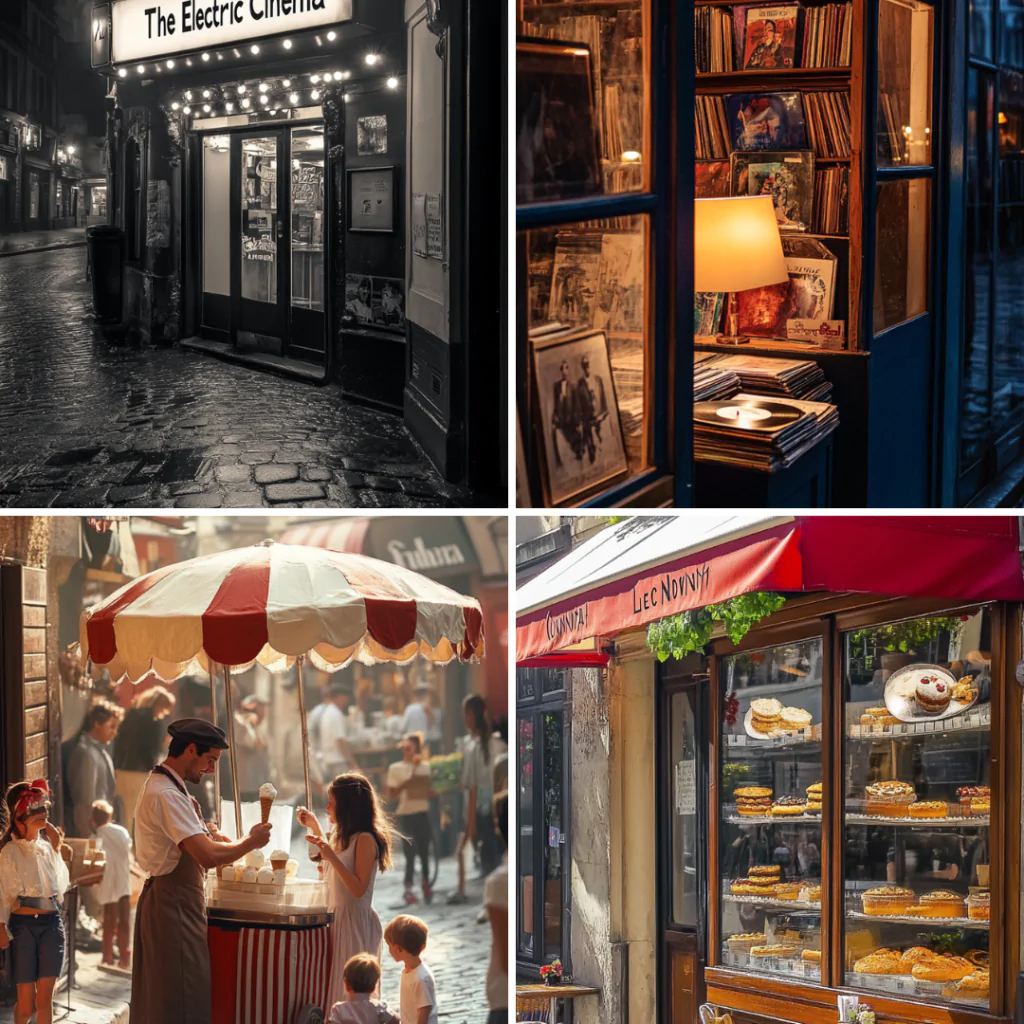
Image 1: A beautifully restored vintage cinema on the cobblestone street “The Electric Cinema”, Portobello Road, London, .marquee glows softly, evoking the charm of a bygone era, cinematic photography, Sony A7R IV, –ar 9:20

Image 2: exterior of a small vintage record store on the cobblestone street of Portobello Road, Notting Hill, London, windows are filled with stacks of vinyl records, cozy dimly lit shop, Nikon Z7 II, –ar 9:20

Image 3: A classic ice cream cart with a cheerful red-and-white striped umbrella on the cobblestone street of Rue Mouffetard, Paris, vendor, dressed in an old-fashioned uniform, smiles as he hands a cone of vanilla ice cream to a woman. Children run by laughing, Canon EOS R5,–ar 9:20

Image 4 : The cozy exterior of Le Consulat Café on the cobblestone street of Rue Norvins, Montmartre, Paris, bakery’s large windows showcase fresh cakes, pastries, and bread beautifully displayed on wooden shelves, , street is quiet, with a few tables and chairs set outside, , Leica M10-R, –ar 9:20

Images are created in midjourney and videos are created in Luma Dream Machine

Video Prompt

In this video, I used two features of Luma Dream Machine: first, the Camera option, and second, the Keyframe option.

Let me start by mentioning that the video was edited in CapCut. For the first transition, where the camera moves from the lady’s bedroom to a cobblestone street, I used the Keyframe feature without any prompts.

In the second transition, where the camera zooms into the cobblestone street, I used the Camera option of Luma (Camera Pushes In).

For the third transition, which features the bakery image, the camera simply moves to the right.

In the fourth transition, the camera moves from the flower shop to the bookstore. Here, I used the Keyframe option again without a prompt. Typically, Luma smooths the transition with the Keyframe feature, so you don’t need to input a prompt.

For the fifth transition, moving from the bookstore to the ice cream shop, I also used the Keyframe feature.

In the final transition, where the camera moves from the theatre image to the lady wearing virtual reality glasses, I used the Keyframe feature.

You might be wondering why I didn’t use a transition from the ice cream shop to the theatre. The reason is that there were people in the ice cream image, and when I used the Keyframe option, Luma morphed the video of the humans in a way that looked odd and unnatural, which was not good to watch

Watch the video in Youtube

A Journey Home #virtualreality #virtualtravel

Prompt For Panda Eating Leaves

For this I created the image in midjourney and then used kling 1.5 professional mode to generate the video.

Just a Panda Brunch.. #naturelovers

Coffee Love

These Two Images I created in Midjourney and created video in kling 1.0 using start and end frame using professional mode (35 credits)

Coffee Love #coffeelover

Chatgpt Microphone and Headphone Usage

How to use CHATGPT Mic and Headphone Icon

Plz note it is available only in mobile app.

There are two main icons: a microphone inside the text box and a headphone outside it. Here’s how they work:

  1. Mic Inside the Text Box:
    • If you don’t want to type your prompt, you can click on the microphone inside the text box and dictate your prompt. ChatGPT will transcribe your spoken words into text in the box. After that, just click enter, and you will get your answer in text format.
  2. Headphone Outside the Text Box:
    • If you prefer to have ChatGPT read the text for you, click on the headphone icon. After clicking it, give the instruction to “read the previous text for me.” You can specify if you want it to read slowly or loudly. After a few seconds, ChatGPT will start reading the text aloud. This function is particularly useful if you don’t want to read long texts yourself.

Additionally, if you have a long document you don’t want to read, take a screenshot of the document and upload it to ChatGPT. Then, click on the microphone icon inside the text box and instruct ChatGPT to convert the screenshot into text. Remember, it cannot read directly from the screenshot; you need to write prompt or give voice instruction by clicking the microphone to convert the attachment to text.Give simple prompt (transcribe the text)

Once the text is converted, click on the headphone icon and ask ChatGPT to read the document details for you. This way, ChatGPT will read the content aloud, which is helpful if you’re not in the mood to read or if you want to avoid straining your eyes.

These features make it easier to interact with ChatGPT, whether you want to dictate prompts or have text read aloud to you. However, please note that these options are available only in the paid version.

You can also instruct ChatGPT to create and edit images. This is particularly useful for generating custom illustrations or modifying existing images according to your specifications.

ChatGPT web search

ChatGPT web search is a recent feature introduced to provide real-time, web-based responses. It allows users to search the web directly from within the ChatGPT interface, offering up-to-date information on current events, trends, or specific queries beyond the knowledge cutoff.

Key Points About ChatGPT Web Search:

  1. Availability:
    • This feature is currently available in the paid version (ChatGPT Plus), which uses GPT-4.
    • It’s accessible on both mobile and desktop versions of the ChatGPT.
  2. How It Works:
    • When users see a web search icon next to the attachment icon, they can input queries and ChatGPT will search the web to provide real-time answers.
  1. It’s particularly useful for checking current news, finding niche information, or exploring updated content that isn’t part of the existing knowledge base.
  2. Benefits:
    • This feature enables ChatGPT to provide the most current and accurate information, making it more relevant for users needing live data, trends, or breaking news.
    • It’s ideal for researching topics like market trends, tech advancements, or global events that are constantly evolving.

Incorporating web search functionality increases the value of the tool, especially for businesses, content creators, and researchers who need accurate, up-to-date information. If you’re using the free version, upgrading to ChatGPT Plus unlocks this feature along with faster response times and the use of GPT-4.

How ChatGPT Web Search Provides More Detailed and Accurate Responses

When you use ChatGPT web search, the responses are more detailed and accurate compared to typical search engine snapshots. Here’s how it works:

Detailed Results: Instead of just providing a quick snippet like Google often does, ChatGPT web search gives you more in-depth responses. It summarizes the key information from relevant sources, often including a thorough explanation, so you don’t have to click through multiple links to gather the details.

Cited Sources: ChatGPT includes website links or citations to the sources it used for the search. This helps you verify the information and explore more if needed. So, you’re not just relying on a short snippet—you can dig deeper into the topic by following the provided links.

Longer, More Accurate Responses: The answers are typically longer and more comprehensive because the AI analyzes multiple sources, interprets the information, and delivers it in a coherent and contextual manner. This means you get a more complete and accurate answer in one go.

Better Context: Since ChatGPT uses advanced AI, the results often have better context and relevance to your query compared to traditional search engines, which just match keywords. This makes it more useful for research, complex queries, or niche topics.

Example:

  • Google Search Result: You might see a short summary followed by website links that you have to click and explore yourself.
  • ChatGPT Web Search Result: You get a more detailed summary of the information you need, along with relevant links if you want to explore further. The answer is crafted in a way that already addresses your query in depth.

Chk the below video

This makes ChatGPT’s web search particularly valuable for people looking for more than just surface-level information or those who want their queries answered in one comprehensive response.

Logo Prompts

MidJourney Prompt to Create Bakery Logo

Gallery of Caps

Camera Angles

Midjourney Camera Angles

Creating photorealistic images in Midjourney is now easier than ever. Here’s how you can achieve stunning results:

1. Give the right prompt:

Ensure your initial description is clear and detailed.

2. Add the right tokens

Lighting: Specify the type of lighting you want (e.g., natural light, studio lighting, etc.).

Camera Angles and Shots : Camera Shots: Choose the appropriate shot type (e.g., long shot, close up shot), (Low Angle. High Angle, etc)

Film Types: Mention any specific film styles or effects you prefer (e.g., black and white, vintage).

These images can be perfect for:

  • Social Media: Enhance your posts with high-quality visuals.
  • Blog Posts: Make your articles more engaging and visually appealing.
  • Projects: Use these images to add a professional touch to your creative work

Types of Camera Angles

  • Bird’s Eye View
  • Eye Level
  • High Angle Level
  • Top Down View
  • Low Angle Level
  • Oblique Angle Level
  • Over the Shoulder Level
  • Point of View
  • Reverse Angle Shot

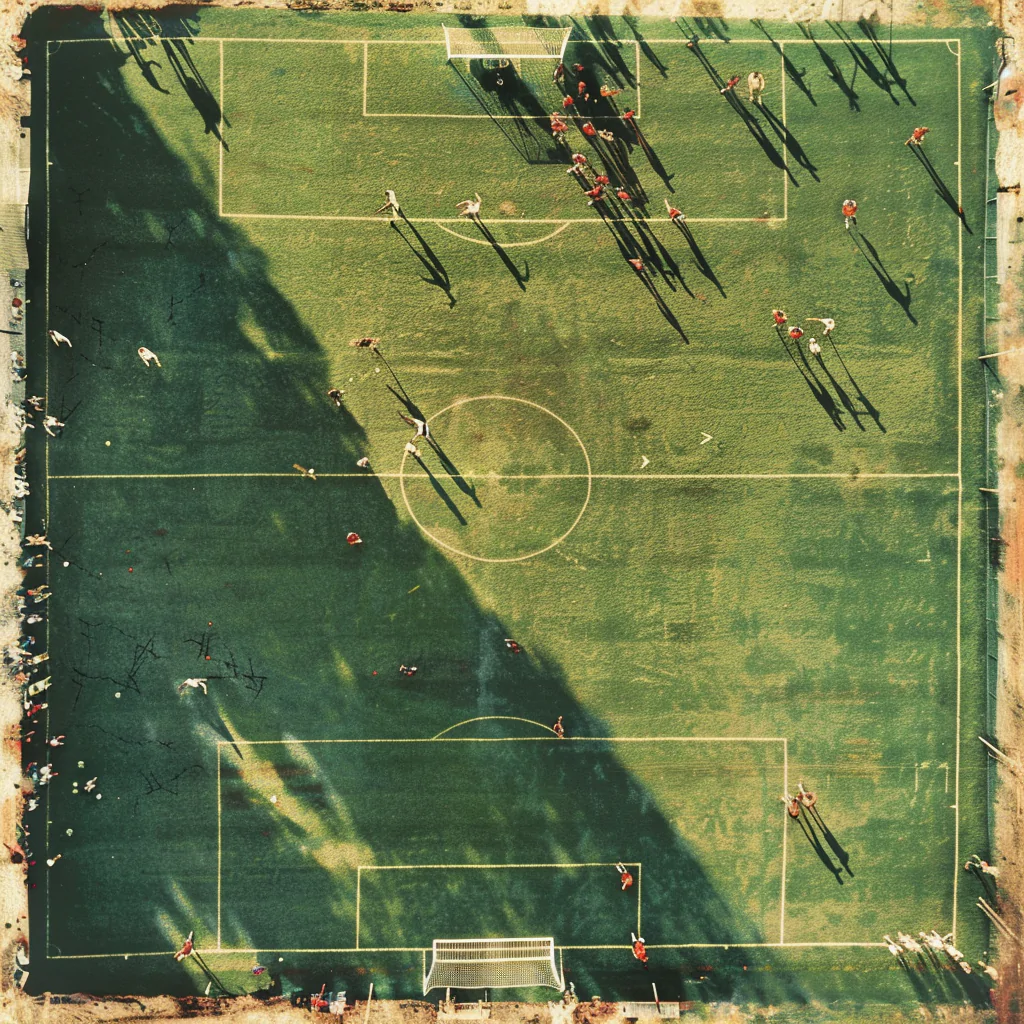
Bird’s Eye View

A high-angle shot captured directly from above and from a distance.

Prompt:bird’s eye view, soccer game in progress, with players in action, the markings of the field, and the audience in the stands, Diana F+

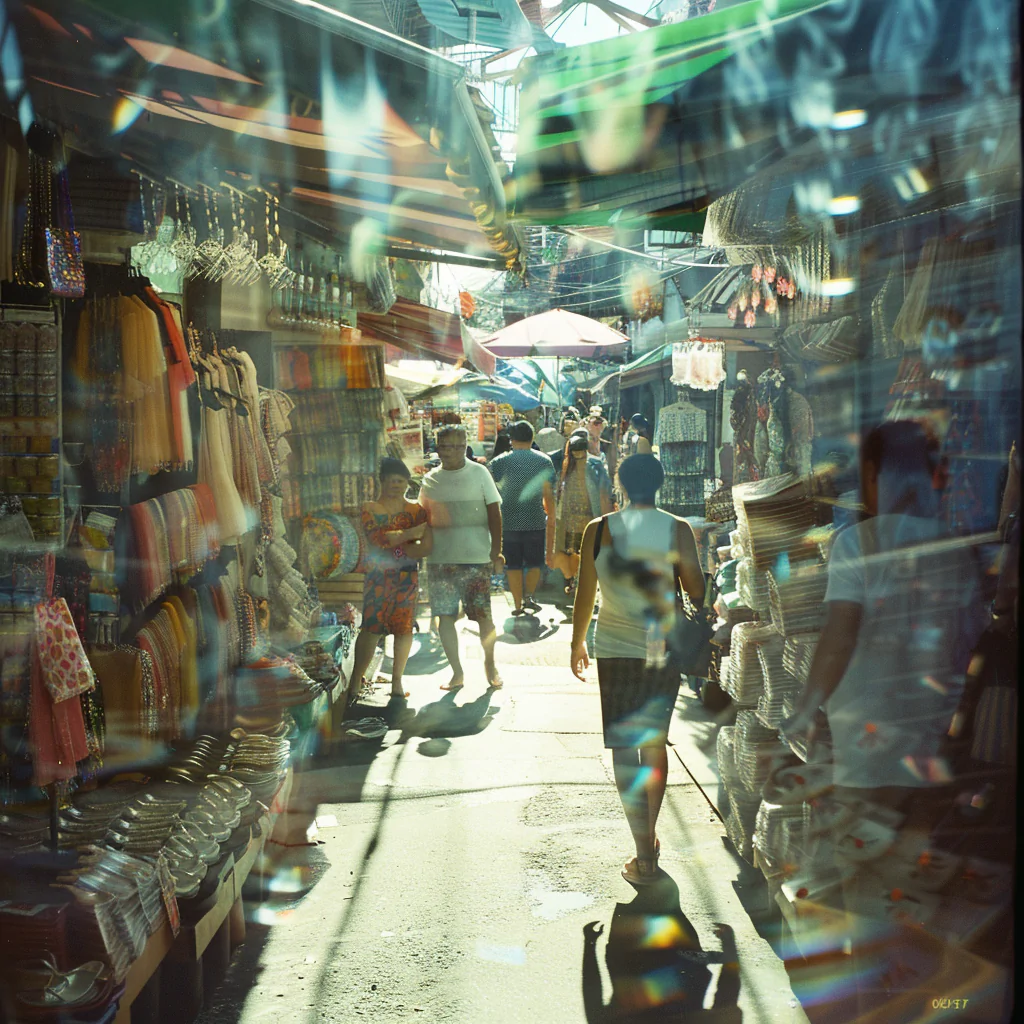
Eye Level

A shot taken with the camera at roughly human eye level, producing a neutral effect on the audience

Prompt:image of a bustling activity of a street market with vendors selling clothes , sandals, eye level angle, Diana F+

.

Top down View

The camera is positioned directly above the subject, pointing straight down at a 90-degree angle.There is no tilt, creating a flat and symmetrical appearance.

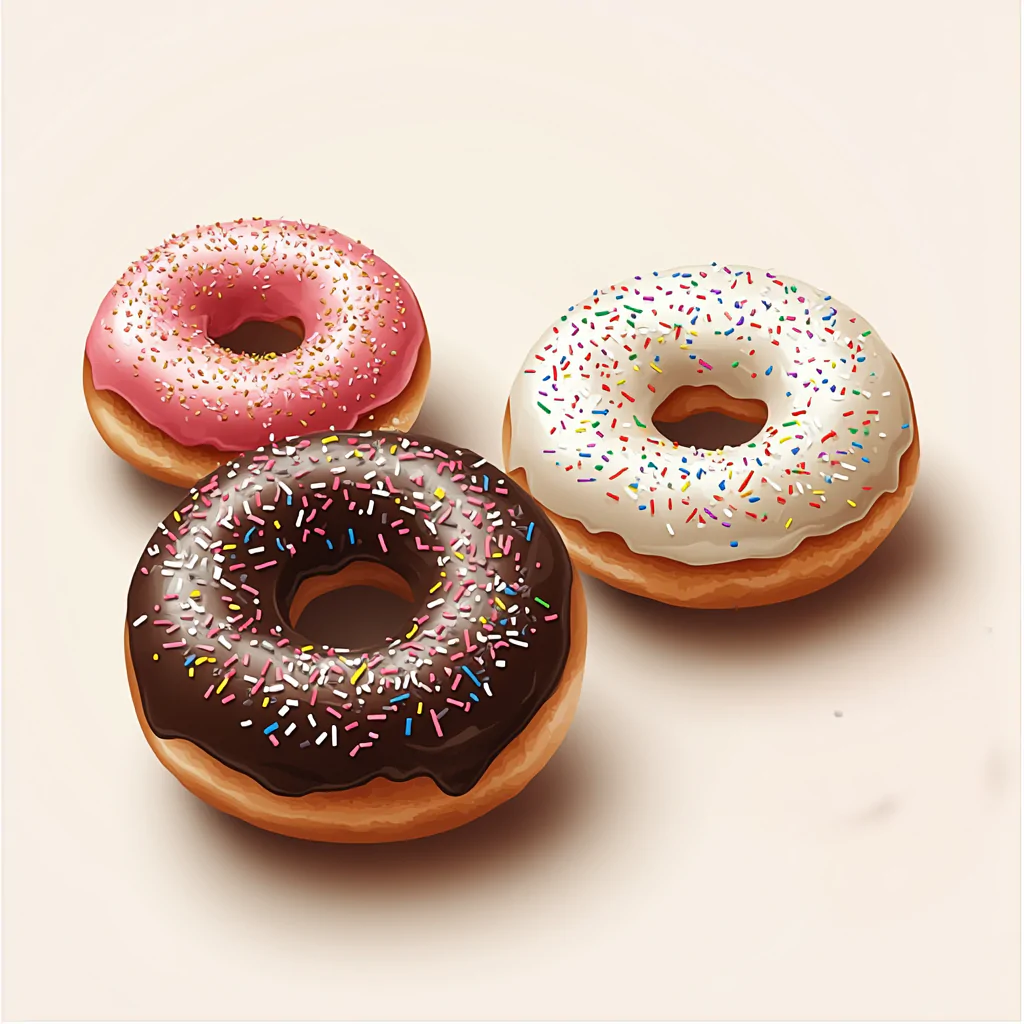
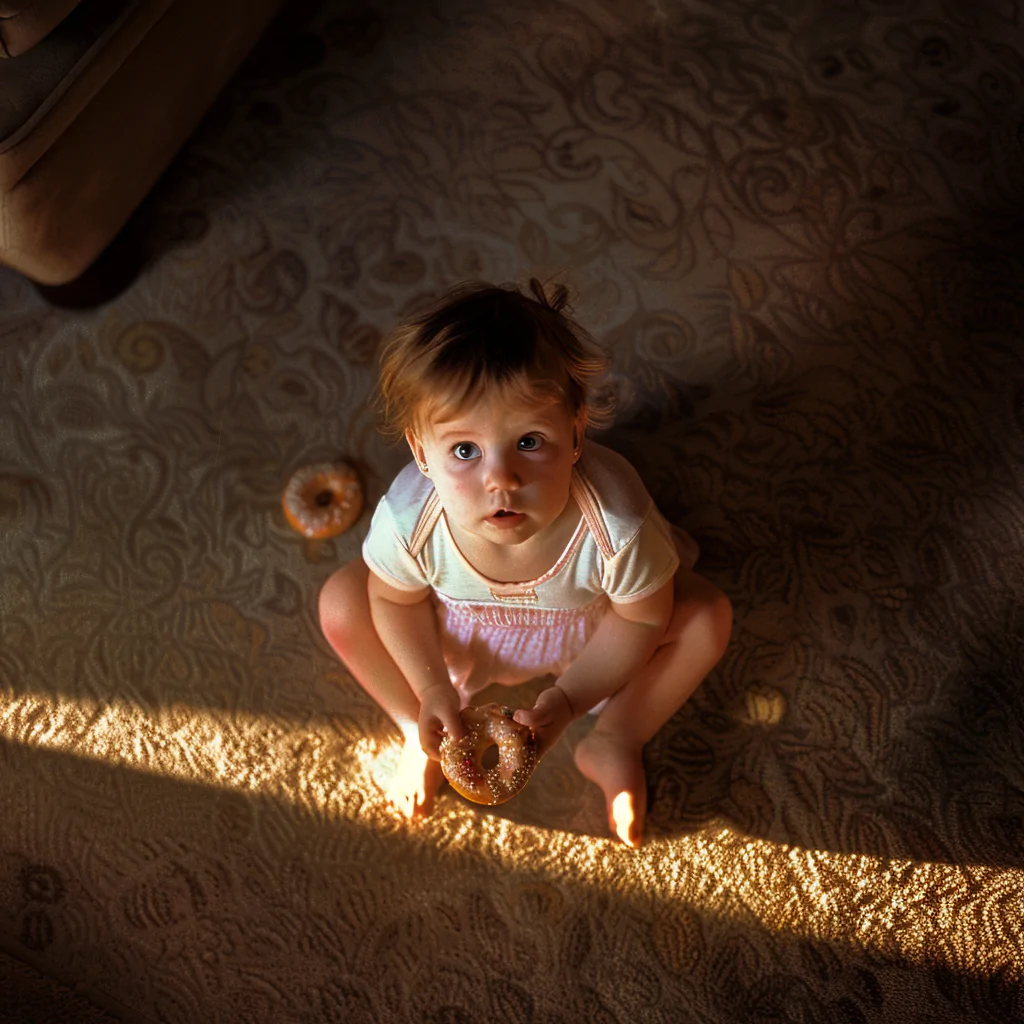
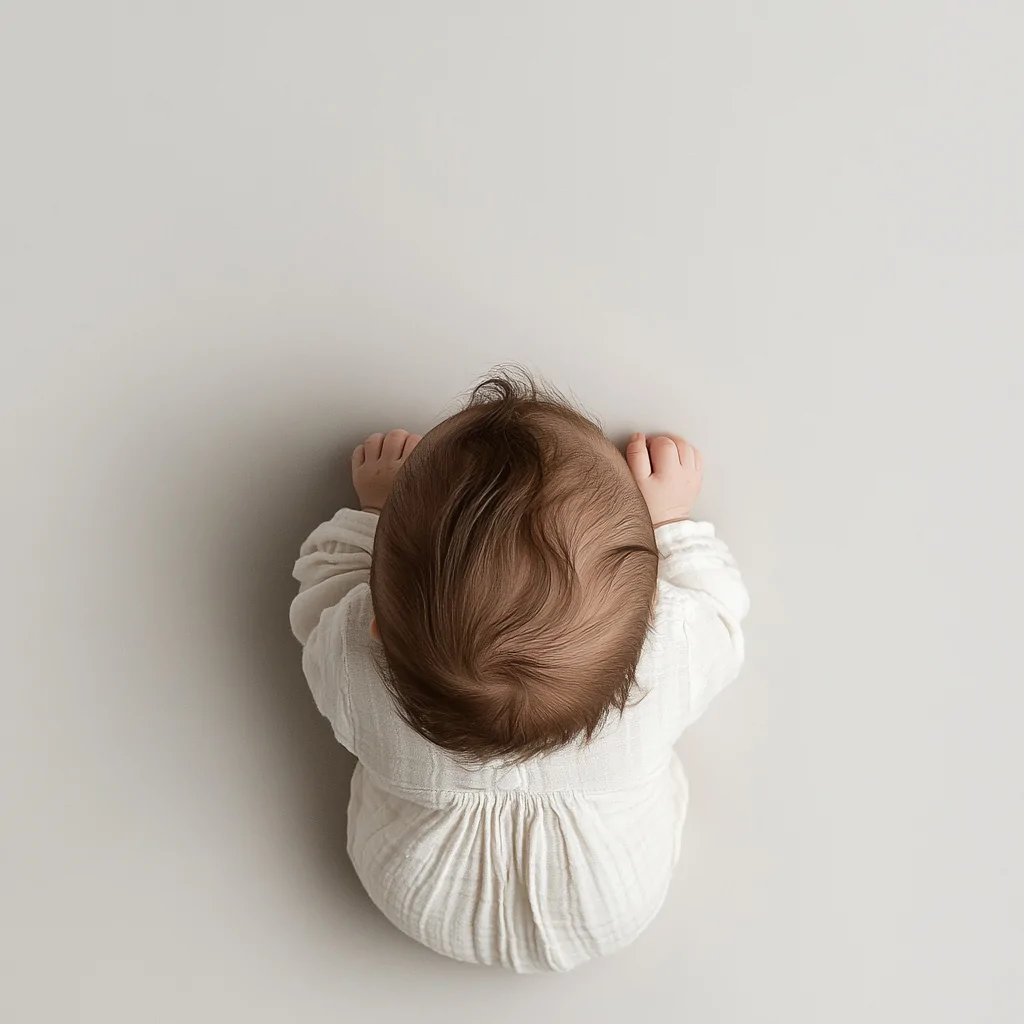
Prompt: Image plz top-down shot, Baby girl wearing a simple onesize, sitting cross-legged on the floor, holding a donut
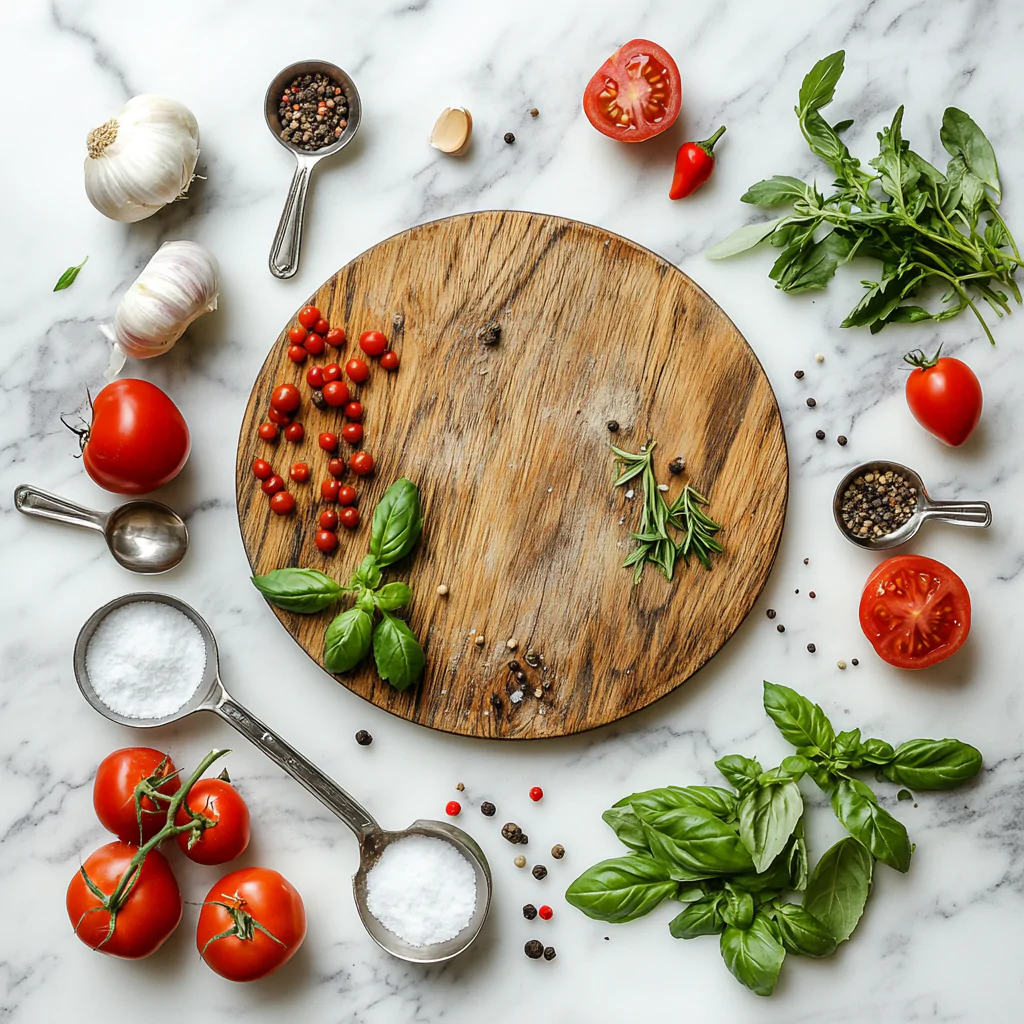
Prompt:Top view , cooking ingredients on marble surface, fresh vegetables, herbs, chopping board, measuring spoons arranged in circular pattern, soft natural light, culinary photography style
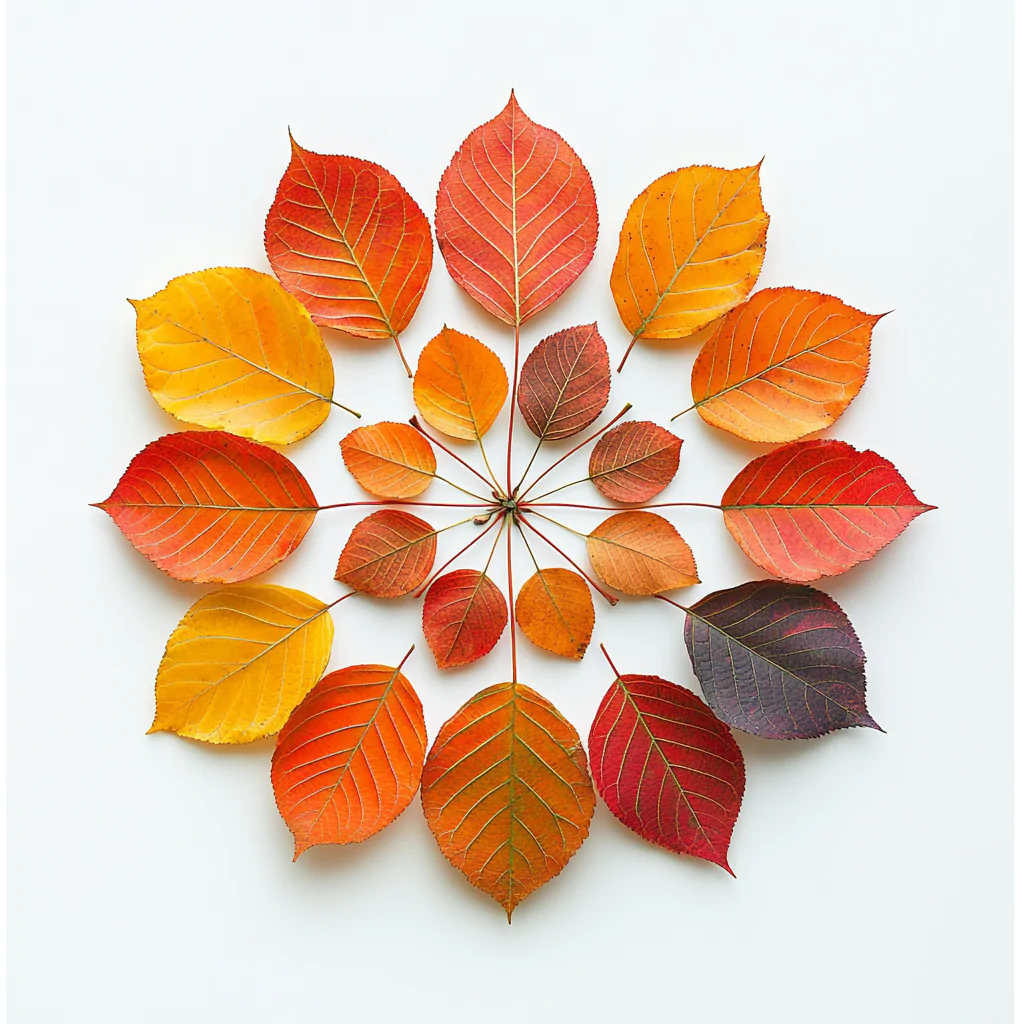
Prompt :Top view shot, autumn leaves arranged in perfect mandala pattern on white background, symmetrical composition, even lighting, no shadows, botanical photography style

Read More

Best for showcasing arrangements or layouts, such as food flat lays, maps, or interior designs.

High Angle Level

The camera is placed above the subject, looking down.

It looks diagonally downward, giving more context to the surroundings.

Allows for more storytelling, as it includes some background or context.

Prompt :Create an image of a baby girl sitting on the floor ,looking up, eating donuts, image taken form top, high angle shot. Diana F+.

This makes the subject appear smaller, often giving an impression of vulnerability, weakness, or fear.

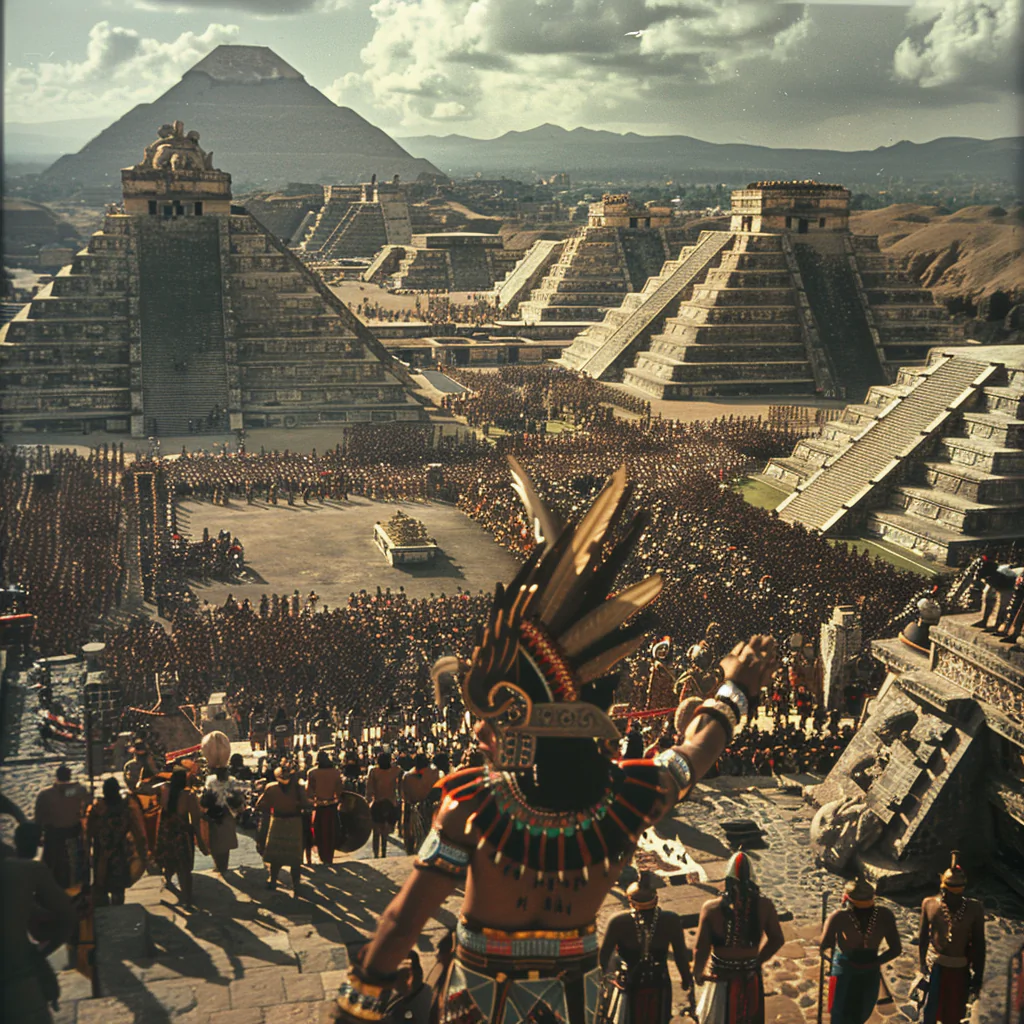
Prompt :A majestic ancient city with towering pyramids and grand structures, bustling with a large crowd of people gathered in the main square. In the foreground, a figure dressed in elaborate traditional attire, including a headdress and ceremonial bands, stands with arms raised, addressing the crowd, image taken form top, high angle shot. Diana F+ .

Low Angle Level

The camera is set below the subject, looking upwards.

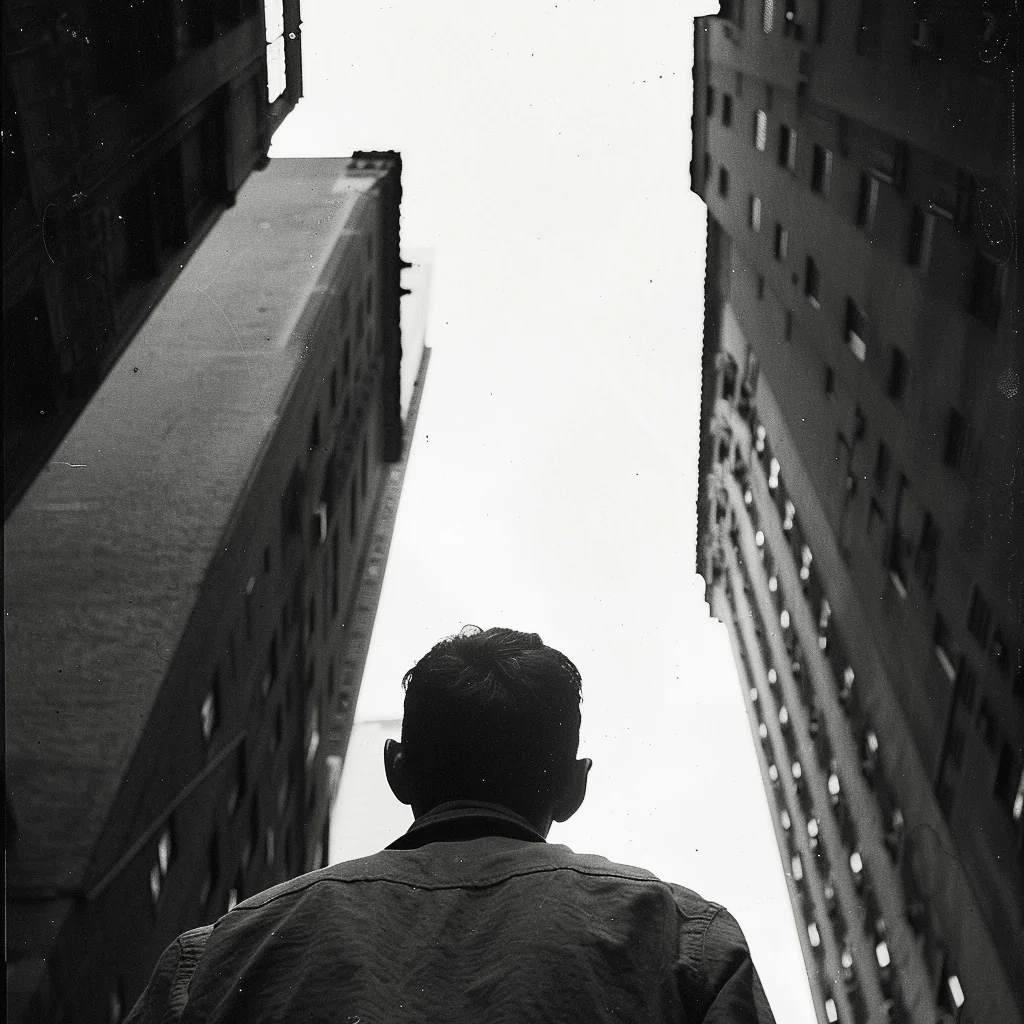
Prompt: Back profile, create an image iif man standing between the sckscrappers, low angle level taken form below, Diana F+

Oblique Angle Level

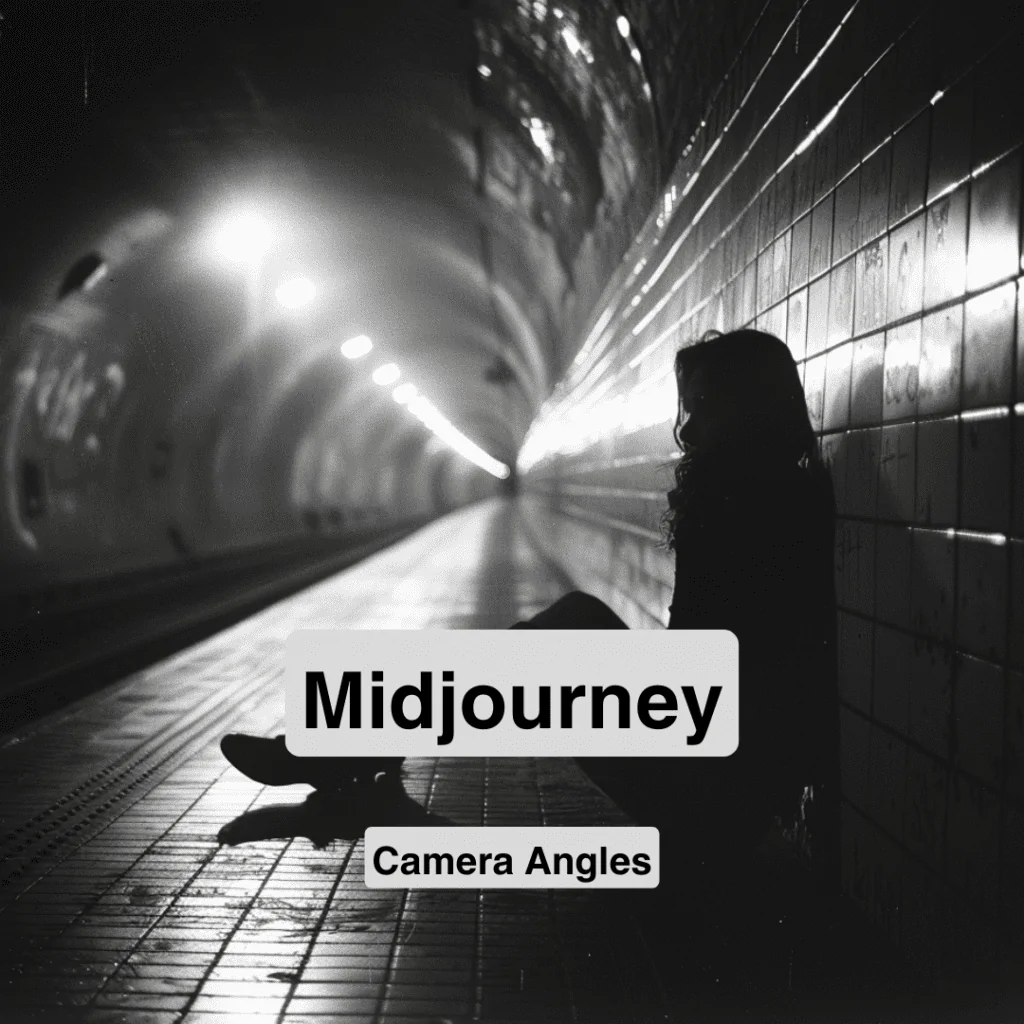
Shot in which the camera is set at an angle on its roll axis so that the horizon line is not level.

Prompt: Oblique angle, Camera tilted at a 20-degree angle, photograph of a lone woman sitting in a dimly lit urban tunnel. Camera tilted at a 20-degree angle, creating a dramatically skewed horizon line, Diana F+

Over the Shoulder Level

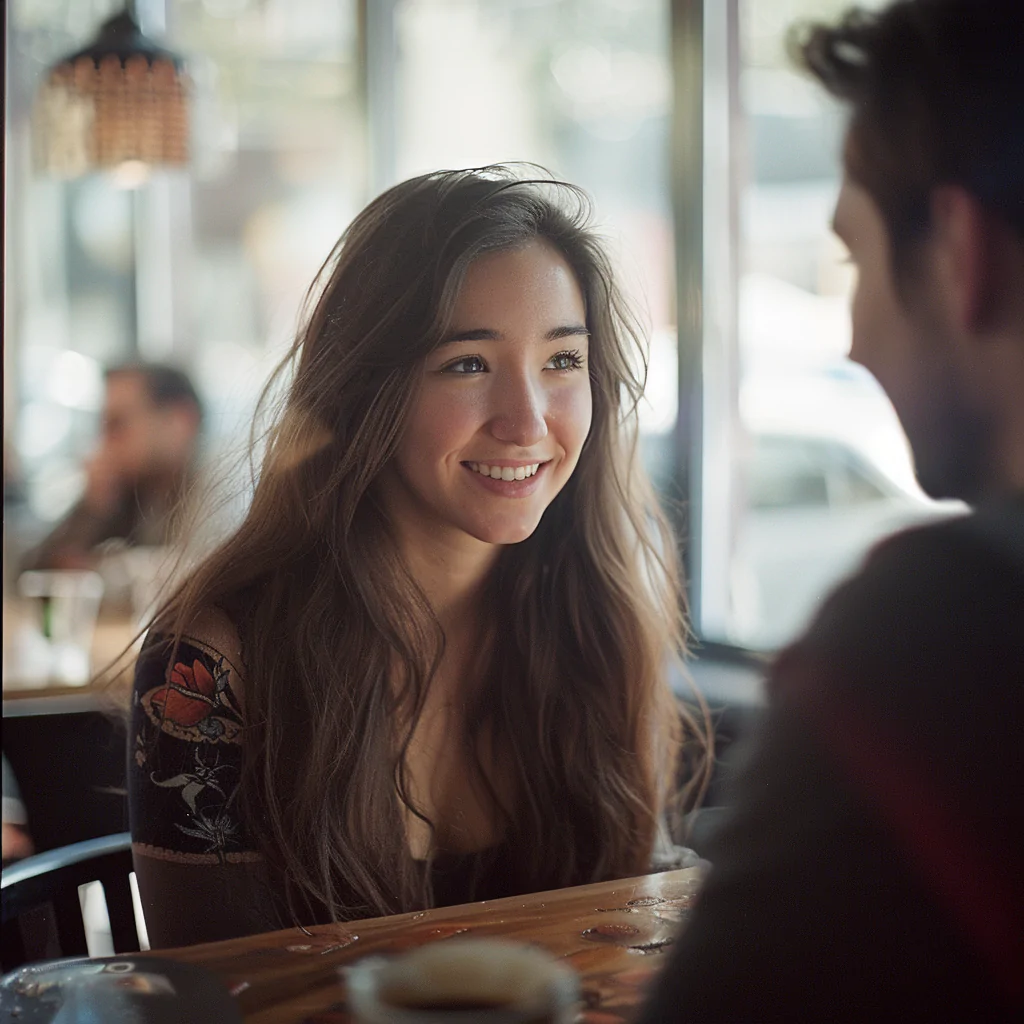
A shot where the subject is filmed from behind another person’s shoulder, framing the subject in either a medium or close-up view.

Prompt: over the shoulder shot, a young woman with long brown hair sitting at a table, smiling, She is engaged in a friendly conversation with a man sitting across from her, background includes a blurred view of windows and natural light, creating a cozy and inviting atmosphere, Diana F+

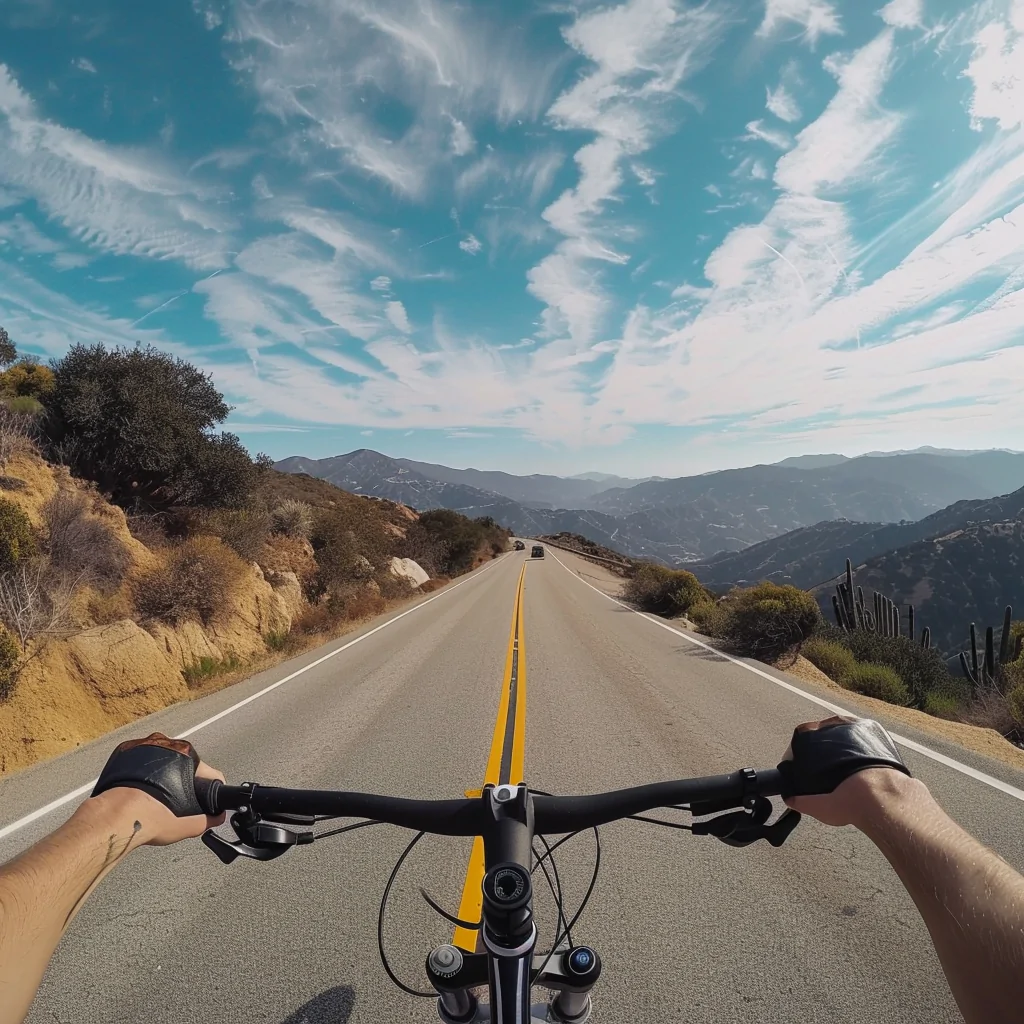
Point of View

A shot that shows what a character in a scene is seeing from their point of view.

Prompt: A shot that shows what a character in a scene is seeing from their point of view.

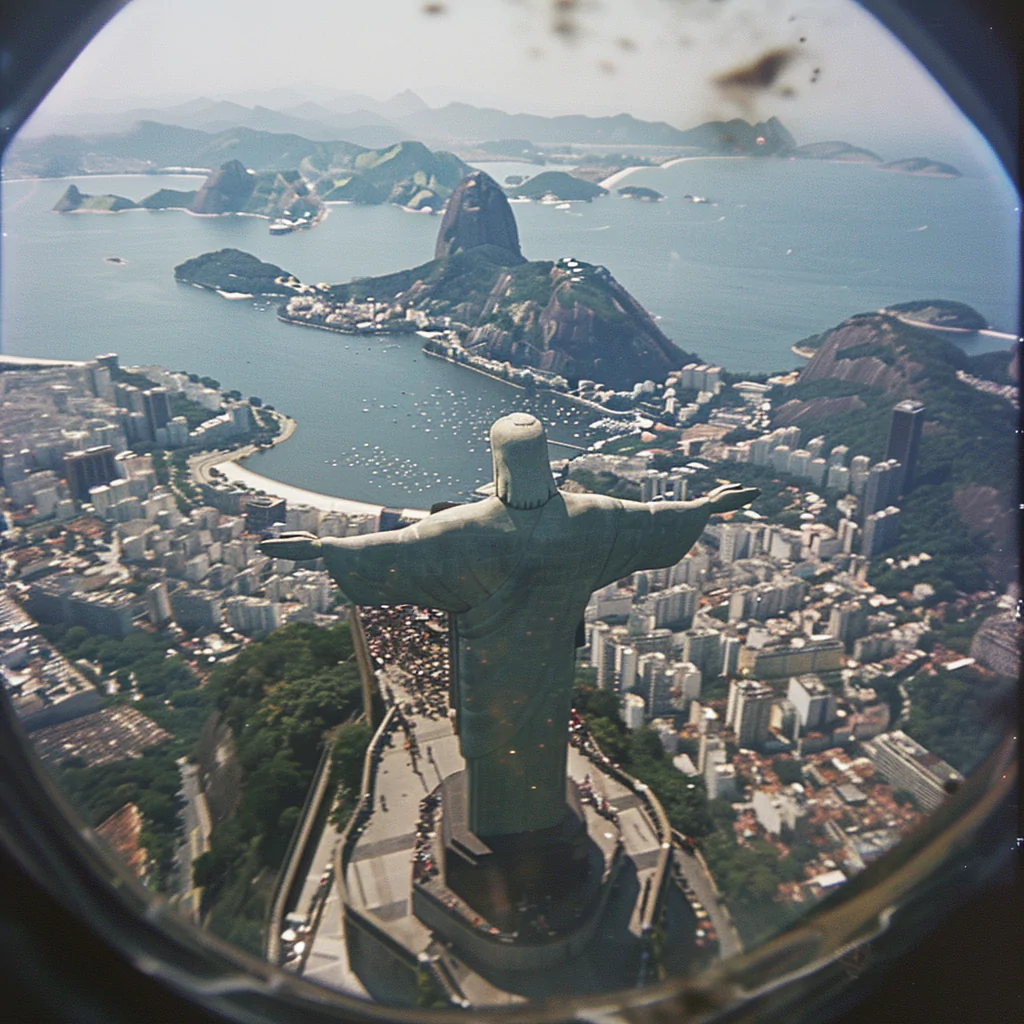
Reverse Angle Shot

A shot taken from an angle roughly 180 degrees opposite of the previous shot.

Prompt: Reverse angle shot , Christ the Redeemer statue , kodal potra 800

Observations: Top-Down View vs. High-Angle View in Image Creation

Let’s explore an interesting observation while experimenting with creating top-down shots and high-angle views using AI tools like MidJourney and ChatGPT.

In Image 1, which was created using ChatGPT, the result aligns perfectly with a top-down shot, as the camera is positioned directly overhead, capturing the baby’s crown and surroundings from a true 90-degree angle. This is an accurate representation of the prompt provided.

However, when the same prompt was given to MidJourney, as seen in Image 2 (right side screenshots), the outputs were not top-down shots but more aligned with high-angle views, where the camera is angled slightly above the subject, creating a perspective where the baby appears to be looking up. This is a limitation of MidJourney, which often struggles to interpret the concept of a top-down view in such contexts.
Interestingly, by tweaking the phrasing of the prompt, as shown in Image 3, using specific terms like “Pure vertical overhead shot, camera perpendicular to the floor”, MidJourney was able to produce a proper overhead shot. This demonstrates that slight changes in the phrasing of your prompt can significantly influence the output.

Key Takeaway:

Image 1
Image 2
Image 3
Prompt :Pure vertical overhead shot, camera perpendicular to the floor, showing only crown of baby’s head,wearing one size :

Click here for the prompt structure to start crafting your perfect prompt!

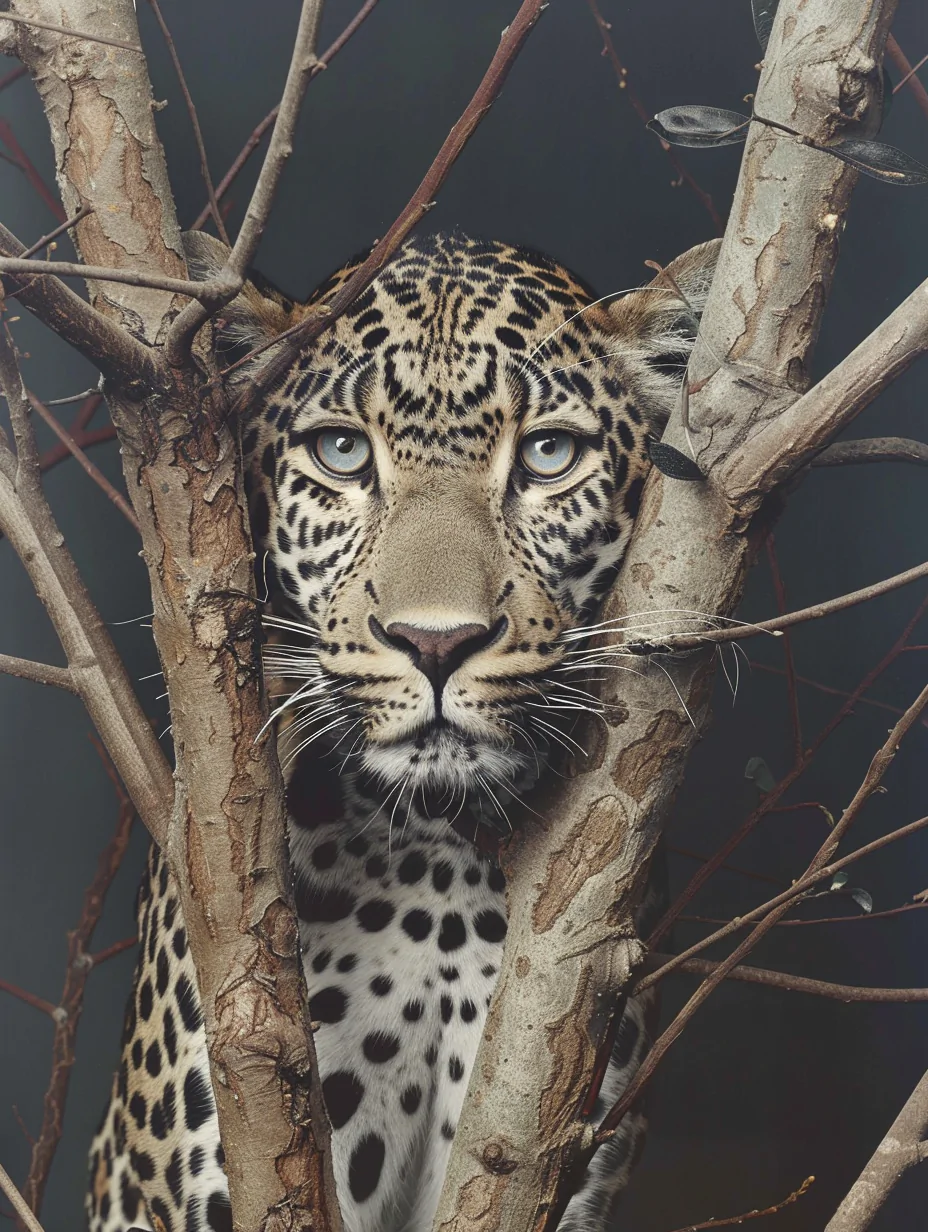
Close up of Leopard

MidJourney Prompt for creating close up of Leopard

Gallery of Caps

Camera Shots

Midjourney Camera Shots

Creating photorealistic images in Midjourney is now easier than ever. Here’s how you can achieve stunning results:

1. Give the right prompt:

Ensure your initial description is clear and detailed.

2. Add the right tokens

Lighting: Specify the type of lighting you want (e.g., natural light, studio lighting, etc.).

Camera Shots: Camera Shots: Choose the appropriate shot type (e.g., long shot, close up shot)

Film Types: Mention any specific film styles or effects you prefer (e.g., black and white, vintage).

These images can be perfect for:

  • Social Media: Enhance your posts with high-quality visuals.
  • Blog Posts: Make your articles more engaging and visually appealing.
  • Projects: Use these images to add a professional touch to your creative work.

Types of Camera Shots

  • Extreme Long Shot
  • Long Shot
  • Medium Shot
  • Close-up shot:
  • Extreme close-up shot

Exreme Long Shot

An extreme long shot shows a large area from a very far distance. It helps the viewer see the entire setting or scene clearly.

Prompt: Create an extreme long shot of a grand historical scene featuring Alexander the Great leading his army across a vast desert landscape.

PROMPT:extreme long shot, image of a narrow body of water, vibrant blue hue, tall basalt columns on both sides, rock is rough and layered with deep grooves and cracks, , Fujifilm Velvia 50, –ar 3:4
PROMPT: Extremely long shot, narrow fjord, azure water, blue sky, weathered basalt columns, varied heights, natural cracks, sparse vegetation, soft shadows, subtle mist, Fujifilm Velvia 50, sharp details

Conclusion : Both prompts use the same type of shot—an extreme long shot—but the images turned out differently because of how much of the environment was described.

In Prompt 1, there’s no mention of the sky, so the image feels more focused on the water and rocks. In Prompt 2, by adding the sky and atmosphere, the image feels much larger and more cinematic.

By adding the sky and atmosphere, the image feels much larger and more cinematic.

If you want a cinematic look:
To create a more cinematic feel in your MidJourney images, make sure to include details about the sky or other elements like shadows or mist. These small touches make a huge difference in how the image feels and what it communicates.

By understanding how different prompt details affect the final result, you can better control the type of images you create—whether you want something close-up and intense or wide and cinematic.

Long Shot

Shows the subject from top to bottom,shows the entire area where the action takes place. The whole subject is in frame.

Prompt: Create an image of a baby girl standing in a serene park, long shot image , Kodak Portra 400 –ar 3:4
Prompt: A long shot of a fierce female warrior in a tactical combat suit, similar to the character Black Widow, with red curly hair, crouched in a dynamic, ready-for-action pose in a modern, industrial hallway. Image created in Chatgpt

Sometimes, a long-shot prompt doesn’t work. Imagine you want to create an image of a couple walking; in that case, you use the below prompt for the same.

If you use the action word walking, MidJourney understands it better to show a full-body shot and a slightly faraway image, which will include the road and surroundings.

Medium Shot

A camera shot which shows approximately

Prompt::side profile, medium shot of a teenage girl in a vibrant garden, her long, wavy hair cascading down her shoulders , kodak Potra 400 –ar 3:4
Prompt::medium shot, lady singing on stage, holding a microphone, eyes closed, dressed in an elegant evening gown, stage lights cast a warm golden shadow on her face, background dimly lit spotlights creating dramatic shadows , kodak Potra 400 –ar 3:4

PROMPT: A medium shot of a couple cooking together in a cozy kitchen. They are both smiling as they prepare a meal, with the woman stirring a pot and the man chopping vegetables. They are dressed casually, with warm lighting creating a comfortable and intimate atmosphere. The scene captures their teamwork and happiness,kodak Potra 400 –ar 3:4

.

Close Up Shot

A camera shot where a small object or a face completely fills the screen.Framed this tightly, the emotions and reactions of a character dominate the scene.

Prompt:close up of a 30 year old man. talking over the phone, Kodak Potra 400
Prompt:close up of a 30 year old man. talking over the phone, Kodak Potra 400, –ar 4:3

Extreme Close Up Shot

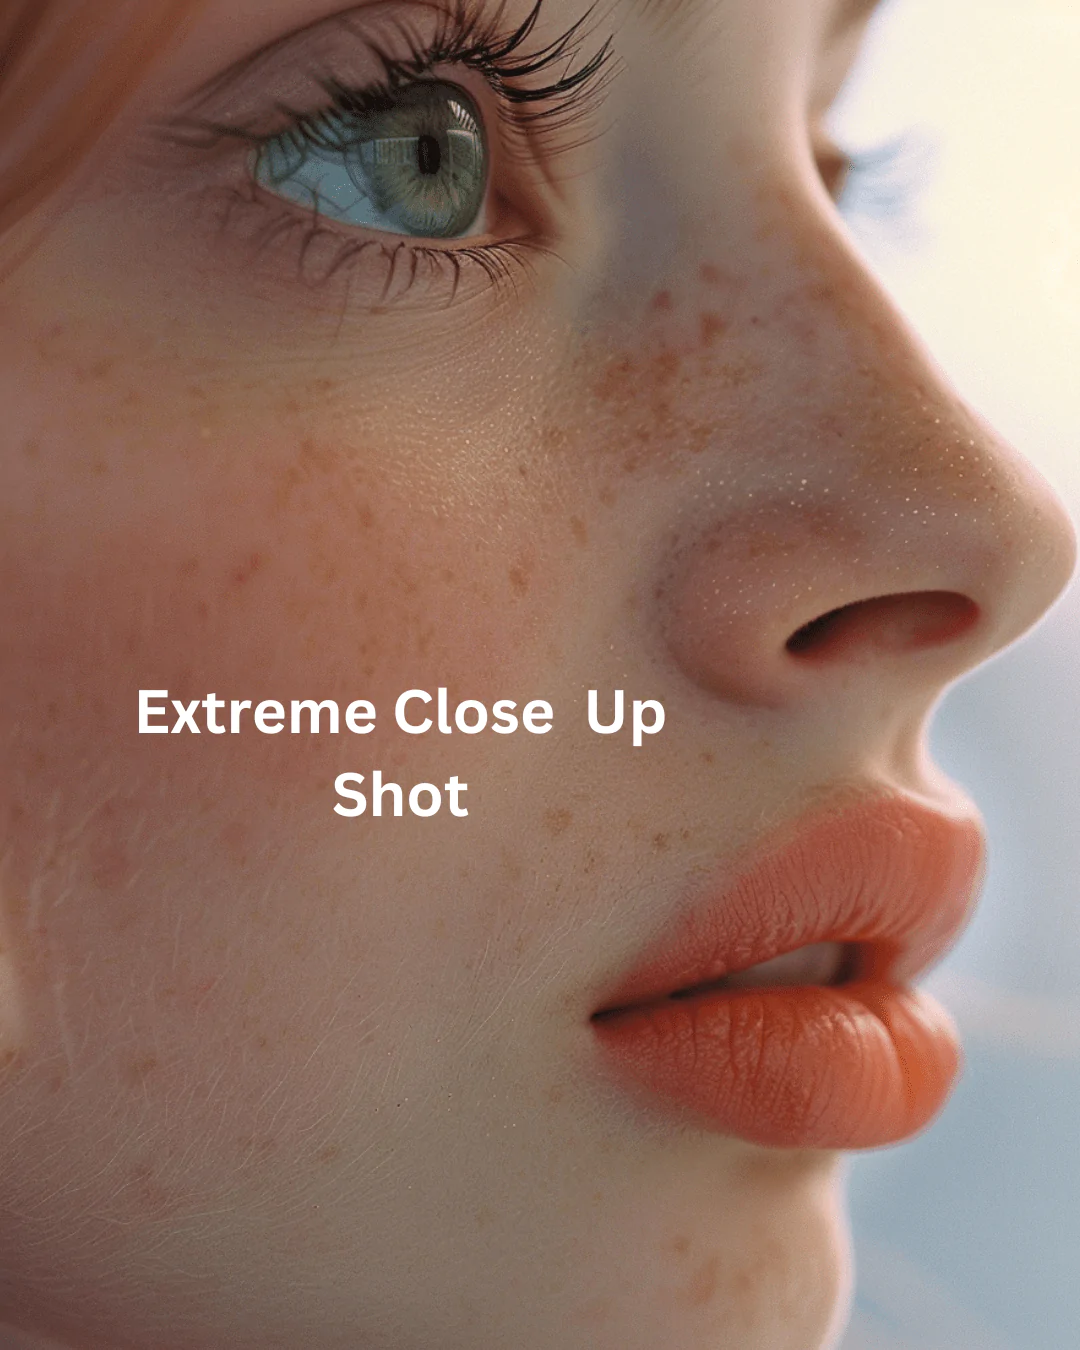
An extreme close-up shot captures a small detail of the subject, like part of a face, hand, or foot

Prompt :side profile, extreme close-up shot of a lady’s face, focusing on her striking green eyes and pink lipstick. The shot captures the fine details of her eyes and lips, highlighting the vibrant colors and textures, Kodak Portra 160 , –ar 3:4
Prompt:extreme close-up shot, “Miss You ” written in cursive writing on a white sheet of plain paper –no pen –ar 3:4
Prompt:extreme close up shot, front profile, white round alarm clock –ar 3:4

Midjourney Prompt Structure

When you’re writing a prompt in MidJourney, it helps to start with the type of shot you want, then add the profile (like side, front, or three-quarter view). MidJourney puts more emphasis on the words at the beginning, so starting with these details makes a big difference in how the image turns out.

Here’s how you can structure your prompt

  1. Start with the type of shot (e.g., close-up, wide shot, portrait).
  2. Mention the profile or angle (e.g., side profile, three-quarter view, front view).
  3. Add any specific details or descriptions: (e.g., lighting, setting, style).
  4. Include any additional details: like colors or artistic effects toward the end.

Example

1.Prompt: Close-up portrait, dramatic lighting, soft pastel background, intricate details on the face, hyper-realistic, Kodak Portra 160

As you can see, this prompt focuses on a close-up shot of a lady’s face. In close-ups, details like the neck are not visible, as the frame zooms in on the face for greater detail.

1.Prompt: Close-up portrait, three quarter profile portrait of a woman, dramatic lighting, soft pastel background, intricate details on the face, hyper-realistic, Kodak Portra 160

Notice that “close-up” comes first, followed by “three-quarter profile.” MidJourney gives more weight to the close-up part and thus captures most of the face while showing only a small portion of the neck.

2.Prompt: three quarter profile portrait of a woman, Close-up shot, , dramatic lighting, soft pastel background, intricate details on the face, hyper-realistic, Kodak Portra 160

In this case, “three-quarter profile” is placed before “close-up shot,” so MidJourney prioritizes the profile, but still shows a close-up view of the subject. The result is a balance between the two elements, giving more prominence to the profile while keeping the close-up feel.

3. Prompt :three quarter profile portrait of a woman, dramatic lighting, soft pastel background, intricate details on the face, hyper-realistic, Kodak Portra 160

Here, only the “three-quarter profile” is mentioned, and it’s accurately reflected in the image. The neck and shoulders are visible, typical of a true three-quarter shot, providing more depth and dimension.

Chk the next prompt

4. Prompt:three quarter profile portrait of a woman, dramatic lighting, soft pastel background, intricate details on the face, wearing a gold chain in neck, Kodak Portra 160 , –ar 3:4

This prompt adds extra details, like the lady wearing a gold chain. By mentioning something specific like that, MidJourney focuses on a wider view to show the chain, resulting in a more complete three-quarter profile shot.

Conclusion:

Want to create prompts like these and get stunning, spot-on images?

Click here for the prompt structure to start crafting your perfect prompt!

Remember, how you structure your prompt in MidJourney really impacts the final result. By putting key details, like the type of shot or profile, at the beginning, you help MidJourney focus on what matters most.

MidJourney doesn’t always give an exact match—it generates four images, and sometimes only one or two will align with your vision. Be patient, keep practicing, and enjoy the creative process!

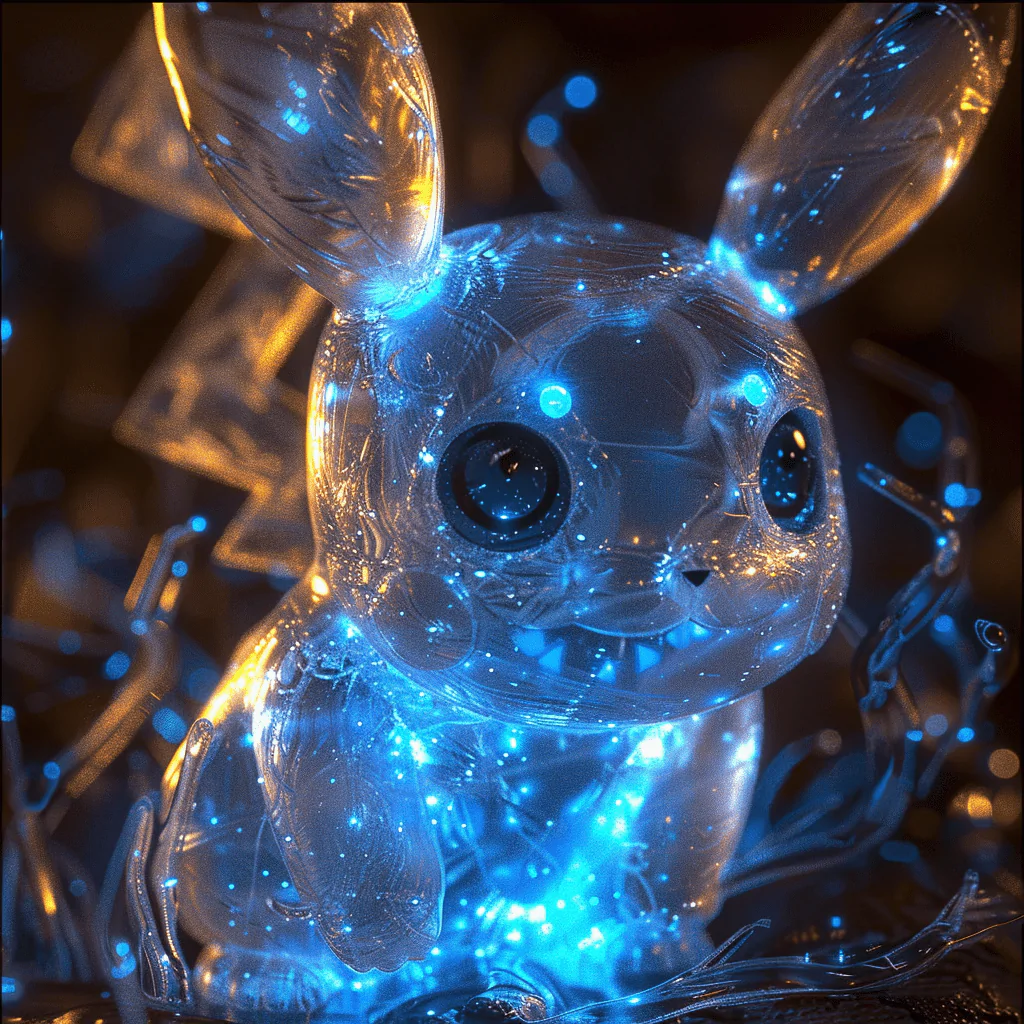
Bioluminescent

MidJourney Prompt for Bioluminescent Images

Gallery of Caps

Lighting

Lighting Prompts for Midjourney

Creating realistic images with AI, especially in MidJourney, can be a fun and rewarding experience. However, one of the key elements to achieving lifelike results is understanding and applying the right type of lighting direction in your prompts. Even if you’re a beginner in AI and not a photographer, this guide will help you grasp the basics of lighting direction and how it can enhance your images.

  • Sets the Mood: The direction of lighting can dramatically change the mood of your image. For example, soft, diffused lighting can create a calm and serene atmosphere, while harsh, direct lighting can make an image look dramatic and intense.
  • Adds Depth and Dimension: Proper lighting direction helps to add depth and dimension to your images, making them look more three-dimensional and realistic.
  • Highlights Features: It emphasizes important features of your subject, such as facial expressions in portraits or textures in landscapes.

When you’re working with MidJourney to create realistic images, getting the lighting right can make a huge difference. Lighting sets the mood, adds depth, and highlights important features. To help you out, I’ve put together a list of different types of lighting that you can use in various situations. Each type has its own unique effect and can really bring your images to life. Check out the list below to see how you can use these lighting techniques to enhance your projects.

PROMPT STRUCTURE

Click here to explore the Prompt Structure guide!

Prompt structure: Portrait (description),Type of Light, Background Description,Camera Type

Below I have given the Prompt Structure for first Prompt for better understanding.

Portrait (description):

  • A side profile portrait of a lady with a serene expression. The sunlight and soft shadows enhance the subtle textures of her skin, emphasizing calmness and tranquility.

Type of Light:

  • Afternoon sunlight, which is warm and soft, casting gentle shadows. The light emphasizes the contours of her face while creating a soft, natural glow around her.

Shot Type:

  • Side profile shot. This framing focuses on the lady’s facial features and expression, highlighting the effect of the light and shadows on her skin.

Background Description:

  • The background is softly lit, suggesting a subtle, unobtrusive ambiance. The focus remains on the lady, with the lighting ensuring that the background does not distract from her but complements the overall warmth of the scene.

Camera Type:

  • Kodak Portra film (implied). This is a film known for its fine grain, soft color tones, and natural skin tones, giving the portrait a warm, cinematic quality

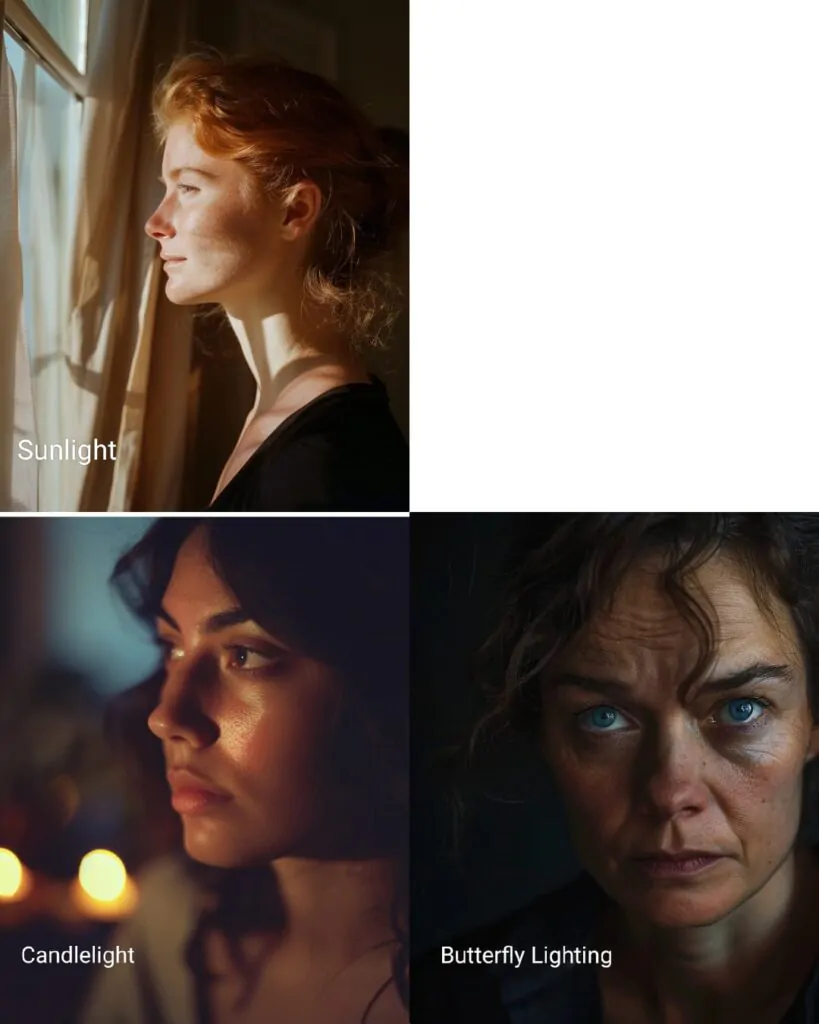
1.SUNLIGHT– side profile portrait of a lady standing in front of a french window, afternoon sunlight falling on her, soft shadows , highlighting her serene expression and the subtle textures of her skin, The background is softly lit, ensuring the focus remains on the lady and the warm glow around her, Kodak Portra 800 –v 6.0

2.CANDLELIGHT -Portrait of a lady illuminated by soft warm candlelight,highlighting her serene expression and the subtle textures of her skin, background is dim and indistinct, ensuring the focus remains on the lady and the warm glow around her, Kodak Portra 800 film type

3.BUTTERFLY -create a portrait of 40 year old women, butterfly lighting, looking in the camera, worried look.

Natural Time of the Day
Bioluminescent images

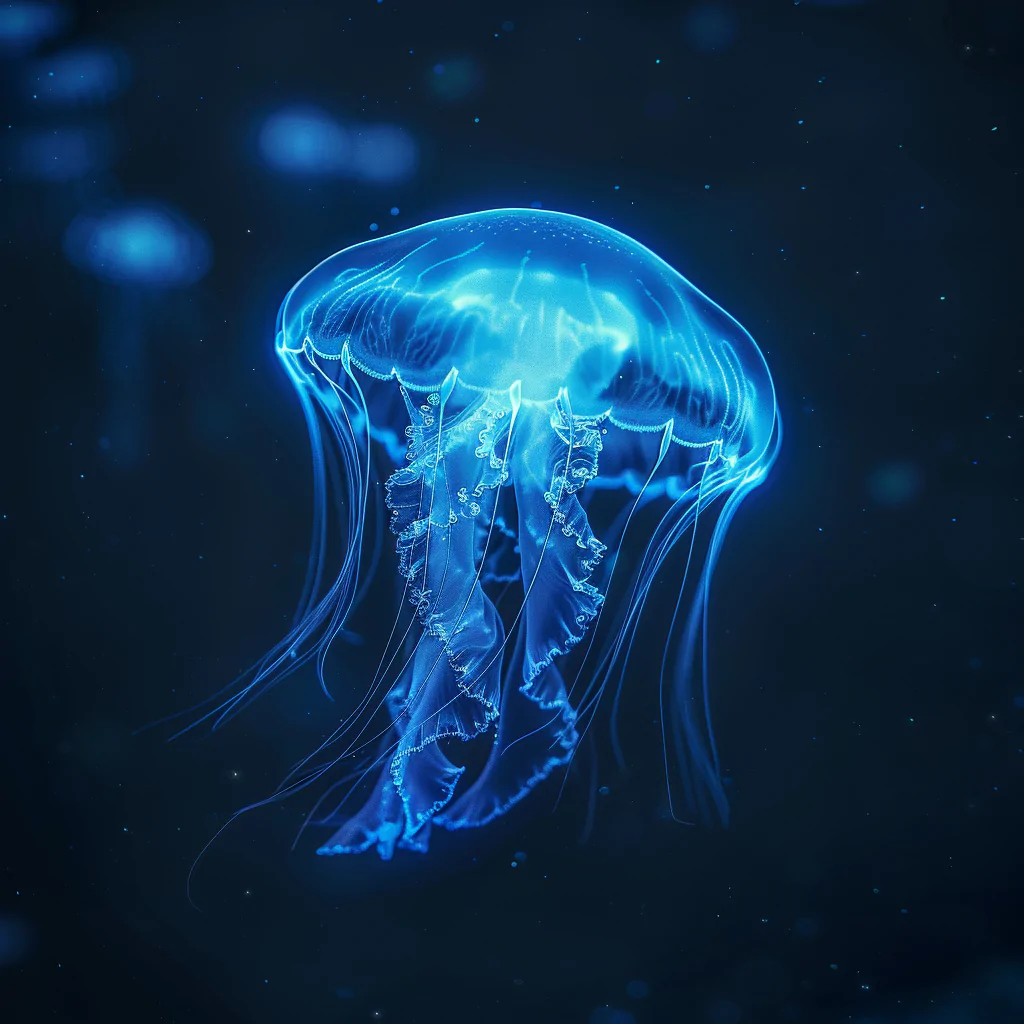
Prompt : Front view of a vibrant blue bioluminescent water, casting an ethereal light and forming intricate patterns., background sky is a blend of warm yellow and orange hues, serene and minimalist, Kodak Vision3 500T AR 16:9 –v 6.0

  • Candlelight: Soft, warm light produced by a candle.
  • Reflected Light: Light bounced off surfaces to create softer illumination.
  • Sunlight: Natural light from the sun.
  • Overcast: Diffused light on a cloudy day.
  • Window Light: Natural light coming through a window.
  • Twilight: Soft light after sunset or before sunrise.
  • Backlit: Light coming from behind the subject.
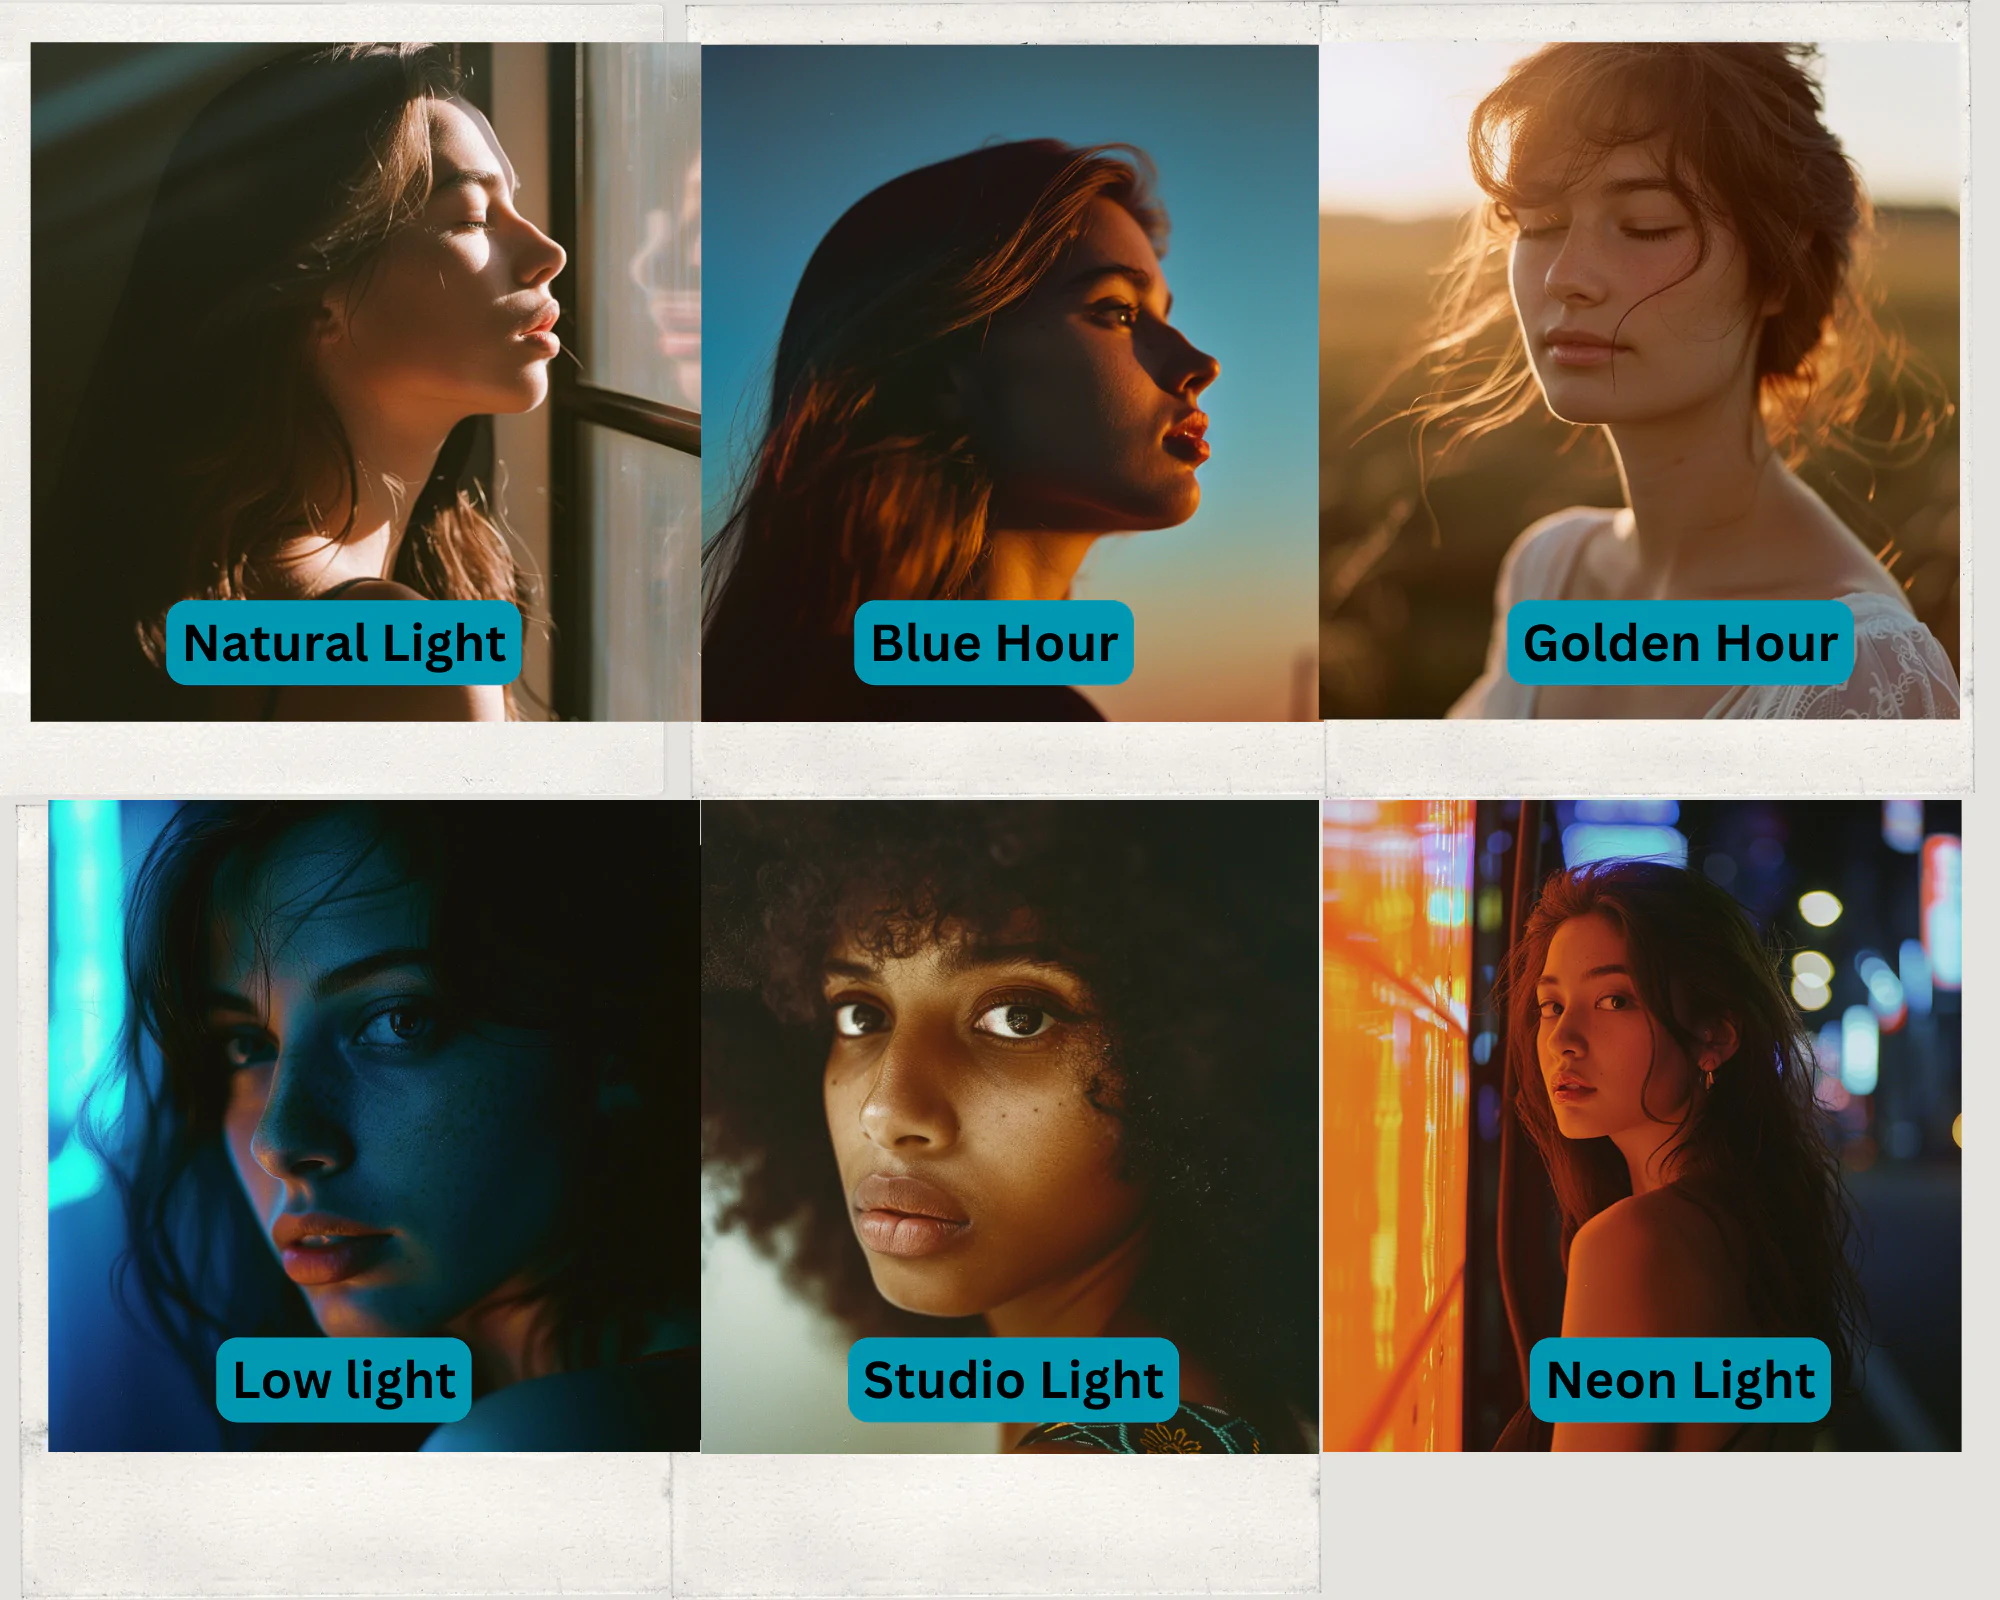
  • Blue Hour: Soft blue light just before sunrise or after sunset.
  • Golden Hour: Warm, soft light shortly after sunrise or before sunset.
  • Midnight: Low light conditions at night.
  • Dappled Light: Light filtered through leaves or other irregular surfaces.
  • Sunrise/Dawn: The first light of the day.
  • Sunset/Dusk: The last light of the day.
  • Side Lighting: Light coming from the side of the subject.
  • Filtered Light: Light passing through a material to create softer shadows.
  • Fire Light: Light produced by a flame.
  • Light Leaks: Unintended light flares in photography.
  • Alpenglow: Red light seen on mountains just after sunset or before sunrise.
  • Lens Flares: Bright light spots created by the lens.
  • Direct Sunlight: Harsh, bright light from the sun.
  • Directional Light: Light aimed in a specific direction.
  • Ambient: General light in a scene.
  • Light Streaks: Lines of light created by moving light sources in a photo
  • Bioluminescence: This is a naturally occurring phenomenon in living organisms.
  • Lighting Through Crystals: Can use either natural sunlight or artificial directional lights. Lighting Through Glass: Can involve either natural light (e.g., sunlight through windows) or artificial directional sources.

Specific Light Sources

Prompt Structure: Type of Light, Portrait (description), Background Description, camera type

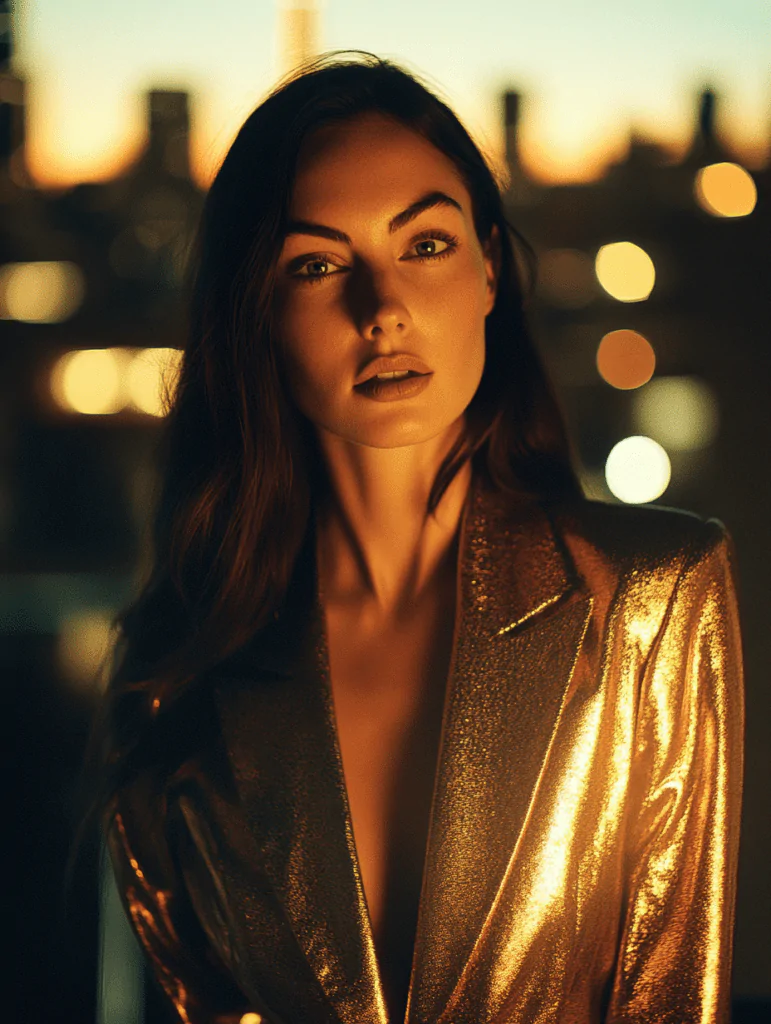
Prompt: tungsten Lighting falling from the front, Portrait of a lady in golden yellow suit, beige background, bold, warm, colourful, cheerful, Kodak Portra 800 film type –ar 3:4 (Try the prompt with diff light settings)

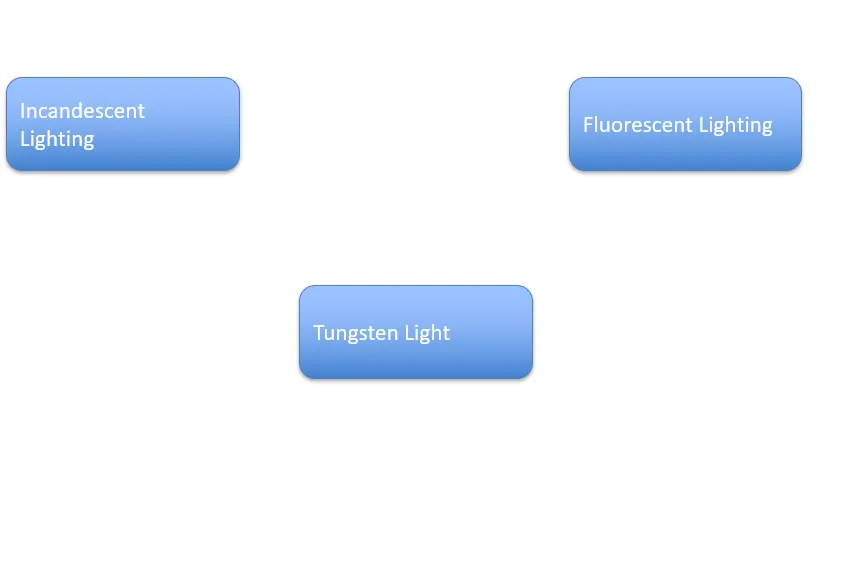
Incandescent Lighting: Warm light from traditional light bulbs.

Fluorescent Lighting: Cool light from fluorescent tubes.

Tungsten Light: Warm light from tungsten bulbs.

Text Pop Animation

Tungsten Light Effect in Midjourney:

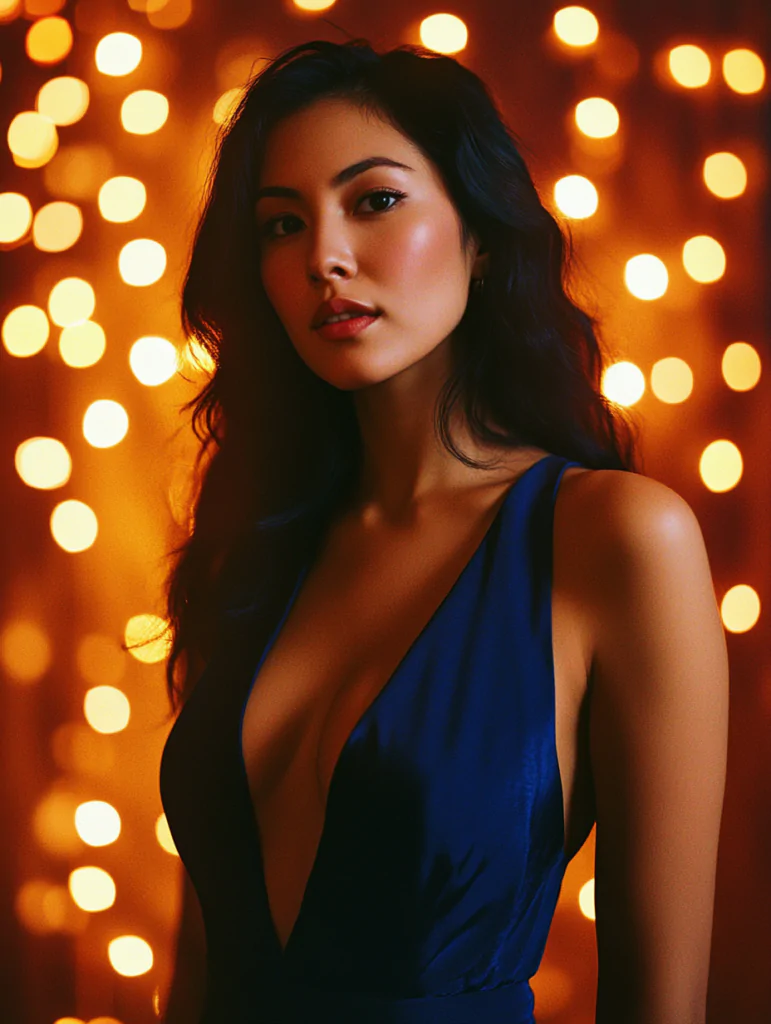
In these two images, we’ve used a tungsten light effect while generating them in MidJourney to create a warm, inviting atmosphere. Tungsten lighting typically gives off a cozy, golden glow, and you can see that reflected in the golden hues across the models’ skin and outfits. It creates a soft, warm light that highlights their features and makes the whole scene feel intimate and rich.

Notice the backgrounds too—those glowing city lights and the beautiful bokeh effect are enhanced by the tungsten lighting. This effect gives the images a warm, cinematic vibe, with orange-yellow tones that you often associate with night photography or indoor lighting.

So if you’re looking to replicate this look in your own MidJourney creations, try experimenting with tungsten lighting to give your images that same warm, golden, and magical atmosphere. It’s a great way to add depth and mood to your images!

 A woman in a golden metallic blazer, illuminated by warm light with a blurred bokeh cityscape in the background, creating a cinematic feel.Images created in midjourney
Tungsten lighting from the front, portrait of a lady in a metallic tungsten-colored suit, looking into the camera, blurred city lights in the background, bold, warm, colorful, cheerful, Kodak Portra 800 film type,
A woman in a deep blue dress, softly lit with glowing bokeh lights behind her, creating a warm and elegant atmosphere.Images created in midjourney
Portrait of a woman in a deep sapphire jumpsuit, tungsten light illuminating her face from the front, golden bokeh lights twinkling in the background, captured on Kodak Portra 800 film

Studio and Cinematic Techniques

Studio and Cinematic Techniques

Prompt Structure:Type of Light, Portrait (description), shot type, Background Description, film type

Prompt:low key Lighting, portrait of a lady in maroon suit, front profile,looking in the camera, bold, warm, colourful, cheerful, Kodak Portra 800 film type –ar 3:4 –v 6.0 (Try the prompt with different light settings)
  • Strobe Lighting: Flash lighting used in photography.shot type,
  • Ring Lighting: Circular light used to reduce shadows.
  • Duo-tone Lighting: Lighting that creates two distinct colors.
  • Butterfly Lighting: Light above and in front of the subject creating a butterfly shadow under the nose.
  • Light Painting: Creating images using moving light sources.
  • Rembrandt Lighting: Light creating a triangle of light on the subject’s cheek.
  • Gobo Lighting: Light shaped through patterns.
  • Catchlight(s): Small reflections of light in the subject’s eyes.
  • Cross Lighting: Light from two directions creating strong shadows.
  • Split Lighting: Light splitting the subject’s face into light and dark halves.
  • Bare Bulb Lighting: Direct light from an unmodified bulb.
  • Rim Lighting: Light highlighting the subject’s edges.
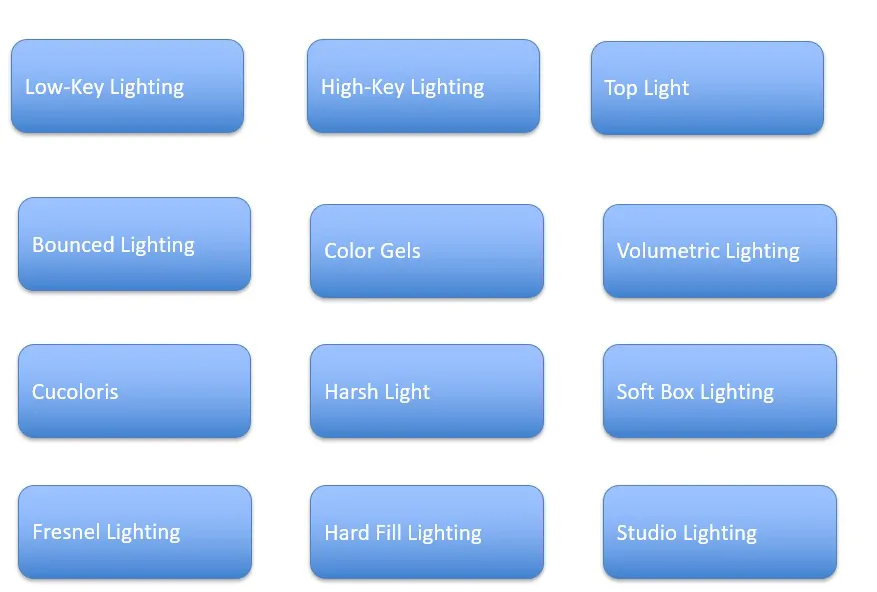
  • Low-Key Lighting: Dark, high-contrast lighting.
  • High-Key Lighting: Bright, low-contrast lighting.
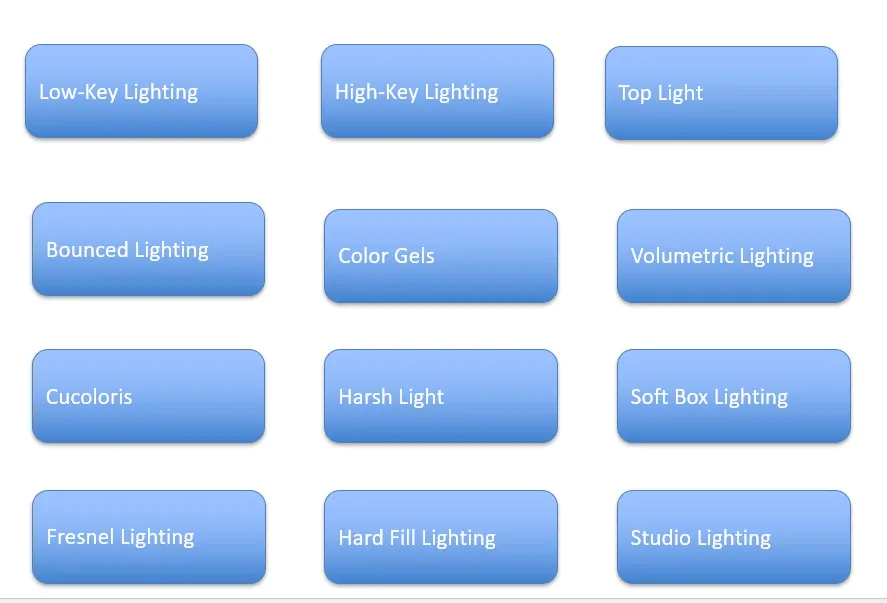
  • Top Light: Light coming from directly above.
  • Bounced Lighting: Light reflected off a surface to soften it.
  • Color Gels: Colored filters for lights.
  • Volumetric Lighting: Light beams visible through fog or dust.
  • Cucoloris: Patterned lighting to create shadows.
  • Harsh Light: Bright, strong light creating sharp shadows.
  • Soft Box Lighting: Diffused light from a softbox.
  • Fresnel Lighting: Adjustable spotlight commonly used in theaters.
  • Hard Fill Lighting: Strong fill light to remove shadows.
  • Studio Lighting: Controlled lighting setup in a studio.
  • Snoot Lighting: Narrow beam of light.
  • Beauty Dish Lighting: Soft, even light for beauty shots.
  • V-flats: Large panels to shape and reflect light.
  • Umbrella Lighting: Light diffused by an umbrella.
  • Scrim Lighting: Light diffused through fabric.
  • Moody Lighting: Dark, dramatic lighting setup.
  • Ring Flash: Circular flash for even lighting.
  • Chiaroscuro Lighting: High-contrast lighting creating strong shadows.
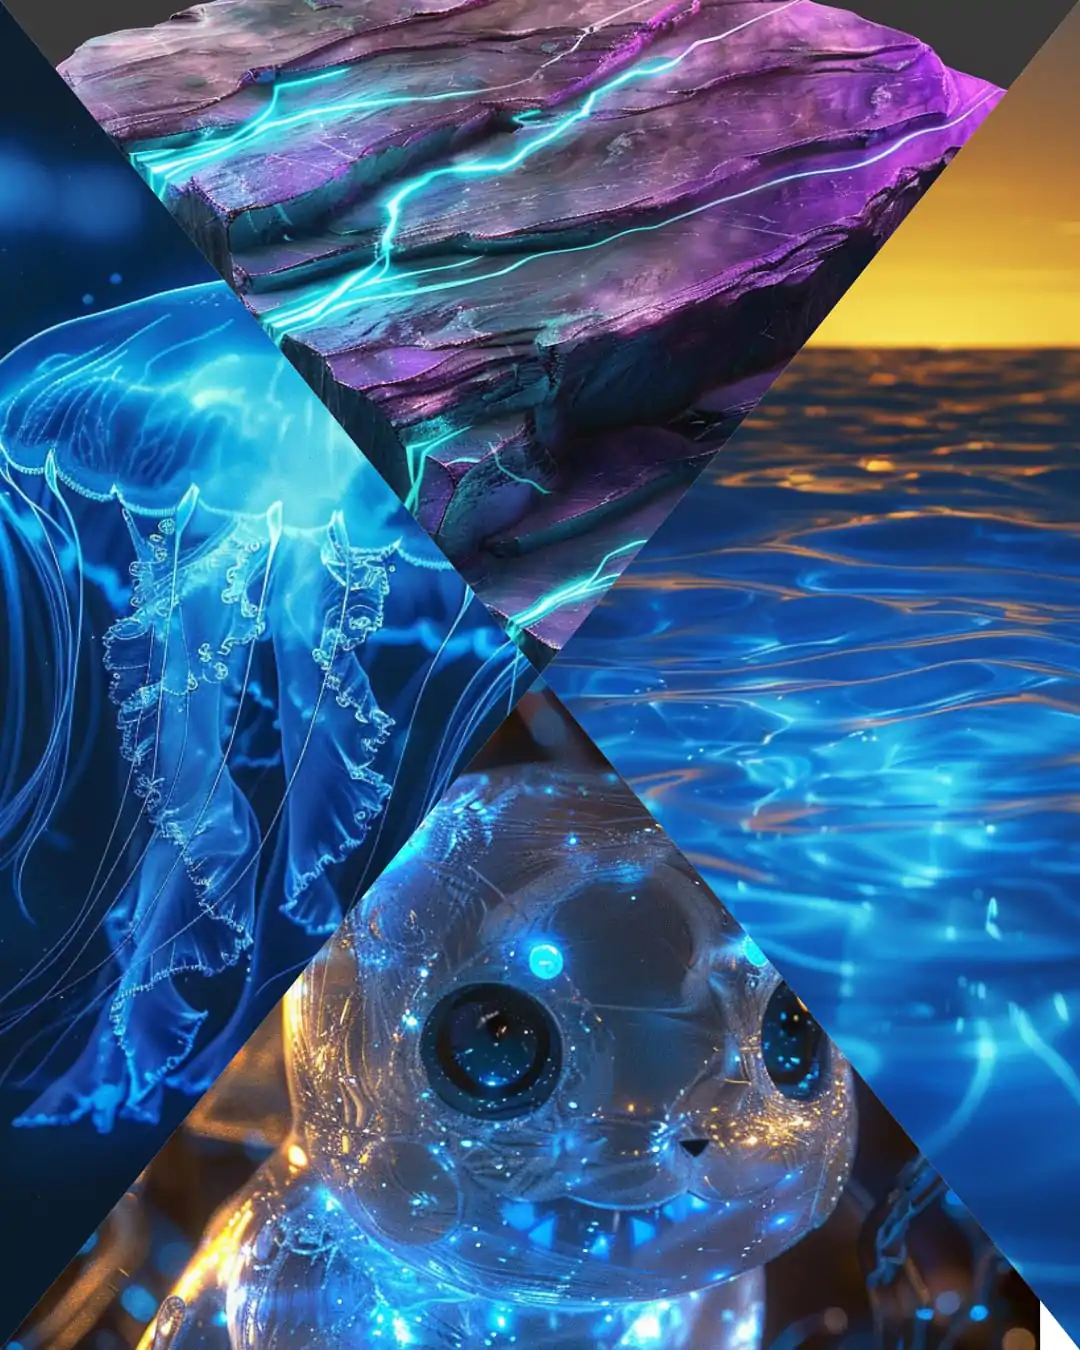
  • Cinematic Lighting: Dramatic lighting used in films.
  • [Color] Lighting: Colored lights to create mood.
  • Parabolic Reflectors with Diffusion: Reflective dishes for focused light.T
  • hree Light Setup: Standard setup with key, fill, and back lights.
  • Global Illumination: Realistic lighting that simulates natural light behavior.

Event-Specific Lighting

Event-Specific Lighting
  • Concert Lighting: Dynamic lighting used in live performances.
  • Club Lighting: Colorful, dynamic light for clubs.
  • Instagram Lighting: Aesthetic lighting for social media.
  • Optical Flares: Bright light artifacts in photos.
  • Silhouette Lighting: Backlighting to create a dark outline.
  • Lighting Through Crystals: Light passing through crystals to create patterns.
  • Lighting Through Glass: Light passing through glass for unique effects.
  • Motivated Lighting: Light sources that are visible in the scene.
  • Lighting Through Crystals: Can use either natural sunlight or artificial directional lights. Lighting Through Glass: Can involve either natural light (e.g., sunlight through windows) or artificial directional sources.

Background Description

Let Us Understand What Happens When You Include Background Details

When you’re creating prompts for AI image generation tools like MidJourney, every detail you include helps the AI better understand your vision. One critical component that’s often overlooked is the background description. You might think mentioning the main subject is enough, but as this example will show, the background can dramatically impact the final result.

Let’s explore why including the background makes a difference and what happens when you don’t.

Here’s a prompt with a clear background description:

Prompt -side profile, lady standing in front of a french window, afternoon sunlight falling on her, soft shadows , highlighting subtle textures of her skin, The background is softly lit, Kodak Portra 800

Result:

The AI generated consistent and accurate images:

  • In all images, the lady is facing the French window as described.
  • The softly lit background creates a cohesive atmosphere, aligning perfectly with the lighting direction.

Why? Including “the background is softly lit” gave the AI a clear understanding of how the environment should interact with the subject. This detail helped ensure that the AI interpreted the scene correctly.

Image with background details
Image without background details

What Happens When You Leave Out Background Details?

Now let’s remove the background description from the prompt:

Prompt: Side profile, lady standing in front of a French window, afternoon sunlight falling on her, soft shadows, highlighting subtle textures of her skin, Kodak Portra 800.

Result:

The AI produced inconsistent images:

  • Two images showed the lady facing the window as intended.
  • The other two images showed the lady with her back to the window, which wasn’t specified.

Why? Without the background description, the AI became confused. While “facing the window” was mentioned, the lack of context about the lighting in the background left the AI uncertain about how to compose the scene. The result? A mix of orientations and lighting that didn’t fully match the intended vision.

Takeaway

Including a detailed background description in your prompt makes all the difference:

  • It clarifies the scene for the AI.
  • It ensures consistency across images.
  • It creates a cohesive relationship between the subject and the environment.

Think of it this way: the background isn’t just a supporting element—it’s an essential part of the story your image is trying to tell.

To learn about different film types that can be used in Midjourney, click below

Click here for the prompt structure to start crafting your perfect prompt!

NEON

MidJourney Prompt to Create Neon Human Shapes

Gallery of Caps